Posted on

How to Eat Your Box (Week of 5/20/18)

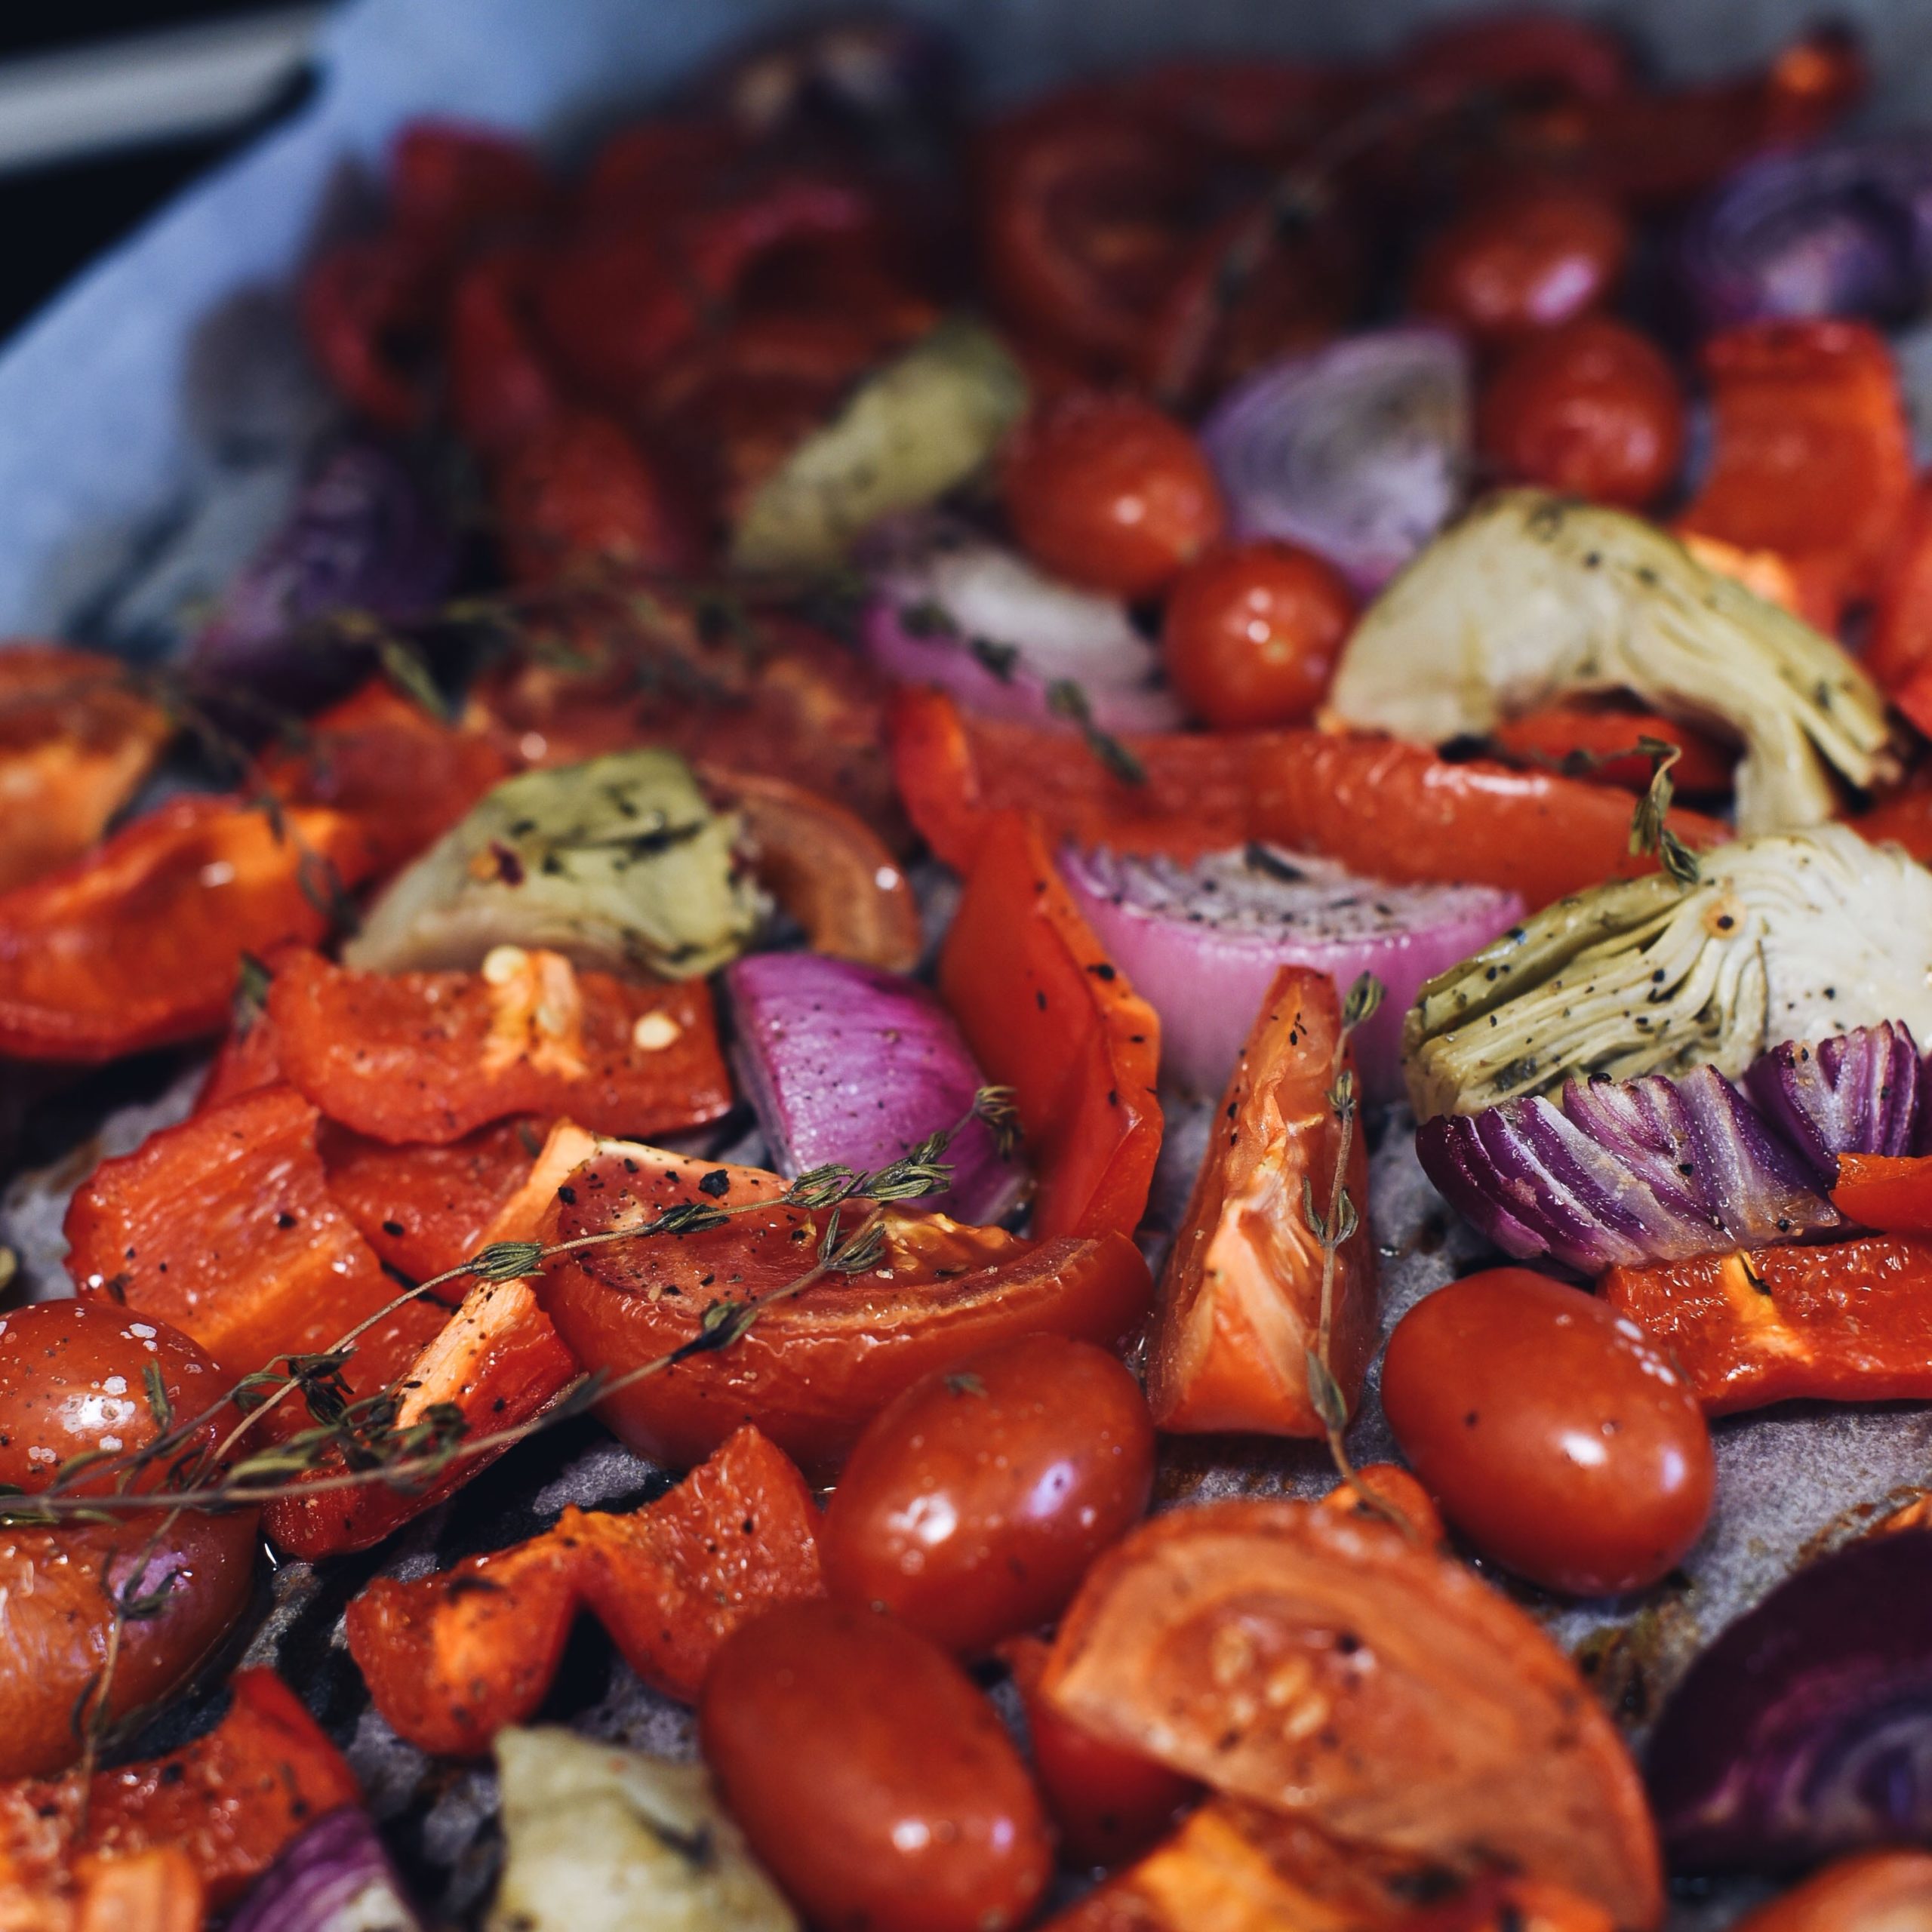
tomatoes roasted

Tomatoes:

Store tomatoes in a single layer at room temperature and away from direct light. Refrigerate only after cutting, as refrigeration makes tomatoes lose their flavor. Slicing tomatoes are great to eat raw, fried (quarter first), or broiled; they are great paired with a little olive oil and salt, herbs such as basil and cilantro, and fresh cheeses such as mozzarella and ricotta. And yes, you can totally freeze those extra tomatoes for fresh flavor all year (slice first). According to studies done at Cornell University, cooking tomatoes actually increases the lycopene content that can be absorbed in the body as well as the total antioxidant activity.
Sheet Pan Roasted Veggies: Try roasting slices of tomatoes along with the cauliflower, mini peppers, and garlic from this week’s box with a little olive oil, sea salt & pepper in a sheet pan at 375 for 35-40 minutes until your crisp veggies are al dente (roast cauliflower for 20 minutes before adding the rest of the veggies so they all finish at the same time).

Bok Choy:

This Asian vegetable is in a class all on its own. It has a delicate and almost foam-like texture but can be quite versatile. Try sautéing in a little olive oil and freshly minced garlic or follow the recipe below. I recently discovered that baby bok choy has a nice flavor without being cooked at all (not sure why I didn’t try it this sooner!) Plus, it has a wonderfully crunchy texture, which I love! So, if you’re not a fan of the squishier consistency of cooked bok choy, try tossing it into a salad with other salad veggies (try using diced apple and raisons in this one!). Then top with your favorite dressing (a ginger vinaigrette works great) or try making your own! You could simply mix olive oil and vinegar with a little mustard (my go to), or try something a little fancier by blending ½ cup of soy, hemp, or almond milk, ½ cup cashews or ¼ cup cashew butter, ¼ cup balsamic vinegar, and a teaspoon of Dijon mustard.

Cauliflower:

It’s incredible how versatile this vegetable can be. Soaking up and blending with whatever flavors surround it, cauliflower fits right in just about anywhere. But cauliflower doesn’t have to go with anything. It’s great all on its own! Simply break it up into small pieces, toss in some olive oil and garlic salt, spread on a baking sheet and bake at 400° for about 15-20 minutes until golden brown.

Cutting out grains? Try this cauliflower pizza crust.

Sugar Snap Peas:

The sweetness of these crunchy veggie lies in their shell. Unlike shelling peas, sugar snap peas are best enjoyed fresh, shell and all. Simply “snap” off the stem bit, and you’re good to go. Great just on their own, they also go well on top of salad, in with pasta, sautéed (lightly) with any Asian-inspired dish or casseroles. Use within 5 days for best flavor and freshness.

Featured Recipe: Grilled Mongolian Chicken Lettuce Wraps

Light yet filling. A delicious, gluten-free meal for those busy weeknights! Makes 8 wraps.

Ingredients:

1 lb. Chicken Breasts

1 large Onion, cubed

0.5 lb. mini Bell Peppers, julienned

1 Baby Bok Choy, roughly cut (1.5-inch pieces or so)

½ cup Sugar Snap Peas cut into 1.5-inch strips

1 teaspoon minced fresh Garlic

½ teaspoon grated fresh Ginger

½ teaspoon Crushed Red Chili Flakes

Salt to taste

3 tablespoon Olive oil or Coconut oil for cooking

1 teaspoon Coconut butter

Mongolian or Barbeque sauce (optional)

Organic Tamarind Soy Sauce (optional)

Cooked Rice as a side, or Lettuce leaves

Instructions:

Wash and cut veggies. Wash chicken thoroughly under cold water, pat dry, cut into cubes.

Heat and grease a frying pan or wok. Cook chicken on the hot pan until fully cooked and browned. This will take ~10 minutes on medium heat. Remove from heat and allow it to cool.

Heat olive oil in a pan (can use the same pan), add ginger and garlic. Cook for 1-2 minutes. Add peas, bok choy, and onions and cook for a minute. Add bell peppers and cook until the veggies are al-dente (vegetables should be crisp tender) (NOTE: you may need to add more oil, or, try chicken broth if they look dry). Stir in the coconut butter and a dash of soy sauce or other favorite sauce if using. Mix together chicken and veggies. Add salt, chili flakes and mix it well.

Serving suggestions: enjoy over a bed of brown rice or white rice. Or, spoon the chicken filling into the center of lettuce leaves—serve immediately before the leaves start to wilt.


Recipe adapted from www.ruchiskitchen.com
Posted on

How to Eat Your BOX! (Week of 5/13/18)

Fresh Herbs

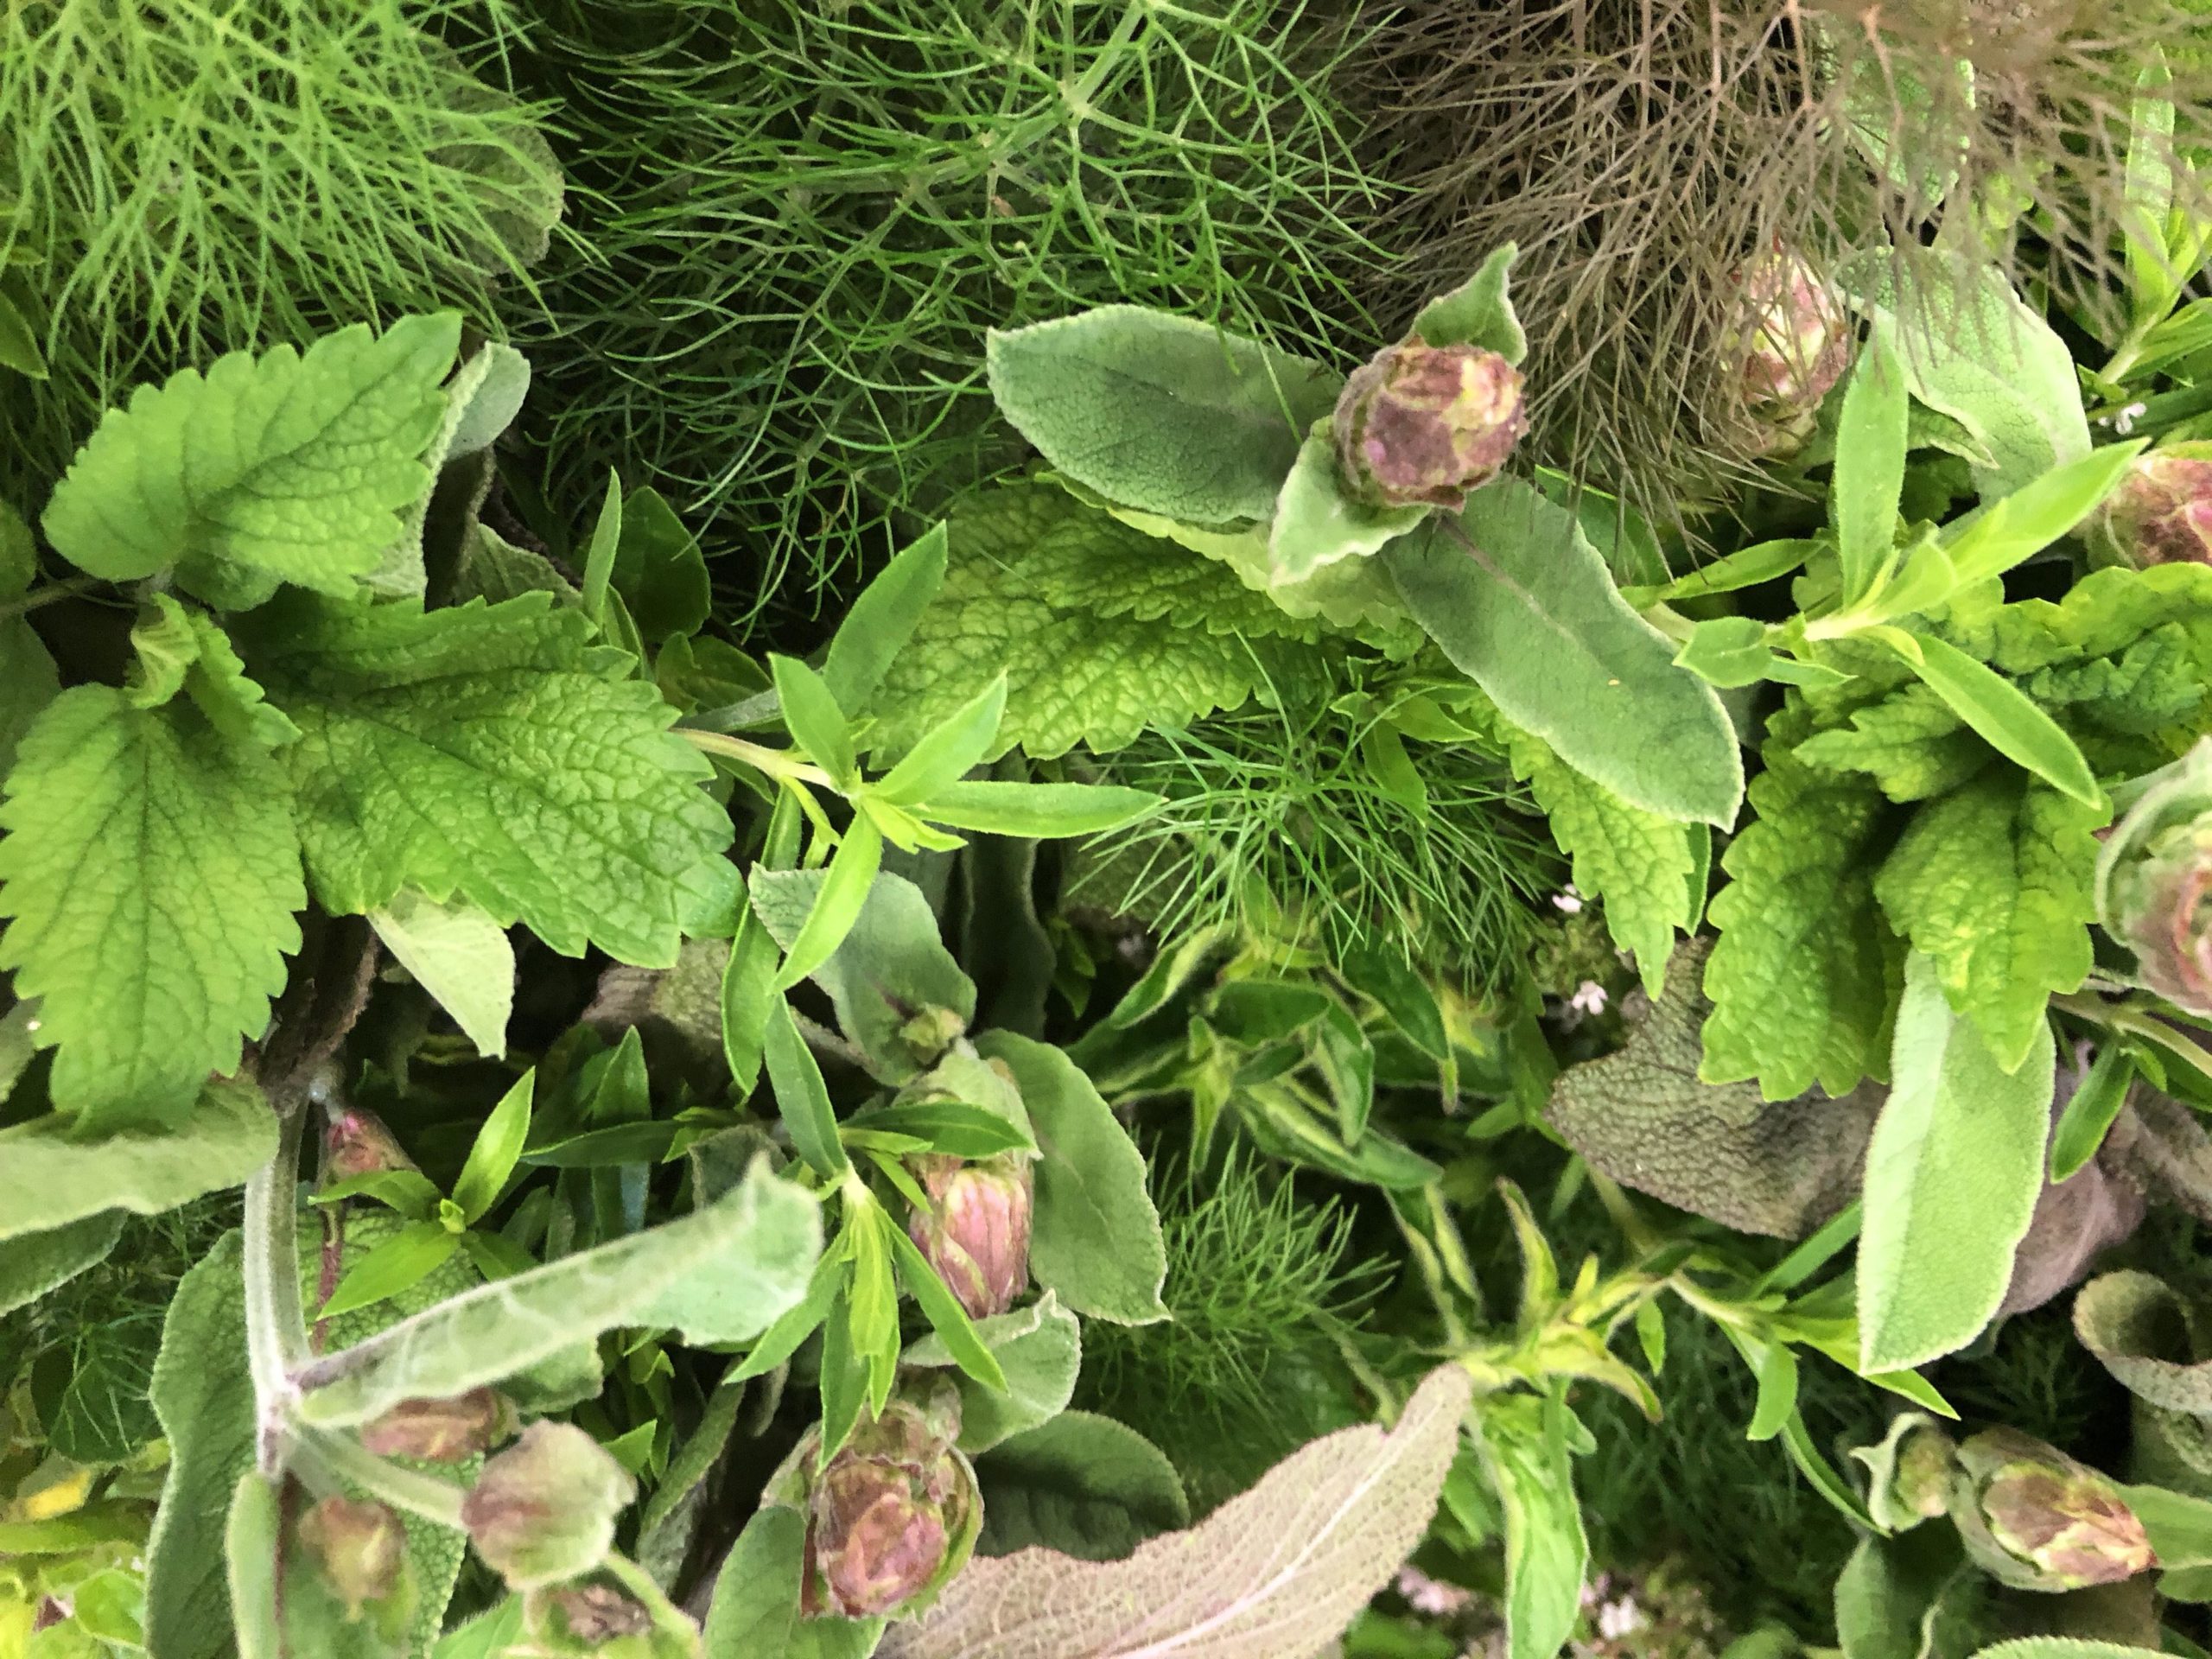
Add them fresh to salad as a garnish. Store them like you would flowers: in a vase on the counter until ready to use.

Artichokes:

Artichokes can be steamed, boiled, baked or grilled. To bake, cut about an inch off the top and stem of the artichoke. Then cut it in half and remove the fuzzy part in the center with a spoon. Rub the cut side with a half a lemon, squeezing some juice into the fold and the middle. Drizzle with olive oil, sprinkle with salt, pepper and freshly minced garlic. Bake on a cookie sheet for about 25 minutes at 425°. Melted butter or mayonnaise mixed with a little balsamic vinegar is commonly used for a dip but you can be creative and use whatever your taste buds desire! Try adding chili flakes, smoked paprika, or fresh herbs to the dip.

Turmeric:

The Fresh turmeric rhizomes look similar to ginger. Turmeric’s flavor is more vibrant when fresh—peppery, earthy, slightly bitter. Peel turmeric with a vegetable peeler before using, but only peel the amount you’re going to use, to keep the rest of the rhizome from drying out. To use, you can zest it (our favorite way), grate it, or slice it up small into discs or cubes.

Radishes:

Radishes a bit too peppery for your taste? Try poaching or sautéing them, you’ll be surprised at how mellow their flavor gets! In the raw, radishes are great as a topping to your salad, tacos, or as a side to Asian or Mexican cuisine! Remove the leaves and give the bulbs a quick rinse before storing to keep them freshest!

Featured Recipe: Golden Turmeric Rice

Serve this gorgeous, aromatic rice with roast chicken or braised lamb. Serves 4

Ingredients:

1 cup basmati rice

1 13.5-oz. can unsweetened full-fat or light coconut milk, well shaken

¼-½ cup water as needed (see recipe)

1 oz. fresh turmeric, peeled and finely grated (about 2-1/2 Tbsp.)

Kosher salt

1/2 tsp. light brown sugar or omit if cutting back on sugar

1/8 tsp. ground cinnamon

Pinch ground cardamom

1/3 cup golden raisins

1/2 tsp. crushed red pepper flakes

1/3 cup coarsely chopped salted pistachios


Instructions:

Rinse the rice in a medium-mesh strainer under cool running water, swishing it with your hand occasionally, until the water runs clear.

In a 4-quart saucepan, combine the coconut milk, turmeric, 1/2 tsp. salt, sugar, cinnamon, and cardamom. Stirring frequently, bring the milk to a gentle boil over medium heat. Remove the pan from the heat, add the raisins, and let steep for 20 minutes.

Return to a low boil, reduce the heat to very low, and stir in the rice and pepper flakes. Add additional water if mixture looks too thick and you’re worried about the rice sticking (you can always cook it off). Cover and cook until all of the liquid is absorbed, 10 to 12 minutes. Remove the pan from the heat, and let the rice stand, covered, for 8 to 10 minutes.

Fluff with a fork, then serve topped with the pistachios.


Recipe adapted from www.finecooking.com

Posted on

How to Eat Your BOX! (Week of 5/6/18)

Daikon Radish-Purple:

Their crunchiness makes them especially good for pickling (think kimchi), but they are equally good cut up into matchsticks and served alongside carrots and broccoli to brighten up that veggie platter. Try it: thin slices atop your next homemade avocado toast.


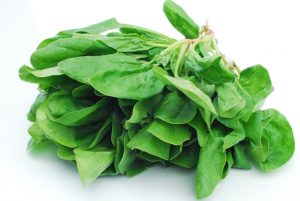
Bunch Spinach:

The first thing I do when I bring spinach home is to wash it and lay it out on the counter to dry (or dry in a salad spinner). Don’t put it away sopping wet. This way it will last longer and be ready to use when needed. Another great way to keep spinach longer is to freeze it. If I’m not going to use it fresh, say in a salad, then frozen spinach can be used just as well in cooking or in a smoothie. I love having spinach in my freezer because I know I don’t have to worry about it and it’s always available when needed. When storing in the freezer make sure to wash it first and let dry. Also, cut off any roots and stems you wouldn’t eat and put in an air tight container vs. a bag. This will keep it from getting freezer burned and is also easier to grab and put away.


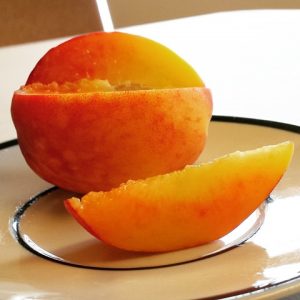
Peaches:

Ripen peaches in a paper bag at room temperature for 2 to 3 days. Unripe peaches can be stored at room temperature up to 5 days. Refrigerate ripe peaches in a sealed container up to one week. (Be sure that they are ripened first, as they will not ripen in the refrigerator.)


Featured Recipe: Daikon Radish Salad

Refreshing, crunchy, and slightly tangy, this Asian-inspired recipe is good and simple!

Serves 4

Ingredients:


1 Tbsp tamari or light soy sauce

1 Tbsp rice vinegar

1 Tbsp sesame oil

1 tsp honey or sugar

1 Tbsp black sesame seeds

1 Daikon

1 carrot


Instructions:

In a bowl, mix soy sauce, vinegar, sesame oil, honey and sesame seeds.

Peel and cut Daikon and carrot into very thin into match sticks.

Mix your veggies well with dressing. Enjoy!

Recipe adapted from www.foodfidelity.com

Posted on

How to Eat Your BOX! (Week of 4/29/18)

Cucumbers:

Now we’ve probably all had cucumber salad at some point, but I still tend to forget that it makes a great main ingredient for salad, not just as a topping. Try marinating thinly sliced cucumber, onion, bell pepper, crushed garlic cloves in a one to one mixture water and white (or cider) vinegar and a tablespoon of sugar. Cover and let sit in refrigerator for a couple hours. If you leave it overnight the flavors come out even more! Drain and enjoy. Try adding a garnish of freshly chopped parsley or dill.


Chard:

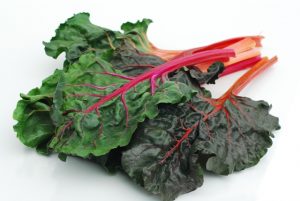
Both the leaves and stalk of chard are edible, although the stems vary in texture with the white ones being the most tender. When you get your box, give your chard a quick rinse in cold water, spin dry, and store in a Ziploc bag to use in smoothies, salads, stir fry’s, and as a wrap for tacos. Unless you’re using the chard as a wrap, you can take your meal prep a step further and tear the leaves into fork-friendly pieces to speed up your meal prep all week long.


Radishes:

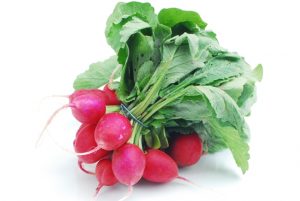
Store radishes in the crisper in a perforated bag. If you’re planning on eating the tops, use within 2 days. If you don’t plan to use the tops, twist them off prior to refrigerating to extend the life of the radish bulbs to a week. Radishes are great fresh, poached, baked, or pickled.


Featured Recipe: Avocado Toast Deluxe

Easy, healthy, and delicious. Made with sautéed rainbow chard, chives, sun-dried tomato, avocado, and sauce drizzles. Serves 2


Ingredients:

2 pieces of toast

1 small avocado

Approximately 1 Tbsp chives – cut however you’d like

4 leaves of rainbow chard – chopped

1 Tbsp tomatoes, medium dice

2 Tbsp spoons loosely packed cilantro

1 Green Onion, diced

Salt & pepper to taste

Olive oil for pan

Hot sauce to taste (optional)

Vegan Ranch to taste (optional)

Instructions:

While your bread is toasting, heat pan with olive oil and add the chard, sun-dried tomatoes, and green onions. Season with salt and pepper to taste

Cook for approximately 3 minutes on medium or medium high and then remove from heat

Smash 1/2 of an avocado on to each toast and then evenly divide the contents from the pan on top of the toasts

Sprinkle the cilantro evenly across both toasts

Drizzle with ranch and hot sauce to taste if desired.


Recipe adapted from foodgalleygab.com

Posted on

How to Eat Your BOX! (Week of 4/22/18)

Kale:

As a salad, kale keeps well in the fridge, so you can make ahead of time and not worry about it wilting. Kale can be a little tricky because it tends to be a bit tough and sometimes bitter (it gets bitter as it ages, so plan to eat within 5 days).

Tips for making a tasty kale salad: make sure to remove all large ribs and stems (They make a great addition to a stir-fry though!); Chop the leaves small; Sprinkle with salt to cut the bitterness; “Tenderize” the leaves by massaging them with your hands (only takes about half a minute); And lastly, massage in the olive oil or salad dressing. This turns the kale bright green and makes it so it’s evenly covered.

For the dressing, I like to use a combination of vinegar and olive oil. Once you have prepped your kale and worked in the dressing, add your toppings. Try with apple or pear slices. Cashews, almonds and dried cranberries also taste great with this combination!

Radicchio:

You can add to a mixed salad (see recipe below) or opt to savor them alone with the simplest of olive-oil dressings. Or, you can cook radicchio; the tonic bitterness is a good contrast to rich or fatty flavors. Radicchio is good braised, grilled, or in a soup. Store: keep radicchio in a tightly sealed bag in the refrigerator for up to one week.


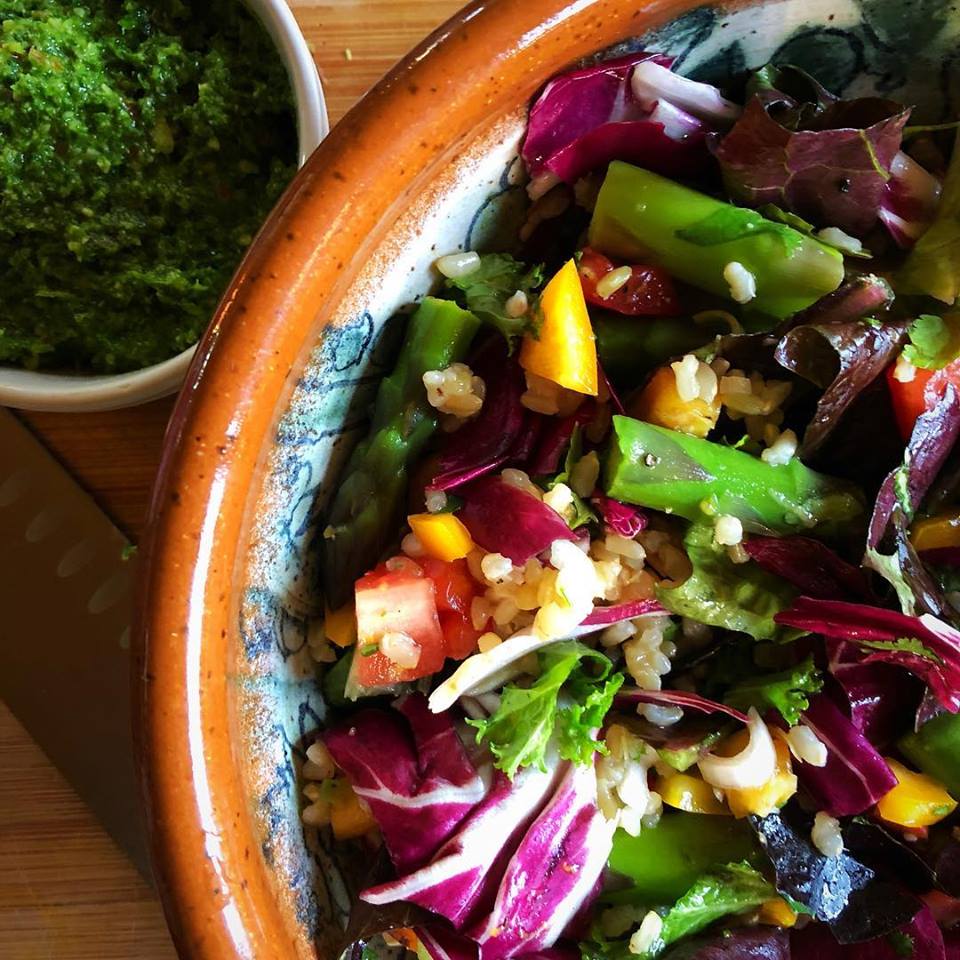
Featured Recipe: Spring Pea, Asparagus, Kale & Quinoa Salad w/Kale Pesto

Finding asparagus and peas in your box of good is a sure sign that it is spring. “The pesto really takes it to the next level and this recipe makes about twice what you will need so feel free to enjoy the next day on your avo toast, breakfast salad w/ fried eggs or on pasta. Mmm all so good.” —caraskitchen.net


Ingredients:

FOR THE PESTO

4-6 leaves kale, de-stemmed, chopped

1/4 Cup walnuts or pine nuts

2 garlic cloves

1/4 Cup extra virgin olive oil, more for smoother pesto

1 medium lemon, juiced and zested

1/4 Cup cilantro, leaves and stems

Pinches salt & pepper, to taste

FOR THE SALAD

1 Cup (heaping) asparagus chopped in 1-inch pieces

3/4 Cups green peas, fresh or frozen

1/4 Cup mini bell peppers, thinly sliced on an angle

4 Cups salad greens (kale, red leaf lettuce, radicchio)

3 Cups cooked quinoa, rice, or pasta

1/4 Cup cilantro chopped (any fresh spring herb will work like basil or mint)

1 medium lemon, juiced and zested

2 Tablespoons extra virgin olive oil

1/2 Teaspoon red pepper flakes

1/2 avocado, cut in cubes

Chopped cilantro to garnish

Instructions:

Make the pesto: De-stem kale and put everything into a food processor. Pulse for about 30 seconds. scrap down the sides and continue to pulse 30 more seconds. Scrape down sides again and then turn on high until desired consistency is reached.

Bring a small pot of water to a boil. Create and ice bath with ice cubes and water, set aside.

Chop asparagus into 1-inch pieces, measure out 1 heaping cup full. Once water is boiling add in the peas and asparagus and blanch. Cook for 2-3 minutes, and once bright green transfer to ice bath using a slotted spoon.

In a large bowl combine your salad greens, lemon zest and juice, oil, quinoa, peppers, red pepper, salt and pepper to taste if desired and toss to evenly coat.

Add in asparagus, peas, avocado cubes and a couple big dollops of pesto. Divide amongst plates. This would be great with fried eggs, salmon or baked tofu.


Adapted from recipe by caraskitchen.net

Posted on

How to Eat Your BOX! (Week of 4/15/18)

Rhubarb:

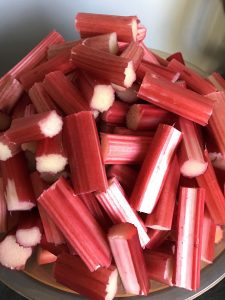
Sugar is not rhubarb’s only friend. Rhubarb also makes a beautiful pickle to top salads or sit charmingly on a cheese board. Or in chutneys and sauces to serve alongside roast pork or chicken. Check out food52.com for some great recipe inspiration.

A favorite way to use rhubarb is to cut the stalks in 3-inch portions then roast with a bit of sugar (or honey)—not too much as you’ll want to retain the eye-catching brightness. Try throwing in a vanilla bean or some fresh ginger. Roast at 400°F for about 20 minutes. Don’t disturb the stalks too much as they are incredibly tender when they cook. Serve on top of yogurt or oatmeal in the morning, put in between layers of cake or serve over ice cream for a lovely dessert.


Asparagus:

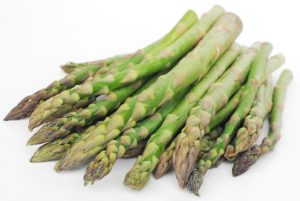
Asparagus is best cooked as fresh as possible but if you need to store it for 3 to 4 days treat it like a bouquet of flowers. Trim a small amount from the bottoms of the stalks with a sharp knife and place them in a tall glass with a little water in the bottom. Cover the top loosely with a plastic bag, and store in the refrigerator. This will keep the stalks firm and crisp until you are ready to cook them.

To prepare: the smallest spears will only need to have their very base tough parts trimmed off before cooking. However, the bottom portions of larger asparagus spears can be chewy and woody; they will either need to be snapped off or peeled. To snap off the tough portion, simply grasp the stalk with both hands and bend the bottom portion until it breaks off. The asparagus will naturally break off at the point where the tender portion ends and the tough, stringy part begins.

The way you cook your asparagus can depend upon its size. The baby spears can be sautéed, or rubbed lightly with olive oil and grilled. With fatter spears you may want to trim them and either steam or boil them in order for them to increase their tenderness. However you choose to cook it, watch your asparagus closely so that it doesn’t get overdone. The perfectly cooked spear is easy to penetrate with a knife, but still slightly firm being bright green in color.

rhubarb pieces

Featured Recipe: Stewed Cinnamon Apple & Rhubarb

Ingredients:

1 bunch rhubarb, stalks only, trimmed and chopped into pieces

2 granny smith apples (or other tart apple), peeled cored and roughly chopped

1/4 cup water

1/4 cup whole cane sugar or honey

1 cinnamon stick

1 pinch ground cloves

1/2 tsp pure vanilla extract

Instructions:

Place everything in a pot over low heat and let simmer for 30-60 minutes until all is soft. Your house will smell amazing. Remove the cinnamon stick before eating.


Adapted from recipe by theveggiemama.com

Posted on

How to Eat Your Box! (Week of 4/8/18)

Savoy Cabbage:

These crinkled leaf cabbages are one of the best varieties for cooking and tender enough to be eaten raw in salads. A drawback of its tender nature is that it does not have the keeping quality of its sturdier cousins but should hold well in the fridge for about a week. Cook them like you would a regular cabbage; in soups, stir fries, or other cabbage recipe. Or, simply cut into one-inch strips and sauté in a large covered pan with some butter.

In China and other East Asian region, it is used like cabbage in stir fries with added onion, garlic, bell pepper and green chillies mixed with steamed rice and soy/chili/tomato sauce to prepare fried rice, egg rice noodles, chowmein…etc.


Leeks:

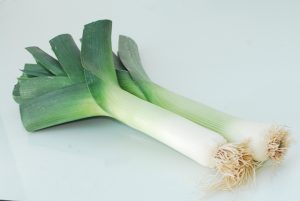
Leeks are cousins to the old, familiar onion, but have a sweeter, more delicate flavor reminiscent of garlic or chives and are delicious no matter how they’re cooked. Additionally, leeks contain generous amounts of vitamins, minerals and antioxidants, making the vegetable a wise addition to a healthy diet. You can cook leeks by poaching them in chicken broth, pan-frying them in a little oil, or boiling them until tender, or you can include the leeks in a variety of other recipes (such as the one below).


Featured Recipe: Simple Shredded Savoy Cabbage

A simple shredded savoy supper or side dish that also pairs well with a protein such as roast chicken.

Prep Time: 5 minutes Cook Time: 5 minutes Total Time: 10 minutes Serves 3-4


Ingredients:

Knob of unsalted butter or ghee

2.5 oz. pancetta (or other salty, savory protein)

1 small savoy cabbage, shredded

1 leek, white parts only, rinsed, medium dice

small glass white wine

Salt and pepper

Instructions:

Melt a knob of butter in a large frying pan over a medium heat until it foams. Add the pancetta and diced leeks and cook for 3-4 minutes until pancetta is lightly browned and leeks are starting to get tender.

Finely shred the cabbage and add it to the pan.

Turn the heat up high and pour in the wine. The cabbage will cook in 2 minutes whilst the wine bubbles and reduces. Be sure not to overcook the cabbage—make sure it retains its bright green color.

Season with pepper and a little salt (depending on the saltiness of the pancetta) and serve. this dish is wonderful on its own with a hunk of bread or as an accompaniment to a roast chicken.


Adapted from recipe by glutsandgluttony.com

Posted on

How to Eat Your Box! (Week of 4/1/18)

Gold Nugget Mandarins:

Citrus, in nearly any form, is a perfect addition to brighten up a salad. Add citrus segments to winter greens along with avocado and crumbles of salty feta. Drizzle the salad with olive oil and a squeeze of lemon or lime.

Radishes, Black:

The skin is particularly spicy on black radishes; for milder flavor, peel them before using. These radishes store well—simply wrap the roots in newspaper or perforated plastic in the refrigerator, and they’ll keep well for a long time. Try them: roasted with olive oil and salt. You can either roast them whole (like a potato, and then peel/mash, or slice them thin into “chips.” To make chips, slice the root as thinly as possible, or put halves in your food processor. Coat in a little olive oil and sprinkle on salt. Bake in a hot oven (375-400 F) for about 10 minutes. Be careful – they can burn to a crisp if you’re not careful.

If you do want to try them raw, slice them thinly (or grate them) and mix in a salad with sweet, balancing ingredients like apples, celeriac, arugula, beets, carrots and pecorino. Salt also helps take the edge off their spiciness.

Arugula:

This peppery green is ubiquitous with fresh salads (try it with blue cheese, walnuts and Asian pears), but it is also great atop pizzas (add just after you remove them from the oven, and allow to wilt slightly), or to wilt atop a winter soup. Arugula pesto has its own following too. Store in the refrigerator and use within 3-4 days to prevent from becoming bitter.

Beets:

Beets can be cooked just about any way you like. They are great boiled or baked, sautéed or stewed. Usually I cut them into bite size pieces to bake in the oven because I love roasted beets! Simply coat in olive oil, sprinkle with salt and pepper, and bake at 375° for about 35 minutes (try adding some parsley when they’re done).  But they can just as easily be cooked in a frying pan along with other veggies. The beet greens are great sautéed as well so don’t throw them out! Try cooking the greens in a little olive oil with garlic, salt and pepper on medium heat until bright green. Don’t let cook them too long though or they’ll get slimy.

Or check out this recipe for sweet potato and beet chips! http://www.foodnetwork.com/recipes/giada-de-laurentiis/sweet-potato-and-beet-chips-with-garlic-rosemary-salt-recipe.html


Featured Recipe: Roasted Radishes with Arugula

Ingredients:

0.66 lb Black Radishes

2Tablespoons Avocado Oil

1 Tablespoon Fresh Thyme Leaves

½ teaspoon of Kosher Salt

½ teaspoon of Cracked Pepper

Fresh bunch of Arugula

Pecorino, grated or flakes (optional)

Instructions:

Preheat oven to 425F

Slice the radishes into cubes and toss with the avocado oil, herbs, salt and pepper.

Spread across a shallow pan and cook in the oven at 425F for about 30 minutes.

When the radishes are done (test with a fork), immediately fold in the arugula leaves until they wilt from the heat. Sprinkle with pecorino if desired. Enjoy!


Adapted from recipe by platedwithstyle.com

Posted on

How to Eat Your BOX! (Week of 3/25/2018)

Pumellos:

Also referred to as pomelos, these giant citrus fruits are closely related to grapefruit. Pummelos have a much thicker pith area than other citrus, but other than that, are much like a milder (non-bitter) grapefruit. We think you’ll like it! Store up to one week in the refrigerator. To eat: remove the thick rind and peel the membrane from around the segments. Pummelos can be eaten fresh, tossed into salads or salsa, used in a marinade, or juiced for a cocktail. Enjoy them nearly any way you eat your favorite citrus fruits.

Mangos:

To peel a mango: using the tip of the mango as a guide, slice the two cheeks of the mango off, cutting around the stone in the center. Then place the edge of the mango against the lip of a glass and slide it down one of the halves, so that you’re using the glass like a giant spoon to scrape the mango from its skin. If your mango is ripe (yields to soft pressure, fragrant), you can get the glass to slide through it and separate the skin with ease. Then, you can eat the half of mango, or, if you’re sharing, slice it up, cut it into cubes, and dump into a bowl.

Dandelion Greens:

Among the list of bitter greens that we talked about earlier in the season, dandelion can also be used in recipes calling for kale or chard. Try balancing them out with milder greens like leaf lettuce or spinach. To use, rinse well, and trim the thicker stems away. Dandelion greens make a great garnish (add to the recipe below) and can be parboiled if you’re looking to make the bitterness go away. Try it: Sauté in with a little olive oil, garlic and red pepper flakes, then sprinkle with a soft mild crumbled cheese and pair with flat bread and hummus.


Featured Recipe: Lentil Niçoise Salad with Shallot-Herb Dressing

Cook the lentils ahead for a quick protein-packed plant-based weeknight meal. Vegan and Gluten Free. Serves 4-6

Ingredients:


2 tablespoons finely diced shallots

1 teaspoon Dijon mustard

1/4 cup red wine vinegar

1/2 teaspoon salt

1/2 teaspoon freshly ground black peppers

1/3 cup olive oil

1 teaspoon herbs de providence

1 lb. small potatoes (halved or quartered if large)

2 cups steamed lentils (cook according to package directions)

0.75 lb. green beans

1/4 cup niçoise olives (or other black/green olives)

8 cups shredded green leaf lettuce

1 cup fresh tomatoes, diced


Instructions:

Steam potatoes in a steamer basket for 10-15 minutes, depending on the size of the pieces. They should be fork tender when cooked. Remove from steamer basket and rinse under cold water. Retain the potato water for steaming the green beans.

While the potatoes are cooking, whisk together the shallots, Dijon, red wine vinegar, salt, pepper, olive oil and 1 teaspoon of herbs de providence. Set aside.


Add green beans to the steamer basket and steam for 2 minutes, remove and rinse under cold water.

Divide the steamed potatoes and beans, olives, lettuce, tomatoes, and lentils among 4 bowls. Toss with shallot-herb dressing and serve.


Adapted from recipe by damndelicious.net

Posted on

How to Eat Your BOX! (Week of 3/18/18)

Blood Oranges:

With ruby-red to maroon-colored flesh, blood oranges are a surprise when you cut them open; taste-wise, they’re tart-sweet and slightly berry-like.

Storage tips: To keep these ruby gems fresh longer, choose refrigeration over the fruit bowl―they’ll only last only a couple of days at room temperature, but up to two weeks in the fridge.

How to eat them: Blood oranges are best eaten fresh―out of hand, or in salads, salsas, or marmalades. If you’re following a recipe you may be asked to section the fruit. To do so, peel the orange, cut between the white membranes to expose the flesh, and remove the sections (for more juice, squeeze the leftover membranes).

Health benefits: Oranges are rich in antioxidants―vital for healthy cells―including vitamin C, which aids in healing, boosts your immune system, helps your body absorb iron, and even helps reduce the risk of cancer. This citrus fruit is also a good source of fiber, which helps lower cholesterol and, like vitamin C, reduce your cancer risk. (To maximize your fiber intake, be sure to eat some of the spongy white pith right under the skin.)


Mangos:

To peel a mango: using the tip of the mango as a guide, slice the two cheeks of the mango off, cutting around the stone in the center. Then place the edge of the mango against the lip of a glass and slide it down one of the halves, so that you’re using the glass like a giant spoon to scrape the mango from its skin. If your mango is ripe (yields to soft pressure, fragrant), you can get the glass to slide through it and separate the skin with ease. If you want to get the part around the pit, we advise going at it with a paring knife, or if you have a toddler, this will keep them busy for a while. Then, you can eat the half of mango, or, if you’re sharing, slice it up, cut it into cubes, and dump into a bowl, ready to serve!


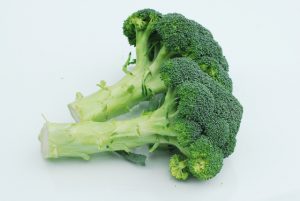
Broccoli:

Baked broccoli is one of my favorite dinner sides. I like it best roasted to crispy perfection with a little garlic, salt and pepper. Try tossing chopped broccoli florets with olive oil, salt and seasonings of choice. Bake on a cookie sheet at 450° for about 20 minutes, until edges are crispy and the stems are tender. For extra flavor, drizzle with lemon juice or top with parmesan cheese.

Broccoli is also great in salad, stir-fry, soup, or raw with your favorite veggie dip.


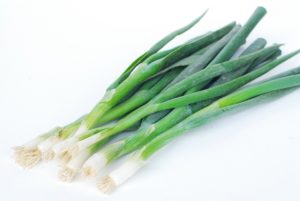
Green Onions:

Also known as scallions, green onions are milder than regular onions but add a nice pop of flavor and color to almost any dish. They are commonly used as a topping for baked potatoes or salad, but can also be used to liven up your Asian style soups like egg drop or ramen noodle. They are also a great addition to omelets or quiche. You can even grill them whole like spring onions and serve as a side dish with a little lemon, salt & pepper.


Featured Recipe: Roasted Yams

Serves 4

Ingredients:


2 large yams

1 tablespoon honey

1-2 teaspoons crushed red-pepper flakes (or to taste)

2 teaspoons smoked paprika

3 tablespoons extra-virgin olive oil

Kosher salt and freshly ground black pepper

¼ cup plain Greek-style yogurt

3 tablespoons fresh lime juice, approximately 2 limes

2 green onions, both green and white parts, trimmed and thinly sliced, for garnish

Instructions:

Heat oven to 425. Cut the yams lengthwise into 4 wedges per yam. Put them in a large bowl, and toss them with the honey, ½ tablespoon of the crushed red-pepper flakes, the smoked paprika and 2 tablespoons of the olive oil. Let it sit for 10 minutes or so, tossing once or twice to coat, as the oven heats.

Transfer the yams to a foil-lined, rimmed baking sheet, season with salt and pepper and then bake until they are deeply caramelized around the edges and soft when pierced with a fork at their thickest part, approximately 30 to 35 minutes.

As the yams roast, combine the yogurt, lime juice and remaining tablespoon of olive oil in a small bowl, and whisk to combine, then season with salt and pepper to taste. Set aside.

When the yams are done, transfer them to a serving platter, drizzle the yogurt over them and garnish with the remaining pepper flakes, the green onions and some flaky sea salt.


Adapted from recipe by cooking.nytimes.com

Posted on

How to Eat Your BOX! (Week of 3/11/18)

Grapefruit:

Think you need to dowse grapefruit with sugar before you partake of its immune-boosting properties? Think again. The bitter component of grapefruit is actually mostly found in the white membrane surrounding the juicy segments. The simplest and healthiest way to enjoy grapefruit is to simply slice it in half horizontally, which exposes the segments while giving you access sans the pith. Take a paring knife and loosen the fruit from the sides, working around the circle. Then, take a spoon and dip out the fruit. You might be surprised at how good it tastes, all on its own.

Swiss Chard:

Both the leaves and stalk of chard are edible, although the stems vary in texture with the white ones being the most tender. When you get your box, give your chard a quick rinse in cold water, spin dry, and store in a Ziploc bag to use in smoothies, salads, stir fry’s, and as a wrap for tacos. Unless you’re using the chard as a wrap, you can take your meal prep a step further and tear the leaves into fork-friendly pieces to speed up your meal prep all week long.

Rainbow Carrots:

Twist the tops off those carrots as soon as they arrive so that they stay nice and crisp in the refrigerator. If you’re reading this, you’ve chosen organically grown carrots, so give yourself a fist bump. ? Carrots are so important to get organic because conventionally grown carrots are often a concentrated source of heavy metals, nitrates and pesticides. Eating carrots is a healthy alternative to junk food, and just one carrot can boost your willpower that is in resistance to those processed foods. Consider adding bunch carrots on to your order on a weekly or bi-weekly basis. Your body will thank you!


Featured Recipe: Swiss Chard and Fingerling Potatoes

Serves 4

Ingredients:


1 lb. fingerling potatoes washed and halved (do not peel)

¼ cup extra virgin olive oil

1 red onion, roughly chopped

1-2 bunches of Swiss chard cut into 2″ wide strips

Himalayan pink salt and freshly ground black pepper to taste


Instructions:

Cook potatoes in salted water, about 10 minutes

While the potatoes are cooking, in a large non-stick pan, sauté onions over low heat until fragrant. About 1-2 minutes

Turn up the heat to medium and add Swiss chard. Season with salt and pepper and stir well. Cover and cook for 4-5 minutes, until greens are just wilted and stalks are tender.

Drain the cooked potatoes and add to the greens. Stir-fry potatoes with the greens for 1 minute or until the potatoes and greens are well mixed.


Adapted from recipe by onlyglutenfreerecipes.com

Posted on

How to Eat Your BOX! (Week of 3/4/2018)

Portabello Mushrooms:

Did you know a single Portabella can contain more potassium than a banana? They’re versatile in the kitchen, too. Flip the caps over, place in a baking dish, drizzle on some olive oil, stuff with veggies (try spinach and tomatoes, with mozzarella for a spin on caprice) or cooked grains such as quinoa and bake until tender about 20 minutes at 425F. You can also slice them up and added to salad or cooked in a skillet with some onion and garlic as a yummy sautéed topping for a breakfast, lunch or dinner plate. Portabellos are a great substitute in recipes calling for steak. Seriously, ask one of your Vegan friends. ? So, get out there and eat some fungus already!

Asparagus:

Asparagus is best cooked as fresh as possible but if you need to store it for 3 to 4 days treat it like a bouquet of flowers. Trim a small amount from the bottoms of the stalks with a sharp knife and place them in a tall glass with a little water in the bottom. Cover the top loosely with a plastic bag, and store in the refrigerator. This will keep the stalks firm and crisp until you are ready to cook them.

To prepare; the smallest spears will only need to have their very bottoms trimmed off before cooking. However, the bottom portions of larger asparagus spears can be chewy and woody; they will either need to be snapped off or peeled. To snap off the tough portion, simply grasp the stalk with both hands and bend the bottom portion until it breaks off. The asparagus will naturally break off at the point where the tender portion ends and the tough, stringy part begins.

Zucchini:

Zucchini is more often used as a cooking vegetable but is also be enjoyed raw. It makes a great addition to salad or veggie trays with dip. When sent through the spiralizer this vegetable makes a sort of noodle which is often used as a substitute in paleo diets in spaghetti or noodle soup. To cook, simply heat oil over medium heat (sauté a little onion or garlic before adding the zucchini if desired), add zucchini noodles and a pinch of salt. Cook for about 5 minutes, until slightly softened. If you don’t own a spiralizer you can use a vegetable peeler and make long, flat noodles instead of round ones.

Serve as the bed to your pasta sauce and meatballs or add to your favorite vegetable soup.


Featured Recipe:

Portabello Baked Eggs

Serves 4

Ingredients:

4 large Portabello mushrooms, stem removed, wiped clean

Olive oil spray

½ teaspoon garlic powder

4 medium eggs

2 tablespoons grated Parmesan or Pecorino cheese

4 tablespoons chopped parsley OR spinach ribbons for garnish

Salt & Pepper, to taste


Instructions:

Preheat broiler to high. Set oven rack in the middle of the oven. Line a baking sheet.

Spray the mushroom caps with olive oil cooking spray on both sides. Sprinkle evenly with kosher salt and pepper and ¼ teaspoon of the garlic powder. Broil 5 minutes on each side, or until just tender.

Remove mushrooms from oven. Drain any liquids. Switch oven from broil to bake, setting temperature to 400 degrees F.

Break an egg into each mushroom. Sprinkle with the cheese. Bake 15 minutes, until egg whites are cooked.

Sprinkle the eggs with the remaining ¼ teaspoon salt and ⅛ teaspoon pepper. Garnish with parsley or spinach and serve.                                                                                                                             


Adapted from recipe by healthyrecipesblogs.com

Posted on

How to Eat Your Box! (Week of 2/18/18)

Italian (Lacinato) Kale:

Kale is just wonderful and it’s so good for you!

Try it: in the Tuscan soup (recipe below), or, in a salad. One great thing about kale as a salad is that it keeps well in the fridge, so you can make ahead of time and not worry about it wilting. To prevent kale from becoming bitter, make sure to make sure to remove all large ribs and stems (They make a great addition to a stir-fry though!). Chop the leaves small; Sprinkle with salt to cut the bitterness; “Tenderize” the leaves by massaging them with your hands (only takes about half a minute); And lastly, massage in the olive oil or salad dressing. This turns the kale bright green and keeps it evenly covered. Use an olive oil & vinegar combination for the dressing.

Toppings: try with apple or pear slices. Cashews, almonds and dried cranberries also taste great with this combination!

Broccoli:

Baked broccoli is one of my favorite dinner sides. I like it best roasted to crispy perfection with a little garlic, salt and pepper. Try tossing chopped broccoli florets with olive oil, salt and seasonings of choice. Bake on a cookie sheet at 450° for about 20 minutes, until edges are crispy and the stems are tender. For extra flavor, drizzle with lemon juice or top with parmesan cheese.

Broccoli is also great in salad, stir-fry, soup, or raw with your favorite veggie dip.

Bosc Pears:

Bosc pears are firm when ripe but you can tell when they are ready to eat when the area around the stem yields to light pressure and are lightly fragrant—usually after 2-3 days on the counter top. Try adding pears to a salad this week! Cut into wedges or cubes they would make a great addition to this week’s salad mix. For dressing, try mixing a tablespoon of balsamic vinegar with a little bit of Dijon mustard and about an eighth cup of maple syrup. Mix together with a wire whisk and beat in an eighth cup of olive or avocado oil. I would probably double the recipe if serving more than 3 people. Can also be topped with gorgonzola, feta, or goat cheese and pecans (or walnuts).


Featured Recipe: Zuppa Toscana

Serves 6

Ingredients:


1 tablespoon Olive Oil

1 lb. Italian Sausage (or sub 15 oz. Cannelloni Beans for vegan option)

¼ teaspoon Red Pepper flakes (or to taste—we advise don’t skip these!)

3 cloves Garlic, minced

1 Onion, diced

4 cups Chicken Broth (or, sub Vegetable Broth for vegan version)

3 Russet Potatoes, thinly sliced

2 cups Italian Kale, finely chopped

1 cup Heavy Cream (feel free to sub Half and Half or Whole Milk OR sub Coconut Milk OR Coconut Cream for vegan version)

salt and pepper to taste (note, because potatoes are salt-stealers, you’ll need more than you think you will)

Instructions:

Place a large pot over medium heat. Add the olive oil. Brown the sausage until no longer pink (if using cannelloni beans, skip this step and add in along with the potatoes). Add the red pepper flakes and onion and cook, stirring often for about 3 minutes, then add the garlic and cook, stirring often until the onions a translucent and the garlic is fragrant, about 2 more minutes. Be careful not to let the garlic burn or it will add that flavor your soup.

Add in the chicken or vegetable broth and potatoes. Bring the broth to a simmer, reduce the heat to medium-low, and cook until the potatoes are tender, about 10 minutes.

At the end of cooking, add in the kale so that it just wilts and turns bright green—no need to overcook it.

Remove the soup from the heat, stir in the cream or cream substitute of your choice (whole milk, half and half, coconut milk or coconut cream), and season with salt and pepper to taste. Ladle into soup bowls and serve.


Adapted from recipe by alaskafromscratch.com

Posted on

How to Eat Your BOX! (Week of 2/5/8)

Mangos:

Mangos also are great on salads, stir-fries, or added to sauces or salsa. Try adding mango to fried rice—we think it’s pretty amazing. If you have a dehydrator they are so good dehydrated or made into fruit leather snacks, or peel, slice and freeze to add to smoothies.

To peel a mango: using the tip of the mango as a guide, slice the two cheeks of the mango off, cutting around the stone in the center. Then place the edge of the mango against the lip of a glass and slide it down one of the halves, so that you’re using the glass like a giant spoon to scrape the mango from its skin. If your mango is ripe (yields to soft pressure, fragrant), you can get the glass to slide through it and separate the skin with ease. If you want to get the part around the pit, we advise going at it with a paring knife, or if you have a toddler, handing it over to them (the pit, not the knife!) will keep them busy for a while. Then, you can eat the half of mango, or, if you’re sharing, slice it up, cut it into cubes, and dump into a bowl, ready to serve!


Pears, d’Anjou:

The d’Anjou is a truly all-purpose pear. They are juicy when ripe, and their subtle sweetness hints at a refreshing lemon-lime flavor. Their dense flesh holds up well in heated applications like baking, poaching, roasting, or grilling and they are delicious when sliced fresh in salads or eaten as an out-of-hand snack. The most important thing to know about d’Anjou pears is that they do not change color as they ripen, unlike Bartletts, whose skin color changes to yellow during ripening. Check the neck for ripeness by gently pressing your thumb near the stem end of the pear. When it gives slightly, the pear is ripe.


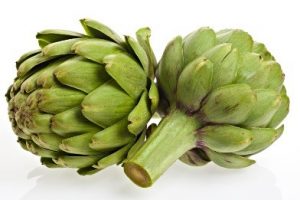
Artichokes:

Artichokes can be steamed, boiled, baked or grilled. To bake, cut about an inch off the top and stem of the artichoke. Then cut it in half and remove the fuzzy part in the center with a spoon. Rub the cut side with a half a lemon, squeezing some juice into the fold and the middle. Drizzle with olive oil, sprinkle with salt, pepper and freshly minced garlic. Bake on a cookie sheet for about 25 minutes at 425°. Melted butter or mayonnaise mixed with a little balsamic vinegar is commonly used for a dip but you can be creative and use whatever your taste buds desire!           


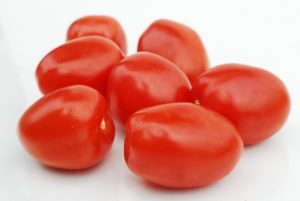
Roma Tomatoes:

Store tomatoes in a single layer at room temperature and away from direct light. Refrigerate only after cutting, as refrigeration makes tomatoes lose their flavor. Romas are great for cooking (especially soups and sauces) as they don’t have the seeds and excess water that many other tomatoes tend to come with. You can also eat them raw, roasted, fried, or broiled; they are great paired with a little olive oil and salt, herbs such as basil and cilantro, and fresh cheeses such as mozzarella and ricotta. And yes, you can totally freeze those extra tomatoes for fresh flavor all year (slice first). According to studies done at Cornell University, cooking tomatoes actually increases the lycopene content that can be absorbed in the body as well as the total antioxidant activity.


Featured Recipe: Quinoa & Bell Pepper Salad

Servings: 6 cups

Ingredients:

For 2/3 cup quinoa*

1 1/3 cups water

5 cups romaine lettuce leaves

1 avocado pitted and diced

2/3 cup chopped cucumber

2/3 cup various (mixture of red, yellow, orange) bell pepper strips

1/3 cup chopped red onion

1/4 cup crumbled feta cheese 

Dressing:

1/4 cup olive oil

2 tablespoons lemon juice

1 1/2 tablespoons Dijon mustard

1/2 teaspoon sea salt

1/4 teaspoon ground black pepper

Instructions:

Bring the quinoa and 1 1/3 cup water to a boil in a saucepan. Reduce heat to medium-low, cover, and simmer until the quinoa is tender, and the water has been absorbed, about 15 to 20 minutes. Cool.

Top lettuce with quinoa, avocado, cucumber, bell pepper, red onion, and feta cheese.

Whisk together olive oil, lemon juice, Dijon mustard, sea salt, and black pepper.  Pour dressing (or toss) over salad right before serving.

*Feel free to substitute the quinoa with cauliflower rice if desired.        


Adapted from recipe by thegirlwhoateeverything.com

Posted on

How to Eat Your BOX! (Week of 1/28/18)

Mizuna Mustard Greens:

You may not have tried Mizuna before, but rest easy, it’s one you’ll be able to use often, and it will be a great addition to your table. It has the peppery taste of arugula with a slight bitter taste (like frisée), and the stems are actually mildly sweet—and yes, eat them too! It’s a mild-tasting green that can be used much like spinach. Try it raw in salads (see recipe below), in your pasta or risotto, atop sandwiches, in soups and stir-frys (add it near the end so it doesn’t overcook), in grain salads and sautéed. Store it like you would most greens, and plan to use within 2-4 days.

Blood Oranges:

With ruby-red to maroon-colored flesh, blood oranges are a surprise when you cut them open; taste-wise, they’re tart-sweet and slightly berry-like.

Storage tips: To keep these ruby gems fresh longer, choose refrigeration over the fruit bowl―they’ll only last only a couple of days at room temperature, but up to two weeks in the fridge.

How to eat them: Blood oranges are best eaten fresh―out of hand, or in salads, salsas, or marmalades. If you’re following a recipe you may be asked to section the fruit. To do so, peel the orange, cut between the white membranes to expose the flesh, and remove the sections (for more juice, squeeze the leftover membranes).

Health benefits: Oranges are rich in antioxidants―vital for healthy cells―including vitamin C, which aids in healing, boosts your immune system, helps your body absorb iron, and even helps reduce the risk of cancer. This citrus fruit is also a good source of fiber, which helps lower cholesterol and, like vitamin C, reduce your cancer risk. (To maximize your fiber intake, be sure to eat some of the spongy white pith right under the skin.)

Leeks:

Two words, LEEK SOUP! What could be more comforting this time of year than a warm bowl of potato soup. Potato leek soup is a classic and so easy to make! You simply soften chopped leaks in butter, then add diced potatoes, stock, and herbs, bring to a simmer and cook until potatoes are done. You don’t even need to add cream to make this soup creamy, just blend some or all the of the soup to thicken. Simple, delicious, and satisfying. Recipe: www.simplyrecipes.com/recipes/potato_leek_soup/

Besides potato leek soup, there are plenty of ways to eat leeks. Used as an onion substitute it makes a great base in just about anything. Cook in a little oil until tender as a base for a sauce, sauté, scrambled eggs, soup, etc. The flavor is milder than an onion size up on the amount.


Featured Recipe: Winter Roasted Garlic & Mizuna Green Salad

Bitter greens, sweet roasted garlic & jewels of golden raisins & fresh citrus balance each other in this simple toss. Roasting the garlic in advance will make this dish a lot easier. Serves 2

Ingredients:

1 head garlic, roasted (see instructions)

½ cup plain yogurt

½ tablespoon Dijon mustard

1 teaspoon white wine vinegar

2 tablespoons extra-virgin olive oil

4 cups mizuna, arugula or other delicate greens

2 Daikon radishes

¼ cup raisins, or cranberries

¼ cup walnuts, crumbled, or toasted sunflower OR pumpkin seeds, optional

Blood orange or Cara Cara orange slices

Instructions:

Roast the garlic: Preheat the oven to 400. Slice the top of the head of garlic off so that the top bit of the cloves are exposed. Wrap in foil or place in a small ceramic baker with a lid. Drizzle on a splash of olive oil and pinch of salt. Place in the oven and bake for 30-40 minutes until the cloves are soft. To check, press against the head with the back of a spoon—it should easily yield to pressure.

Slice the radishes into thin rounds. Wash, dry, and roughly chop or tear the mizuna.

Squeeze or peel about half of the garlic out of the head. For the original two serving recipe you will want a generous tablespoon of garlic paste, so multiply as needed. Place in a blender or food processor with the yogurt, mustard and white wine vinegar. Whirl around until smooth. Drizzle in the olive oil while blending until consistency is thick and creamy.

Toss with the greens and turnips. Sprinkle on the raisins & walnuts and orange slices. Serve immediately.


Adapted from recipe by lillystable.com

Posted on

How to Eat Your BOX! (Week of 1/21/18)

Apples:
Apples are one of those quintessential healthy eating choices! You can dice them up and throw them into your hot cereal with some cinnamon for a fresh take on breakfast, toss them in smoothies, slice them atop green salads to sweeten them up and add texture, dip them in nut butter or yogurt for a snack, roast with savory fall veggies, bake with a topping of your favorite granola…so many ways to enjoy them! And perhaps the best part? Antioxidants and phytochemicals in apples have been linked to help prevent a number of chronic diseases, including: Alzheimer’s, lung cancer, heart disease, breast cancer, diabetes and more. Store unwashed apples in the coldest part of your refrigerator. Be sure to store separately from strong-smelling veggies like onions or garlic, as apples will take on their strong flavors. Good food tip: to ensure you get the best of your will power when it comes to snacking in between meals, ask yourself “Am I hungry enough to eat an apple?” If the answer is yes, eat an apple. If the answer is no…then you’re not hungry. 🙂

Brussels Sprouts:

For oven-cooked Brussels Sprouts: Preheat oven to 425°F. Trim the stem base (don’t take off too much or they simply fall apart) and outer leaves and slices lengthwise. Toss with olive oil (about a tablespoon), salt, pepper, and mix until coated thoroughly. Roast on a baking sheet until tender and caramelized, about 20 minutes. You can just eat them like this but if you want to make them truly amazing, try drizzling with equal parts olive oil and balsamic vinegar and a little honey.

Red Cabbage:

Cabbage is a handy thing to have around. Don’t let it be that vegetable that sits in the bottom of your refrigerator drawer for months on end. There are endless opportunities to use it up. I’m constantly pulling mine out and adding it to my “just about anything”. I like to make cabbage “shavings” by first cutting the cabbage in half, then simply shaving off pieces from along the edges. Also, if you’re like me and rarely use a whole cabbage in one sitting, keep the cut edges from drying out by rinsing and storing in a sealed plastic bag.

Featured Recipe: Fish or Chicken Tacos

Total time: 17 minutes. Makes 12 tacos.

Ingredients:

1 lb. Salmon, or Tilapia Fillets OR Chicken Tenders

1 Tablespoon Extra Virgin Olive Oil

12 Corn Tortillas OR Butter Lettuce leaves as wraps

1 Small Red Onion, diced

1 Roma Tomato, diced

1 Anaheim Pepper, finely diced

2 Cloves Garlic, fine

Juice of 1 Lime

¼ Teaspoon Cumin

¼ Teaspoon Coriander

¼ Teaspoon Chili Powder

¼ Head Red Cabbage, thinly sliced

½ Cup Plain Greek Yogurt

½ Cup Light Sour Cream

4 Ounces Cotija Cheese, crumbled

Salt & Pepper, to taste

Garnish: 1-2 Radishes sliced, Lime, & Fresh Cilantro


Instructions:

Combine onion, tomato, Anaheims, cilantro, garlic, lime, cumin, coriander, chili powder, and salt and pepper to taste. Taste, and adjust seasoning, erring on the strong side. Add cabbage to salsa mixture, cover, and refrigerate.

Combine yogurt and sour cream in a small bowl, cover and refrigerate.

Heat a large skillet over medium-high heat, and add in olive oil. Season the fish fillets with salt and pepper, and add to pan, cooking until done, about 3 minutes for each side.

Place tortillas in a warm towel and place in a warm 200 oven rack for a minute or two to warm.

Flake the fish fillets, and add 1/3 of each fillet to a tortilla (or lettuce leaves), top with salsa/cabbage mixture, cream sauce, and cotija cheese. Garnish with watermelon radish slices, fresh cilantro, lime wedges and enjoy!


Adapted from recipe by thedevilwearsparsley.com


Posted on

How to Eat Your BOX! (Week of 1/14/2018)

 Cara Cara Navel Oranges:

Their pinkish orange flesh is reminiscent of grapefruit, but their taste is sweeter and softly tropical. It is believed that Cara Cara’s are a result of a Washington navel crossed with the Brazillian Bahia. Subtle tastes of cherry, rose petal and cranberry is enough to brighten a dreary day and make a salad of avocado and feta quite special. Try it!

Health benefits: Oranges are rich in antioxidants―vital for healthy cells―including vitamin C, which aids in healing, boosts your immune system, helps your body absorb iron, and even helps reduce the risk of cancer. This citrus fruit is also a good source of fiber, which helps lower cholesterol and, like vitamin C, reduce your cancer risk. (To maximize your fiber intake, be sure to eat some of the spongy white pith right under the skin.)

Lettuce/Greens:

The key to keeping greens fresh is to pre-wash, dry and store them. Try to wash your greens the same day that your box of good is delivered. Try to make sure when you’re unpacking your box to set the lettuce and any other greens on the kitchen counter, so you don’t forget to wash them.

First off, fill a large bowl with some cold water and swirl the leaves around to get rid of the excess dirt. When washing kale, de-stem it as you’re washing it. That will save you time when it comes to throwing that kale salad together. Place in salad spinner, give the spinner a whirl, and spin until your greens are dry.

Wrap greens up in a paper towel or clean cotton kitchen cloth. Make sure to wrap the leaves up gently but tightly, a lot like you would a sleeping bag.

Place the wrapped lettuce inside sealed plastic bags and store in your crisper drawer. The lettuce should stay good for about a week to two weeks, though you should always eat ‘em sooner!

Now that you have some freshly washed greens, you can make some amazing salads on the fly. Here’s to eating more greens!

Arugula:

This peppery green is ubiquitous with fresh salads (try it with blue cheese, walnuts and Asian or Bosc pears), but it is also great atop pizzas (add just after you remove them from the oven, and allow to wilt slightly), or to wilt atop a winter soup. Store in the refrigerator and use within 3-4 days to prevent from becoming bitter.


Featured Recipe:  Power Salad

Total time: under 15 minutes. Serves 2.

Ingredients:


1 teaspoon olive oil

1-2 tablespoons lemon juice

pinch of salt

Generous handful of fresh butter lettuce leaves, cleaned and gently torn

Generous handful of fresh arugula

1 small handful of thinly sliced chard

1/4 cup diced red pepper

1/2 cup toasted pumpkin seeds or pepitas

1 Cara Cara orange, sliced into segments

2 tablespoons crumbled feta cheese

4 ounces of sliced grilled chicken


Instructions:

  1. Combine In a medium bowl first whisk the olive oil, lemon juice, and salt together. Add the lettuce, arugula, and chard and toss them in the dressing. Top with the red pepper, pumpkin seeds, orange segments, grilled chicken, and feta. Optional, top with a dollop of Hope original hummus.


adapted from recipe by girlgonegourmet.com