Posted on

Holiday Stressors

Six Holiday Habits That Cause Heart Attacks  

Some traditions make for merriment and fun – but these six can literally stop your heart. 

BY DR. DARRIA GILLESPIE, MD 

“Christmas Coronary.” It sounds festive, doesn’t it? Like something you’d hear in a holiday movie. Unfortunately … no. The term was coined by doctors who noticed a disturbing pattern: Heart attacks and heart-related problems peaking every year over the winter holiday season — specifically on Christmas, the day after Christmas and on New Year’s Day.  Of course, health emergencies at this time of year seem to stick out more in our minds — the dad who had a heart attack just after the family dinner or the grandfather who experienced severe chest pain after shoveling snow. But it’s more than just anecdotal. Studies show that the number of heart attacks increases by over 30% in the winter. This number holds true for all ages (young people can manifest as having dangerous heart rhythms) and genders.
 

What’s behind this increase? These six stressors specifically surrounding the holidays put us at greater risk: 

  1. Cold temperatures. Cold weather causes your blood vessels to constrict in your arms and legs, making your heart work harder. It can also cause the blood vessels to your heart to spasm, temporarily depriving the heart of oxygen.
  2. Overexertion. Even those who are sedentary during the rest of the year may increase their physical activity over the holidays — shoveling snow, trudging through snowdrifts or going sledding with the kids. Suddenly becoming active in the cold weather causes a spike in demand on your heart. In addition, the mere act of lifting a heavy snow shovel increases your blood pressure, which makes someone with heart disease even more at risk of having a heart attack. 
  3. Nonstop food feasts.A study from Switzerland showed that in the winter, people had higher blood pressure and cholesterol — the very factors that drive a heart attack.
  • What to do: I know—the parties, family gatherings and treats are half the fun! And we all need a little fun. You can still enjoy the festivities, albeit with some caveats. Give yourself some boundaries—for example, you’ll only eat two pieces of mom’s special fudge or one piece of apple pie. Or maybe you’ll allow yourself to indulge at one party, but not the other. I try to keep my nutrition in check on weekdays and then allow myself to cheat a little on the weekend. That works for me, but everyone is different so try some strategies to see what works for you. 
  1. Alcohol. Holiday spirits can lead to “Holiday Heart Syndrome” if you’re not careful. I remember last holiday season taking care of a 34-year-old guy who had come home for the holidays, gone out with his friends and noticed that his heart was suddenly racing. His heart rate was 180 when EMS brought him in. It took hydration and medications to stabilize his heart rate.
  2. Ignoring symptoms. It’s a common excuse: “All the family is here right now” or “I don’t want to spend Christmas Eve in the ER” or “I have 30 guests coming this evening.” Health problems never come at convenient times, and the holidays make those surprises seem even more inconvenient.
  3. Catching a bug.‘Tisthe season for gifts, family — and the flu. A disease like the flu can put excess pressure on your heart — especially if you already have heart problems — increasing the risk of a heart attack. 

With a little extra caution, you can enjoy the holidays while staying your healthiest.  


May you keep the holiday spirit in your heart year ‘round, avoid “Holiday Heart Syndrome” and always and forever remain young at heart. 


This week’s newsletter is excerpted from an article that can be read in its entirety at https://www.sharecare.com/health/heart-attack/article/6-holiday-habits-that-cause-heart-attacks 


Let’s commit to a good food strategy that is heart healthy this holiday season.  

Tristan

your farmer and health activist


  • 1/4 cup lime juice 
  • 1 Tbsp. agave nectar or honey 
  • 1 tsp. sea salt 
  • 1/2 cup olive oil 
  • 1 tsp. white vinegar 
  • 1/2 cup chopped parsley 
  • 3 cups cooked quinoa 
  • 2 fresh pears, cut into chunks 
  • 1/2 cup dried wild blueberries (optional) 
  • 1/2 cup pecans, chopped 
  • 1/2 cup shaved carrots 
  • 1/2 cup diced cucumber 
  • 1/2 cup finely diced red pepper 
  • 1/4 cup red onions, diced 

DIRECTIONS: Mix lime juice, honey, salt, olive oil, and vinegar in a bowl; set aside. 

  1. In large bowl, mix together quinoa, fruit, vegetables, nuts, dried blueberry, then pour over dressing. 
  1. Place in refrigerator to chill, then serve cold! (Optional to serve with chicken.) 

All images and text ©Sandy Coughlin for Reluctant Entertainer. 

Recipe Permalink: https://reluctantentertainer.com/pear-quinoa-salad/ 


Posted on

Delicata

This week we are featuring Delicata Squash and, oh what a crop we have had! This might have been one of the top two or three growing seasons!  

I love that…by just eating fruits and vegetables our bodies can get an incredible amount of nutrition and phytochemicals. Delicata and all winter squash are nutritional powerhouses! Low in Calories, low on the Glycemic Index and high in everything important. If Americans would just commit to getting enough daily fiber in their diets from plants, we would avert the looming health crisis of diabetes, heart disease, kidney failure, cancer, obesity. Just using the goal of 30grams of fiber a day you would also tap into a plethora of phytochemicals, minerals, and vitamins that also nourish and heal our bodies. 

Just look at the nutritional profile for winter squash and this is only 1 cup and only 1 item in your box of good this week. Organic fruits and vegetables are super foods, super healthy and super tasty!  

Enjoy! 

Tristan 

Your Farmer and Health Advocate 


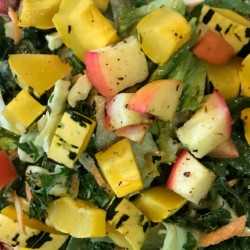
DELICATA, APPLE AND GREENS SALAD 

Serves 4 

INGREDIENTS 

1 delicata squash, seeds removed and cut into chunks (½”x1”)

2 small apples, largely diced  

1 carrot, grated
1 teaspoon fresh thyme, or ½ tsp dried thyme ⅛ teaspoon ground nutmeg
¼ teaspoon sea salt
¼ teaspoon freshly ground black pepper
4 cups of Lettuce, Spinach, Cabbage or Kale or a mix of all them
The juice of 1 lemon
3 Tablespoons tahini

2 Tablespoons olive oil
1 Tablespoon maple syrup
¼ cup pumpkin seeds
½ cup pomegranate seeds
1 avocado, diced 

DIRECTIONS 

Preheat oven to 425 degrees Fahrenheit. Add cut delicata squash and apple to baking tray (optional – line a large baking dish with parchment paper) and drizzle with Olive oil. Sprinkle with sea salt, black pepper, and nutmeg. Use your hands to fully coat squash and apples. Roast for 20 minutes or easily pierced with a knife/fork.  

While delicata and apple are roasting, combine lemon juice, tahini, olive oil and maple syrup together. Drizzle the mixture on the salad ingredients (lettuce, cabbage, kales, spinach, carrot, etc) in a large bowl.  

Sprinkle with sea salt and pepper to taste. Use your hands to gently work in the liquids into salad mix for a minute or two – a little less for lettuce and a litt

le more for kale and cabbage. 

Add pomegranate seeds, pumpkin seeds, and diced avocado to the salad mix. Top with roasted apple and delicata squash and mix once more. Enjoy! 

Posted on

Changes

This week we are rolling out some new features that will make shopping with Klesick’s even easier! The primary change is a new reminder email that lets you know what’s coming your way, and also incorporates the option to add to or change your order quickly. Tuesday and Wednesday customers will get the email reminder on Friday’s and will have till Monday Morning at 8am to make changes to your order. Our Thursday, Friday and Saturday customers will receive the same email on Monday Mornings. I am really excited about this new benefit that will make it even easier to eat heathier. Below is a copy of the email that was sent to each of you this week, explaining the changes.


Life is so busy and especially for working families, but no matter what season of life you find yourself in, life can be busy. This week we are introducing a new email/order page that will serve as, both, a reminder about your next order and what’s in it as well as my favorite additional picks for the week. As I talk with other farmers and suppliers, I wanted a way to highlight just a few more produce or grocery items that can be easily added to your deliveries. I think this email will make it even easier to eat healthy!

You will notice that your next order is listed first and then a list of “Tristan’s top picks for the week” follows. The beautiful thing about this list is that it is super easy to add items from this list that are in season and super healthy. And when you choose to add them to your order, the items you pick will only be added to your next delivery and then drop off. Your standing order will remain unchanged. And then when your next delivery is scheduled you will receive another email reminder with my top picks for that week. Of course, you can add any item to arrive weekly or every other week, but for “Tristan’s Top Picks” these will be added to your next delivery only.

Pesto anyone! This week we are featuring beautiful Bulk Basil from Blue Heron Farms in Concrete and you can use our new shopping concept to add the basil to next week’s order.


I am so excited about this change. Making eating healthier simpler and more convenient, what’s not to love about that. I am also excited about the new section “Tristan’s Top Picks for the Week”. The farming and fresh fruits and vegetable world is dynamic and always changing and this section will be devoted to highlighting the seasonal nature of the produce world.

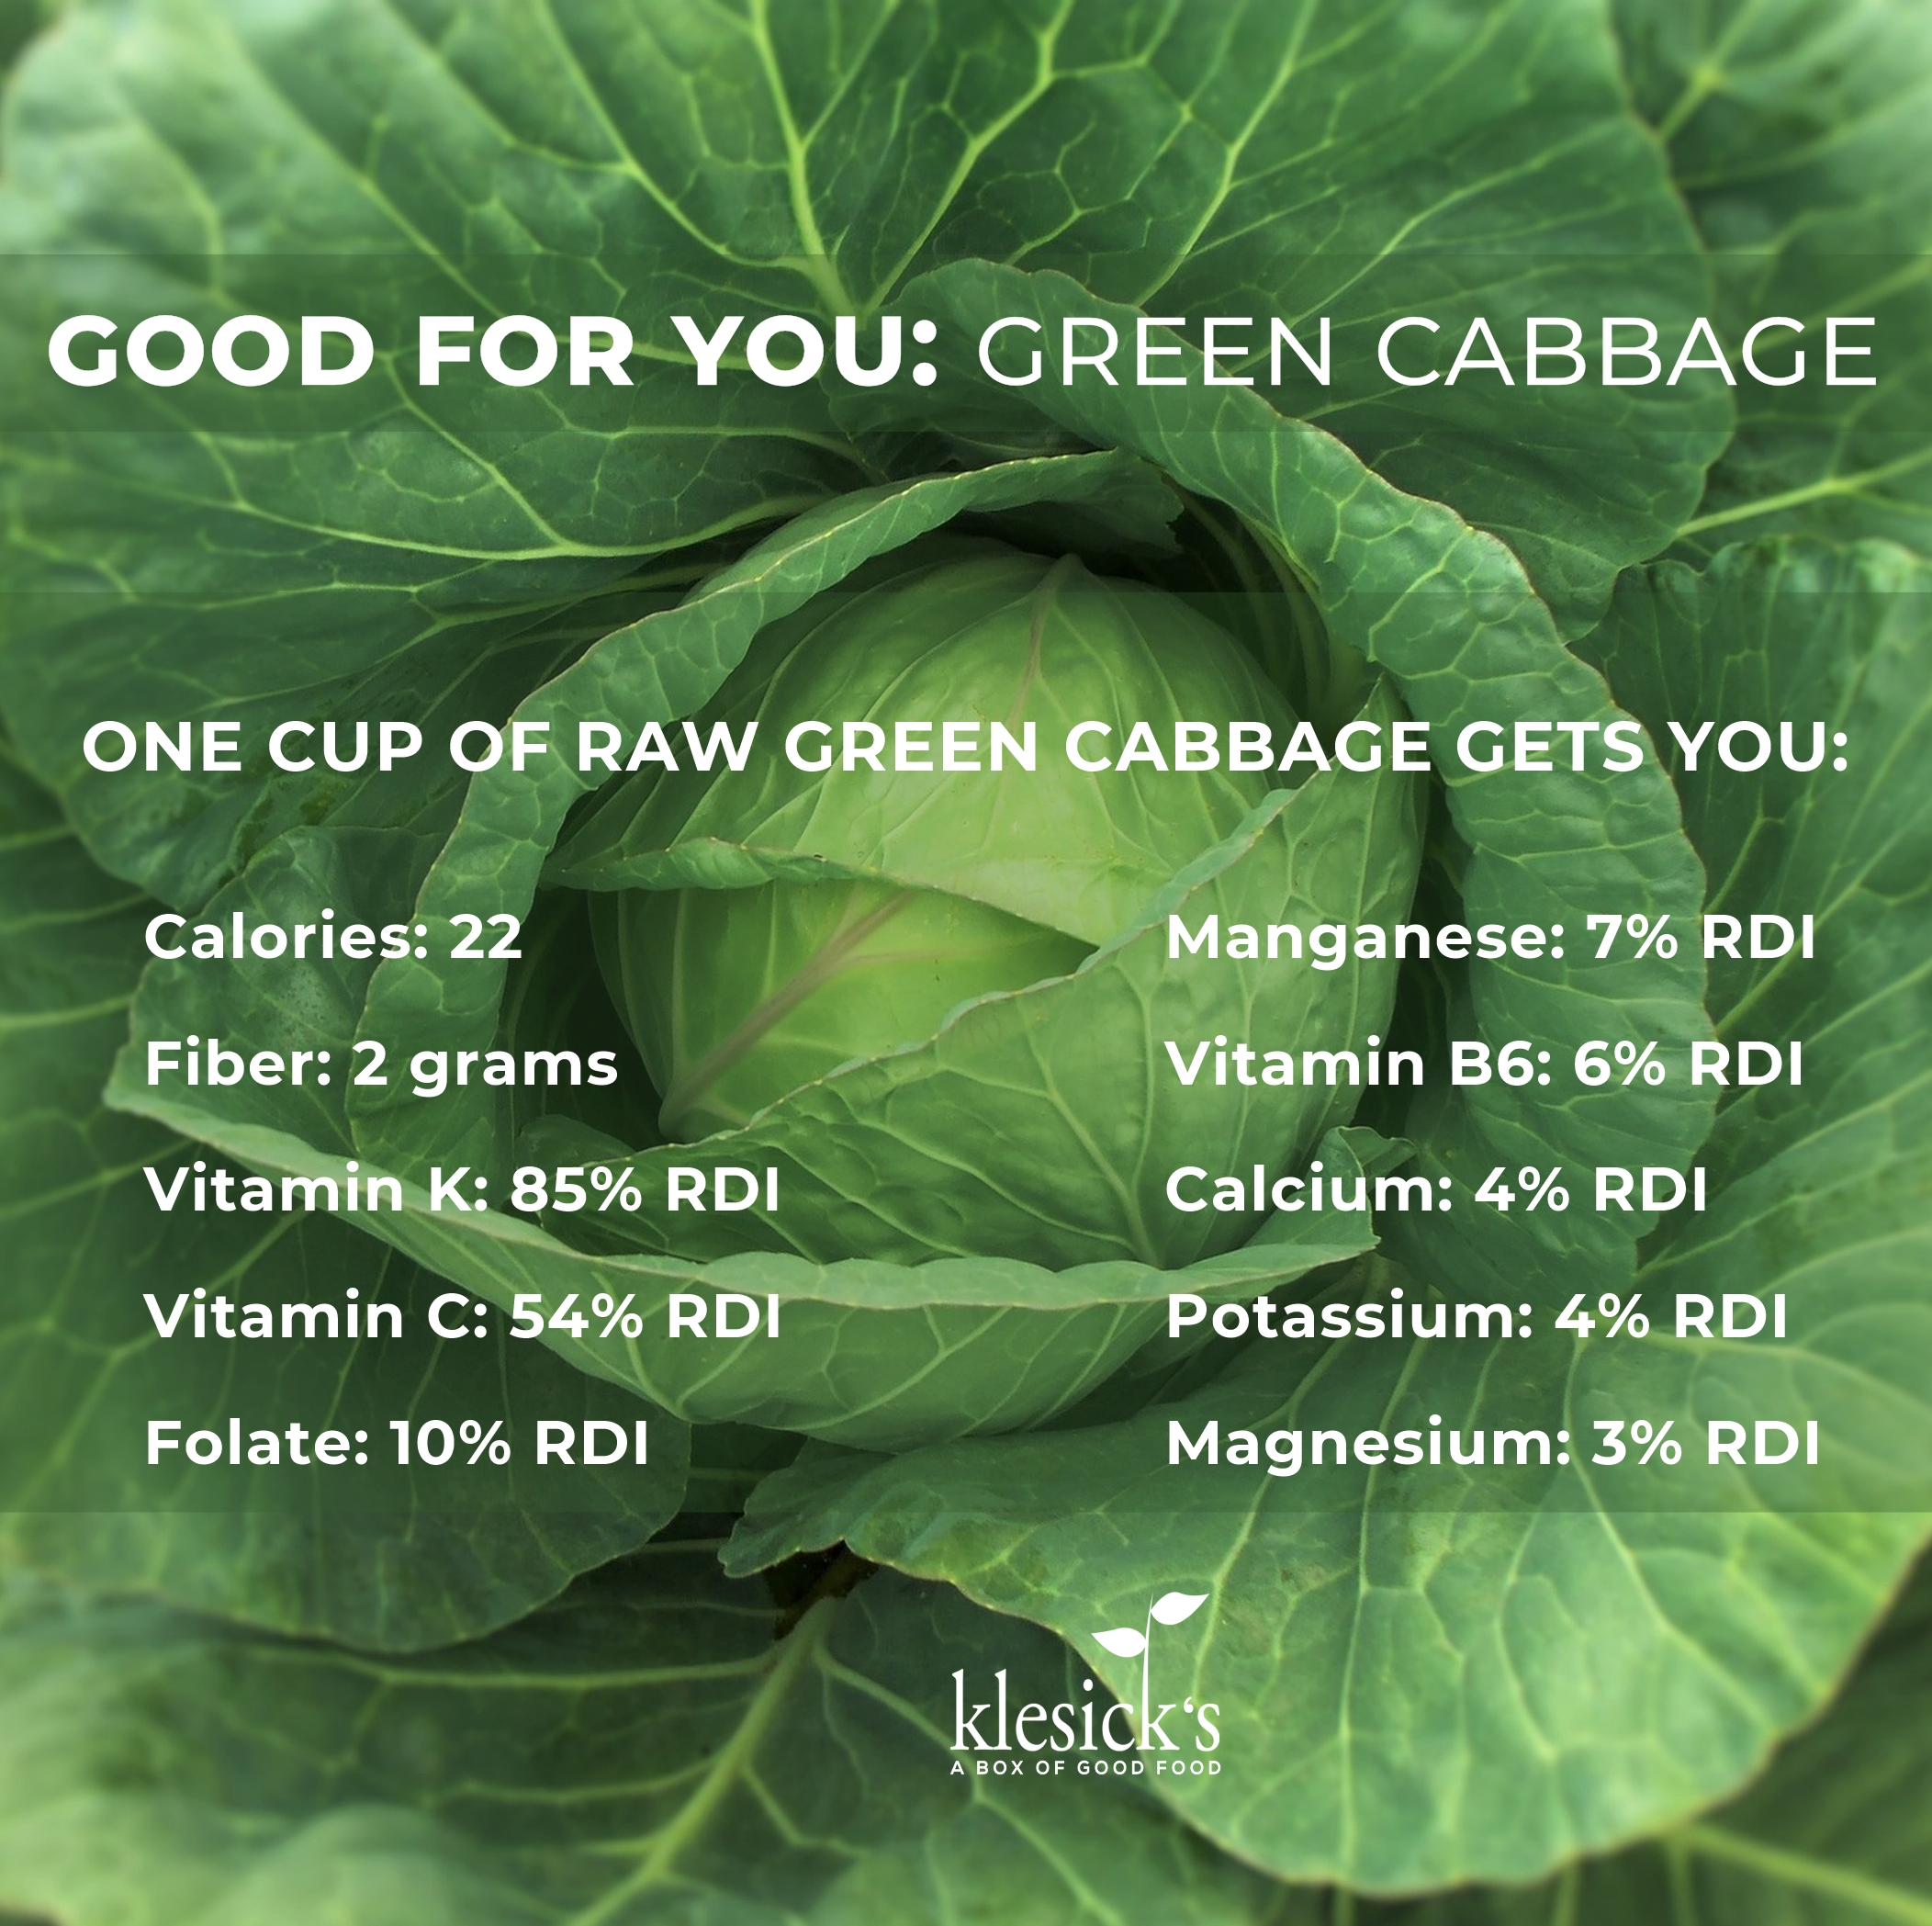
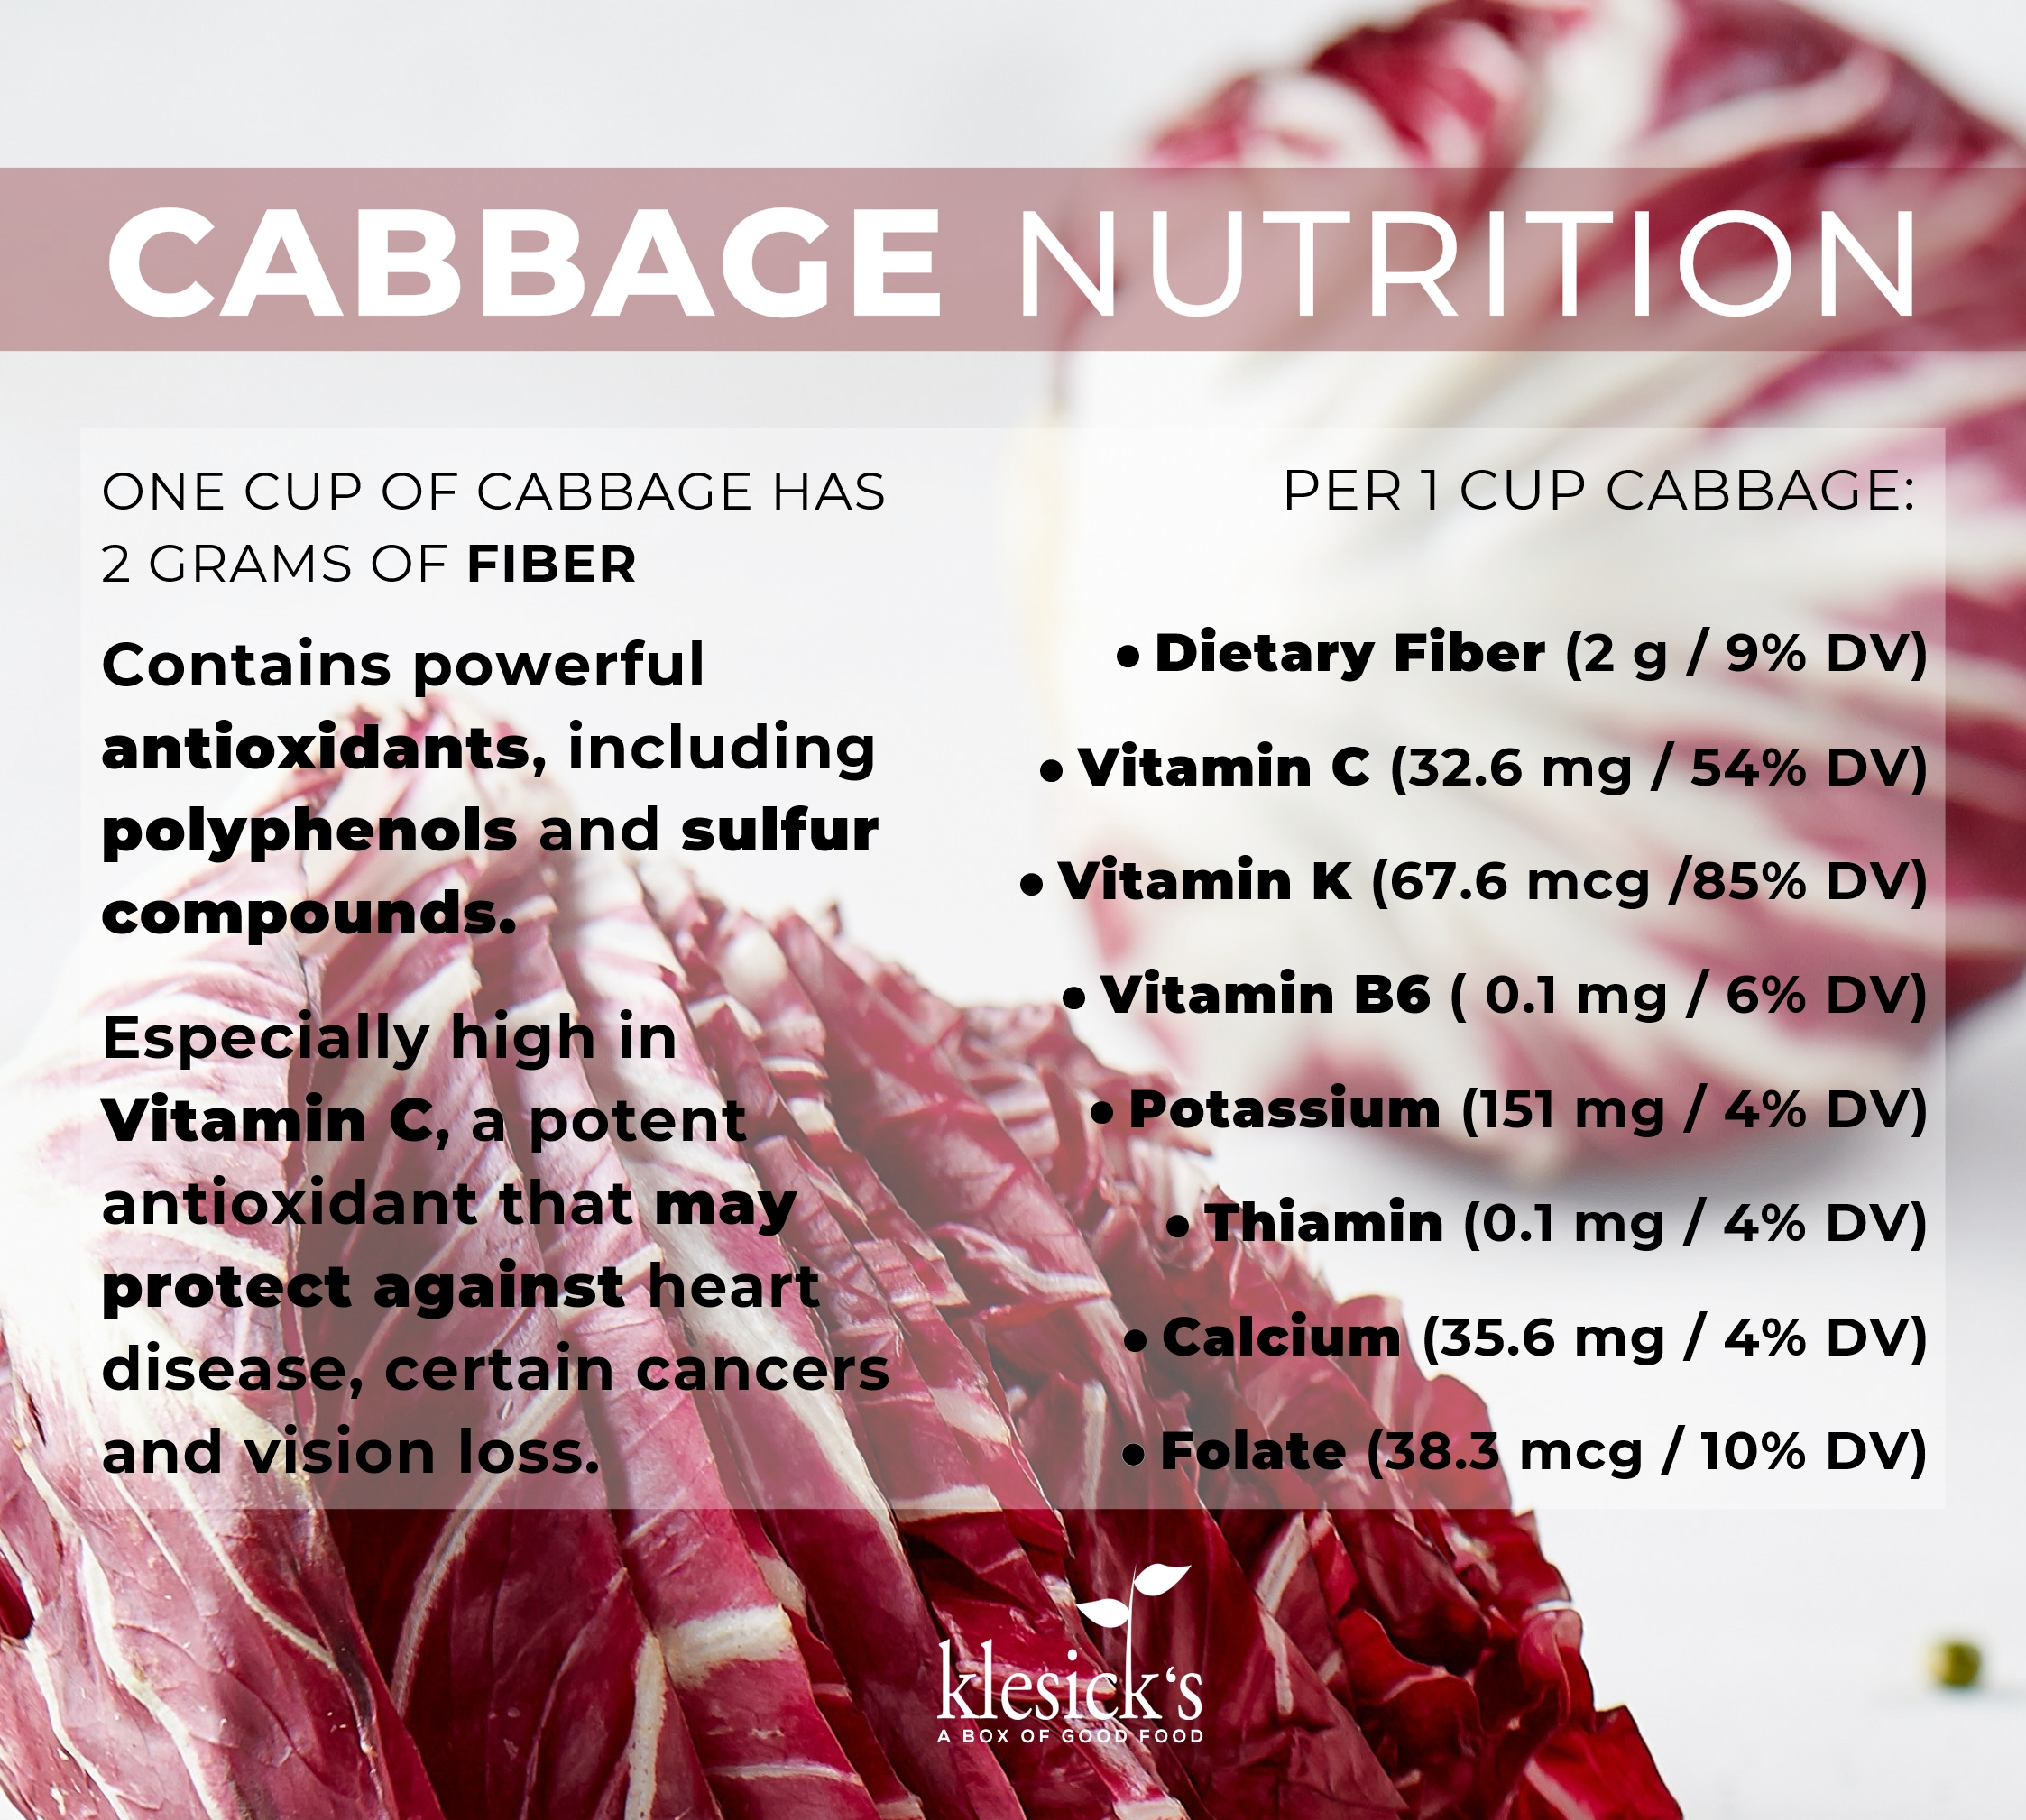
Another change we are going to be devoting space to our newsletter that highlights the phytochemicals and plant compounds that are unique to produce, and this week we are featuring Green Cabbage.


Featured Recipe

Cabbage Soup

Prep Time: 10 mins  |  Cook Time: 30 mins  |  Total Time: 40 mins  |  Servings: 8-10

This soup/stew can be made ahead of time and frozen (or freeze leftovers). In fact, it originally was made just for that purpose. Make it with or without the meat, switch out the beef broth for vegetable broth and it’s vegan! Hearty and super easy. A crowd pleaser on cold nights. You can find the blog post at https://gooddinnermom.com/cabbage-soup

Ingredients

  • 1 tablespoon olive oil or avocado oil
  • 1 tablespoon butter
  • 1 onion, chopped
  • 1 cup celery ribs and leaves, chopped
  • 1 pound ground beef
  • 2 15- ounce cans kidney beans, not drained
  • 3 cups chopped or shredded cabbage
  • 3 cups beef broth
  • 2 15- ounce cans stewed tomatoes, not drained
  • 1 tablespoon chili powder
  • 2 tablespoons sugar
  • 2 teaspoons sea salt
  • 1 1/2 tablespoons Worcestershire sauce
  • 1 tablespoon fresh parsley or chives for garnish, optional

Instructions ­

  1. In a dutch-oven, add the olive oil and butter and heat to medium until butter has melted. Add onions and celery and begin to cook while you break up the ground beef. You can just break it up in the pot or roll it into small, loose meatballs before adding. Cook the onion, celery and beef mixture over medium heat until the beef just starts to cook on the outside.
  2. Stir in the undrained kidney beans, cabbage, stewed tomatoes and all the seasonings. Stir and bring to a boil. Reduce heat, cover and simmer at least 30 minutes but up to 1 hour, until the cabbage has softened and the broth has thickened.
  3. Sprinkle individual servings with fresh parsley or chives, if desired.
  4. Serve immediately or if wanting to freeze the soup, allow the soup to cool and then place in freezer-safe containers or gallon freezer bag.
  5. To reheat from frozen: Thaw in refrigerator overnight. Reheat to slow boil. Serve!
Posted on

How to Eat Your Box! (Week of 8/26/18)

Pluots

STORE: ripe pluots in the refrigerator for up to three days.

PREP: If stored in the refrigerator, remove your pluots before eating and let them return to room temperature. They taste much better this way. Rinse and leave whole, slice into wedges or cut into chunks.

USE: These sweet Dapple Dandy Pluots can be eaten out of hand, as a fresh topping for yogurt, dehydrated into dried pluots or made into jam. You can also experiment by substituting them for plums in recipes (after all, they are the delicious hybrid of the plum x apricot).

Cauliflower

Containing unique antioxidants that may reduce inflammation and protect against several diseases, such as cancer and heart disease, cauliflower is also very easy to add your diet. It’s tasty, easy to prepare and can replace high-carb foods in recipes. Cauliflower can be chopped up and added to salad or soup, roasted in the oven, tossed in a stir fry, boiled and pureed as a stand-in for mashed potatoes or to make a creamy soup, baked into a pizza crust as a flourless alternative, or simply eaten raw. You don’t even have to cut it up. Try baking it whole by simply cutting off the leaves and stem so it can sit upright, baste in olive oil, salt and spices of your choice, and bake on a cookie sheet or cast iron skillet at 450° for about 45-60 minutes or until a knife can be inserted easily. Because of its mild flavor, cauliflower goes well in spicy dishes or curries as it soaks up all the other flavors


Eggplant

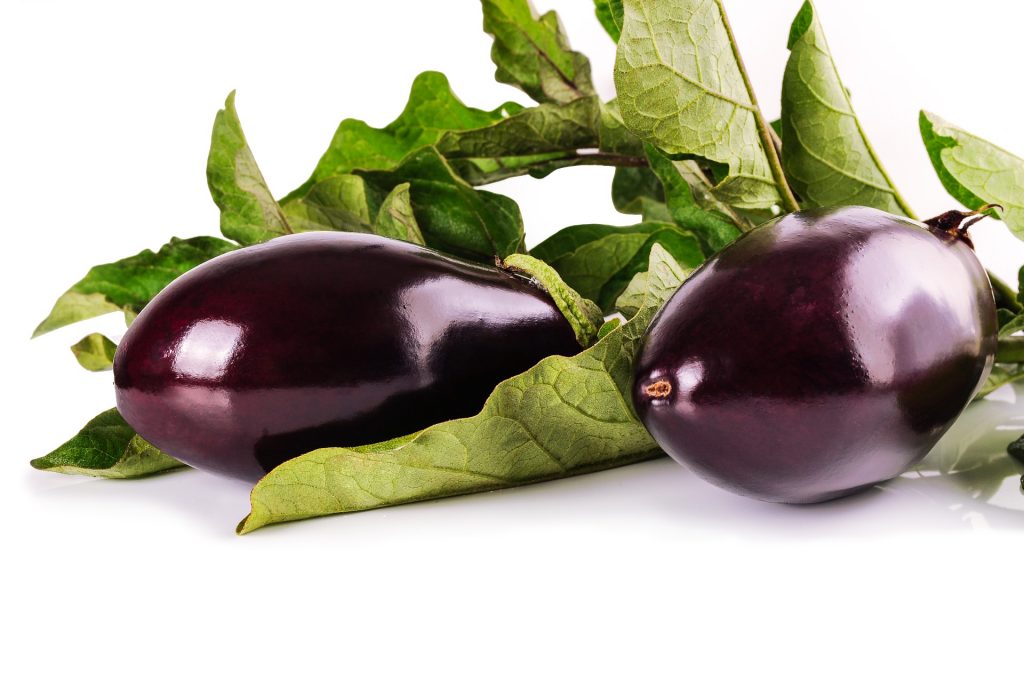
Larger globe eggplants should be peeled and salted before cooking. To peel, use a small knife or peeler and cut off the skin in stripes, leaving some of the peel still intact to help hold its shape when cooking. Then cut into slices or cubes. The most important step is to “sweat” the eggplant. This helps in getting the best flavor and consistency (helps it not be bitter). Do this by tossing in a generous amount of salt and leaving in a colander for about an hour, then squeeze dry. Rinse well under cold water and completely dry by squeezing them between a towel. To cook you can grill, bake or sauté.


Featured Recipe: Quinoa Salad with Roasted Eggplant, Caramelized Onion, and Pine Nuts

The eggplant soaks up lots of flavor from the olive oil and balsamic vinegar, and the caramelized onions add a touch of sweetness. Toss it all together with chewy quinoa and you’ve got a satisfying whole-grain salad to enjoy!

Serves 4 to 6

Ingredients

For the quinoa:

2 cups water

1 cup quinoa, or about 3 cups cooked

1 bay leaf

1 dried red chile pepper, optional

1 teaspoon minced hot green chile such as serrano, optional

3/4 teaspoon Aleppo pepper, or more as needed

3/4 teaspoon dried mint, preferably spearmint, optional

For the salad:

1 1/2 pounds eggplant, cut into 1-inch cubes (about 8 cups)

1/2 medium red onion, thinly sliced (less than 1/4 inch)

4 tablespoons extra-virgin olive oil

1/2 teaspoon fine sea salt

1/2 cup loosely packed torn fresh mint leaves

2 tablespoons white balsamic vinegar or red wine vinegar

1/4 cup lightly toasted pine nuts

Instructions

Place a rack in the center of the oven and preheat to 425°F.

To prepare the quinoa, add the water, quinoa, bay leaf, and dried chile to a 2-quart heavy saucepan and bring to a boil. Decrease the heat to maintain a simmer, cover, and cook until the grain is tender with a slight chew, 20 to 25 minutes. Remove the bay leaf and chile, drain if needed, and transfer to a large serving bowl. Sprinkle with the minced chile, Aleppo pepper, and dried mint and toss to combine.

Meanwhile, to make the salad, place the eggplant and the onion on a large rimmed baking sheet. Drizzle with 2 tablespoons of the olive oil, sprinkle with the salt, and combine well, using your hands. If you don’t mind the extra dish, it’s a bit easier to toss everything in a large bowl.

Roast the mixture until the eggplant pieces have softened and are browned in spots, and the onion slices have caramelized, turning them once with a spatula in between, 30 to 35 minutes. Remove the baking sheet from the oven and immediately sprinkle the vegetables with 1/4 cup of the fresh mint and drizzle with 1 tablespoon of the vinegar. Toss well with a spatula — this will soften the mint leaves and take the sting out of the vinegar.

To finish, add the warm eggplant mixture to the quinoa. Drizzle with the remaining 2 tablespoons olive oil and 1 tablespoon vinegar and toss to combine. Season with salt and vinegar to taste. Top with the remaining 1/4 cup mint and the pine nuts and serve.


Recipe adapted from thekitchn.com

Posted on

How to Eat Your Box! (Week of 8/19/18)

Apples:
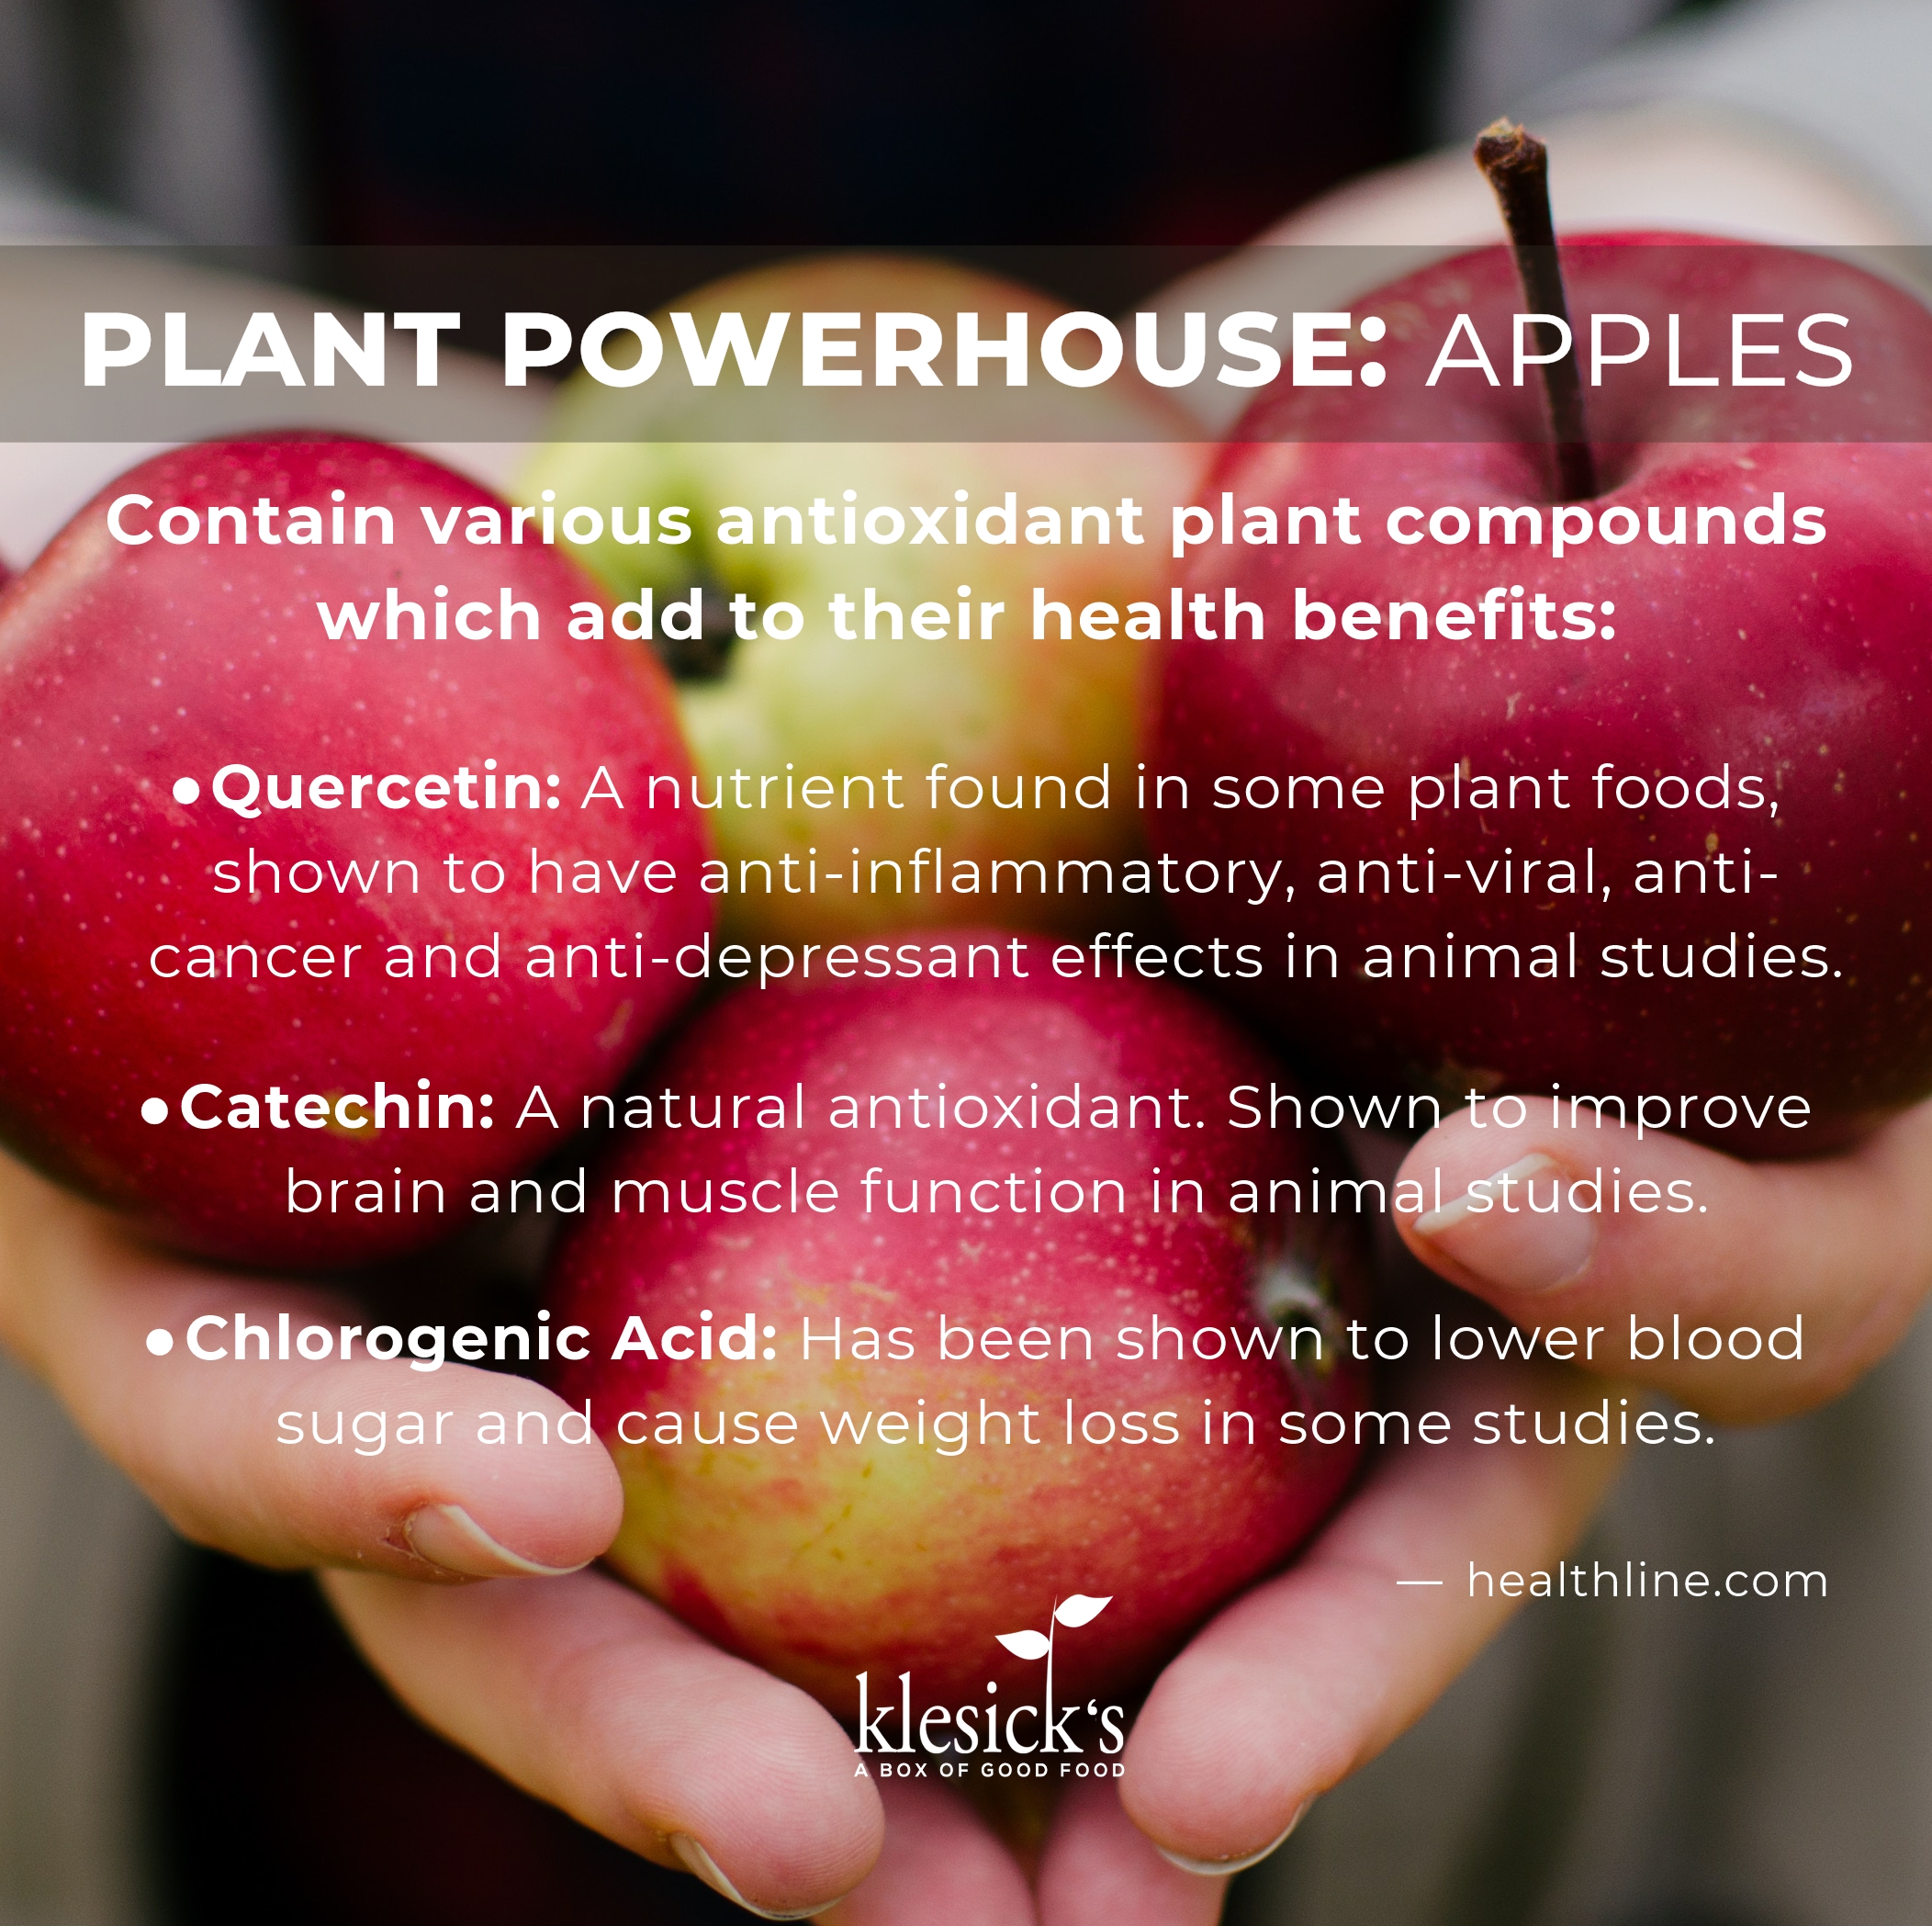
Apples are one of those quintessential healthy eating choices! You can dice them up and throw them into your hot cereal with some cinnamon for a fresh take on breakfast, toss them in smoothies, slice them atop green salads to sweeten them up and add texture, dip them in nut butter or yogurt for a snack, roast with savory fall veggies, bake with a topping of your favorite granola…so many ways to enjoy them! And perhaps the best part? Antioxidants and phytochemicals in apples have been linked to help prevent a number of chronic diseases, including: Alzheimer’s, lung cancer, heart disease, breast cancer, diabetes and more. Store unwashed apples in the coldest part of your refrigerator. Be sure to store separately. See healthline.com for more nutrition information on Apples!

Green Beans:
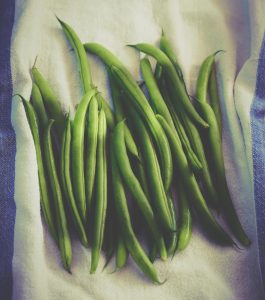
Greens beans make a great side for dinner, especially if you sauté them in little olive oil and garlic. To cook more evenly blanch first by adding to a pot of boiling for 2 minutes. Then drain and put in ice water to stop the cooking process. Sauté garlic in olive oil and add green beans, sautéing until lightly seared. Add salt and pepper to taste. Green beans can also be easily baked in the oven like any other vegetable. Simply spread out evenly on a baking sheet, drizzle with olive oil, salt, pepper, and garlic powder, and toss to coat. Bake at 425° for 15 minutes. Take out after about ten minutes and shake to turn. Sprinkle with some parmesan and serve.

Frisée

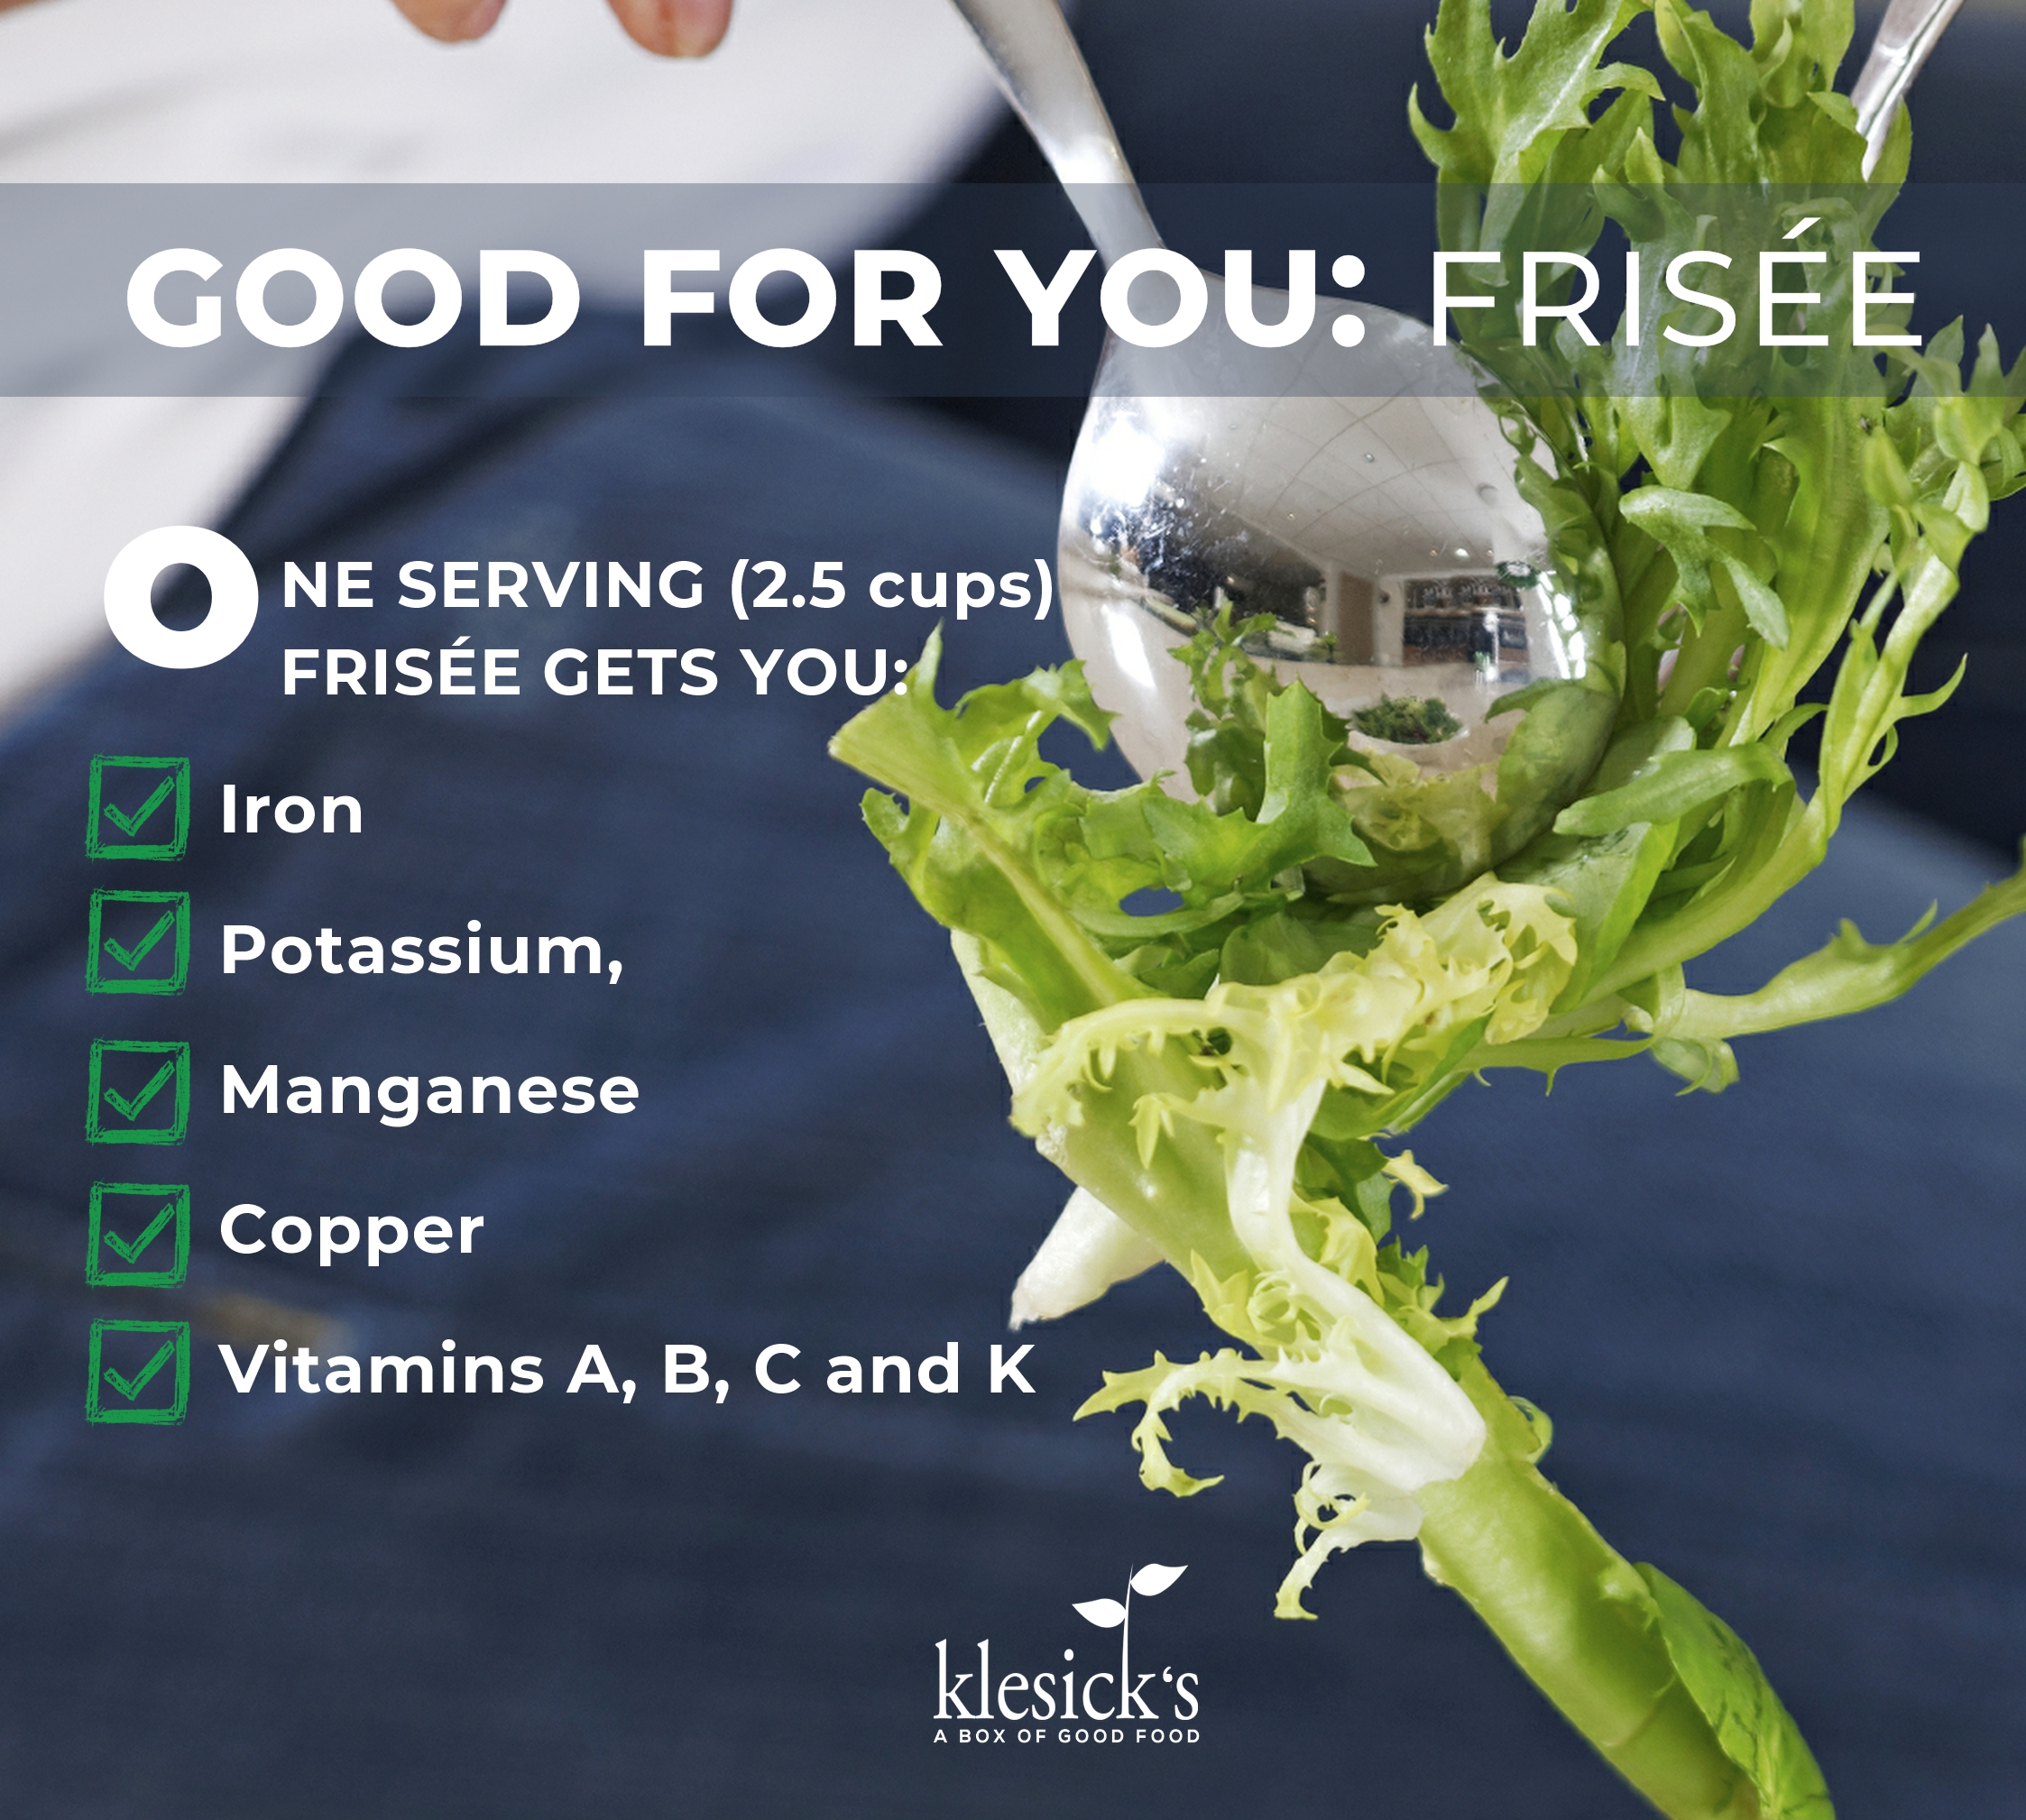
You’ve no doubt seen frisée before, perhaps without realizing it, tucked away inside a mesclun baby greens mix. Also called curly endive, the curly, pale green leaves are frizzy in appearance. Frisée is a variety of chicory, as you’ll be clued in to with the first solo bite: it’s one of those bitters we were talking about in last week’s newsletter. Store: in the fridge for up to five days (rinse first), in plastic or other non-breathable material, so it doesn’t wilt. Use: most often served fresh in salads, try it wilted or sautéed to mellow its bitterness. Frisée pairs well with flavor-packed ingredients and fats: Dress leaves with a warm vinaigrette of roast-chicken pan drippings and sherry or red wine vinegar, toss in browned bits of thick-cut pancetta, ham, or steak bits, or top with a poached or fried egg.


Featured Recipe: Farmer’s Market Salad

This dish combines all of those wonderful summer veggies with a creamy, yet light, dressing that is full of flavor. This version has cooked chicken, but this salad can certainly be served on its own. Likewise, feel free to swap in your favorite vegan dressing if dairy isn’t in your diet. Serves 3-4.

Ingredients:

2 medium (about 1 lb.) summer squashes (zucchini, yellow crookneck), sliced thin

1 bell pepper, sliced

2 cups tomatoes cut into 1-inch pieces

2 cups frisée, chopped

½ cup green onions, sliced

1 ear fresh corn, off the cob or 1 cup

6” length of cucumber, sliced

2 cups cooked chicken breast, shredded or sliced, this would be 3/4 uncooked boneless chicken breast

DRESSING:

1/3 cup buttermilk

1/3 cup soy-free mayonnaise

1/3 cup plain Greek yogurt

¼ cup cilantro, chopped

1 clove garlic, chopped

1 tablespoon lime juice

¼ teaspoon salt

¼ teaspoon pepper

Instructions:

If you are starting with uncooked boneless chicken breast, preheat your oven to 400 degrees.

Brush the chicken with olive oil on both sides and sprinkle with salt and pepper. Place in a baking dish and roast for 15-20 minutes until cooked though. The internal temperature should be 165 degrees.

Let cool and either slice into thin strips or shred with a fork.

In a large bowl combine the summer squash, bell pepper, tomatoes, frisée, green onions, corn, cucumber, and shredded chicken.

In a small bowl combine the buttermilk, mayonnaise, Greek yogurt, cilantro, garlic, lime juice, salt and pepper.

Pour the dressing over the salad. Combine well. Serve at once.


Recipe adapted from anothertablespoon.com

Posted on

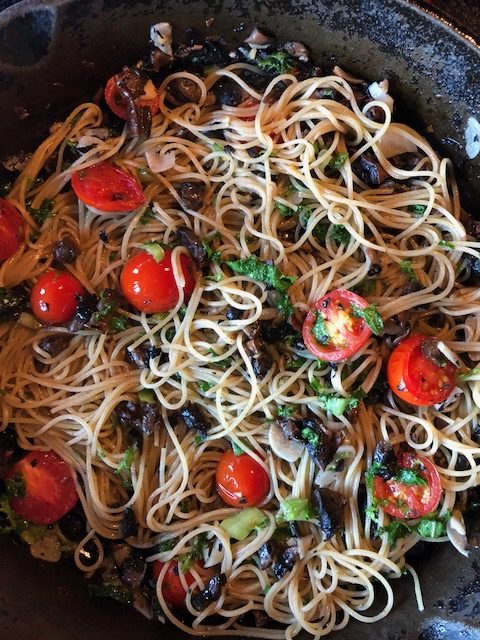
Spaghetti with Frisée, Oil and Garlic

Spaghetti with Frisée, Oil and Garlic

A fresh take on spaghetti dinner. We add the frisée at the end so that it just wilts as there’s no need to overcook it. Serves 4-6

Spaghetti with Frisée, Oil and Garlic

Ingredients
  

  • Kosher salt to taste, plus 1 teaspoon
  • 1 pound spaghetti pasta
  • 3 cloves garlic sliced
  • 1/3 cup extra-virgin olive oil
  • Pinch red pepper flakes
  • 2 tablespoons chopped flat-leaf parsley
  • 1/2 lemon zested, optional
  • Freshly grated Parmigiano-Reggiano optional
  • ¾ cup cherry tomatoes halved
  • 1 bunch Frisée loosely chopped

Method
 

  1. Bring a large pot of cold water to a boil over high heat, then salt it generously. Add the pasta and cook, stirring occasionally until al dente, tender but not mushy, about 8 minutes.
  2. While the pasta cooks, combine the garlic, olive oil, the 1 teaspoon salt, and red pepper flakes in a large skillet and warm over low heat, stirring occasionally, until the garlic softens and turns golden, about 8 minutes.
  3. Drain the pasta in a colander set in the sink, reserving about a 1/4 cup of the cooking water. Add the pasta and the reserved water to the garlic mixture. Mix well. Add in the cherry tomatoes and frisée. Add the parsley and lemon zest (if using). Adjust seasoning, to taste. Transfer to a large serving bowl or divide amongst 4 to 6 dishes. Serve topped with grated cheese, if desired.
  4. Recipe adapted from Spaghetti with Oil and Garlic (Aglio Et Olio) by Food Network Kitchen

Tried this recipe?

Let us know how it was!
Posted on

How to Eat Your BOX! (Week of 8/12/18)

Bartlett Pears

These are easy to tell when ripe because they brighten in color (turn from green to yellow in tone) and have a wonderful fragrance. Try adding pears to a salad this week! Cut into wedges or cubes they would make a great addition to this week’s salad mix. For dressing, try mixing a tablespoon of balsamic vinegar with a little bit of Dijon mustard and about an eighth cup of maple syrup. Mix together with a wire whisk and beat in an eighth cup of olive or avocado oil. I would probably double the recipe if serving more than 3 people. Can also be topped with gorgonzola, feta, or goat cheese and pecans (or walnuts).

Beets

If you don’t have time to roast or boil beets you can shorten the cook time dramatically by slicing off thin rounds and either sautéing, steaming, or boiling them, just peel them first with a vegetable peeler.

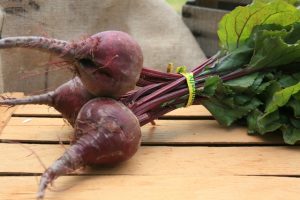
In the cooking world, beets are often referred to as “nature’s multivitamin” for their incredible range of vitamins, minerals and antioxidants. Although beets can be cooked in a variety of ways (including as a secret ingredient for deep dark chocolate cake-Google it!), roasting beets is one of the easiest and most delicious. Roasting beets intensifies their flavor, brings out their earthy sweetness, and makes their skin tender and easy to peel off. Roasted beets are particularly delicious in beet salads or just as a complementing side dish.

Kale

We love Apple Kale Salad: (Kale, Apple, Pear, Red Bell Pepper, Green onion, Carrot….)

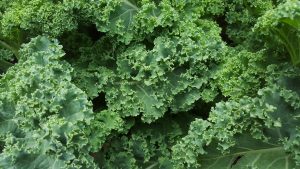
Kale is just wonderful and it’s so good for you! One great thing about kale as a salad is that it keeps well in the fridge, so you can make ahead of time and not worry about it wilting. Kale can be a little tricky because it tends to be a bit tough and sometimes bitter. Here are a few tips that have helped me. First make sure to remove all large ribs and stems (They make a great addition to a stir-fry though!); Chop the leaves small; Sprinkle with salt to cut the bitterness; “Tenderize” the leaves by massaging them with your hands (only takes about half a minute); And lastly, massage in the olive oil or salad dressing. This turns the kale bright green and makes it so it’s evenly covered.

For the dressing, I like to use a combination of vinegar and olive oil. Once you have prepped your kale and worked in the dressing, add your toppings. Try with apple or pear slices. Cashews, almonds and dried cranberries also taste great with this combination!

Broccoli:

Pass the broccoli! Broccoli contains plant compounds which protect against cancer. Broccoli is great in salad, stir-fry, soup, roasted, steamed, or raw with your favorite veggie dip. Add Broccoli to your next box of good food delivery here.

Featured Recipe: Roasted Broccoli

The high heat with this method causes the broccoli to caramelize making this one of the tastiest ways to prepare and eat broccoli. Leave off the pecorino for a vegan option (try topping with a drizzle of tahini instead). Serves 3-4.

Ingredients:

1 and ½ pounds broccoli crowns (roughly 2 heads)

¼ cup extra virgin olive oil

4 garlic cloves, pressed

large pinch of dried red pepper flakes

½ teaspoon kosher salt

3 tablespoons raw, sliced almonds (with or without skin)

2 teaspoons freshly squeezed lemon juice

2 – 3 tablespoons freshly grated aged pecorino cheese (leave out for vegan option)

zest of half a lemon

Instructions:

Preheat the oven to 475 degrees Fahrenheit. If you prefer less crispy florets (or if your oven runs hot), you can reduce the oven temperature by 10 to 15 degrees Fahrenheit and adjust cooking time as necessary.

Line a sheet pan with parchment. Trim any dry, tough ends of the broccoli crowns, leaving roughly 2-inches of stalk attached. Slice the broccoli into ½-inch-thick steaks, starting in the center of each broccoli crown and working out to the edges, reserving any small or medium florets that fall off for roasting. Slice any large remaining florets in half lengthwise.

In a large bowl, whisk together the olive oil, pressed garlic, and red pepper flakes. Add the broccoli steaks and toss gently until evenly coated. Arrange the broccoli, cut-side down, on the lined sheet pan, setting them apart slightly. Sprinkle with salt.

Roast the broccoli for 10 to 12 minutes. Remove the pan from the oven, flip the broccoli, and sprinkle the almond slices evenly across the sheet pan. Roast for an additional 8 to 10 minutes, or until the broccoli is evenly caramelized and fork tender, and the almond slices are toasted and golden.

Transfer the broccoli to a platter, toss gently with the lemon juice and top with the grated pecorino cheese. Garnish with fresh lemon zest. Serve hot or at room temperature (it also tastes great cold). Leftover broccoli can be stored in an airtight container in the fridge for up to 2 days.


Recipe adapted from abeautifulplate.com

Posted on

How to Eat Your BOX! (Week of 8/5/18)

Melons, Cantaloupe      

Cantaloupe provide a range of antioxidants, phytonutrients, and electrolytes which have been shown to have multiple health benefits. Two types of powerful antioxidants in cantaloupe (carotenoids and cucurbitacins) have been linked with the prevention of diseases including cancer, cardiovascular and neurodegenerative disorders. They help to stop free radical damage within the body and slow the aging process. —dr.axe.dom

Storage and Eating: They may look hardy, but melons can perish quickly if not kept in the refrigerator. Keep ripe melons away from other fruit so that the ethylene gas that they produce does not speed up the fruit’s ripening. Uncut ripe melons should keep in the fridge for up to 5 days. You can also use a melon baller to scoop out ripe fruit and then freeze to add to smoothies.

Green Cabbage

Cabbage has the highest amount of some of the most powerful antioxidants found in cruciferous vegetables – phytonutrients such as thiocyanates, lutein, zeaxanthin, isothiocyanates, and sulforaphane, which stimulate detoxifying enzymes. Research has shown these compounds to protect against several types of cancer, including breast, colon, and prostate cancers. They also help lower the LDL (low-density lipoprotein) or “bad cholesterol” levels in blood, which can build up in arteries and cause heart disease. —foodfacts.mercola.com

Eat it: Cabbage is a handy thing to have around. There are endless opportunities to use it up. You can add it to “just about anything” veggie-wise. Make cabbage “shavings” by first cutting the cabbage in half, then simply shaving off pieces from along the edges. Also, if you’re like me and rarely use a whole cabbage in one sitting, keep the cut edges from drying out by rinsing and storing in a sealed plastic bag.

Featured Recipe: Cabbage Salad

This delicious, filling comes from the one by Dr. Joel Fuhrman. This combination of greens, seeds and currants will fill you up quickly and keep you full.

Ingredients:

3 ½ cups green cabbage, grated (approx. ½ cabbage)

1 carrot, peeled and grated

1 red pepper, thinly sliced

1/4 cup dried currants or cranberries

2 tbsp raw pumpkin seeds

2 tbsp raw sunflower seeds

1 tbsp unhulled sesame seeds

For dressing:

1/3 cup almond or hemp milk

1 apple, peeled and sliced

1/2 cup raw cashews

1 tbsp balsamic vinegar

Instructions:

Mix all salad ingredients together.

In a high-powered blender, blend almond/hemp milk, apple, cashews and vinegar and toss with salad.

Garnish with currants and lightly toasted sesame seeds.

Recipe adapted from Dr. Joel Fuhrman

Posted on

How to Eat Your BOX! (Week of 7/29/18)


plumsPlums

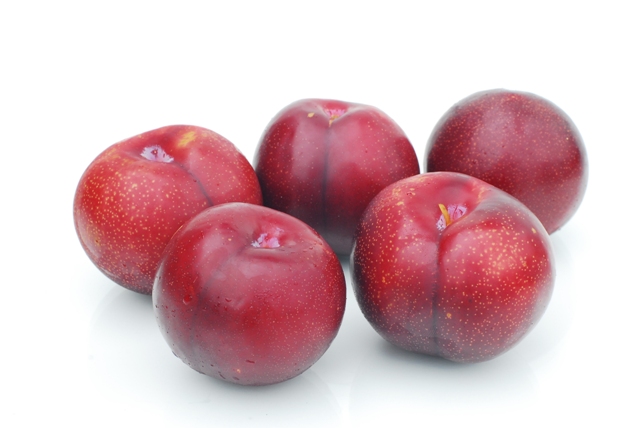
Your plums will continue to ripen once off the tree. Simply leave them on the counter away from the sun. When ripe, store unwrapped in the refrigerator for up to three days. If stored in the refrigerator, remove your plums (same goes for pluots) before eating and let them return to room temperature. They taste much better this way. Rinse and leave whole, slice into wedges or cut into chunks. Use them as a fresh topping for yogurt, dehydrated for fruit snacks or make into jam.

Roma Tomatoes

Store tomatoes in a single layer at room temperature and away from direct light. Refrigerate only after slicing, as refrigeration makes tomatoes lose their flavor. Romas are great for cooking (especially soups and sauces) as they don’t have the seeds and excess water that many other tomatoes tend to come with. You can also eat them raw, roasted, fried, or broiled; they are great paired with a little olive oil and salt, herbs such as basil and cilantro, and fresh cheeses such as mozzarella and ricotta. And yes, you can totally freeze those extra tomatoes for fresh flavor all year (slice first).

Featured Recipe : Niçoise Salad with Frisée

“This salad from the South of France is a meal on its own and you vary endlessly with the ingredients. This one is made with Frisée which adds a slightly bitter touch. A perfect companion to the other ingredients of the Niçoise like green beans, tomatoes and anchovies.” — lovemysalad.com

Check out more great info on Frisee from the front page of this week’s newsletter, HERE.

Ingredients:

1 Frisée lettuce

2-3 Roma tomatoes, diced

3-4 whole green onions, roots removed, sliced into thin rings

0.75 lb. green beans or haricot verts

handful of black olives such as Kalamata

4 hardboiled eggs

2 cans of tuna in oil, drained (feel free change this up: top with smoked or baked salmon instead)

8 anchovy fillets in oil, drained

1 can of artichoke hearts, drained

Instructions:

Put a large pan of salted water on medium high heat. Rinse the green beans and cut of the stem of each bean.

When the water boils add the green beans and cook them just until al dente. Rinse with cold water and let them cool.

Wash and dry the frisée and divide over 4 plates. Cut the tomatoes and eggs in wedges.

Divide onion, cooled green beans, artichoke hearts, olives and eggs over the frisée.

Prepare the dressing by mixing the olive oil, red wine vinegar, lemon juice and crushed garlic. Add sea salt and freshly ground pepper to taste and divide the dressing over the salad.

Divide the tuna (or salmon) chunks and anchovy fillets over the plates and serve with a lemon wedge.


Recipe adapted from lovemysalad.com

Posted on

How to Eat Your BOX! (Week of 7/15/18)

Kohlrabi

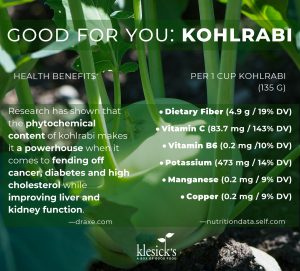
Mike (our customer caretaker) is Kohlrabi’s biggest fan so if you need some convincing to try this alien-like vegetable, give him a call;) Kohlrabi is typically eaten raw—peeled, sliced and added to a salad or used for serving with a dip. You can also steam, boil, bake, grill, or roast them. Just peel away the outside thick skin first. Add them to soups or stews. Try grating them and toss with grated carrots or apples to make a slaw!

You can also boil and mash them with potatoes or other root vegetables. Stir-fry them with other vegetables, or julienne them and fry them like potatoes. Look for Indian recipes using kohlrabi as they are often used in Indian cuisine.

Peaches

Test for ripeness by fragrance and by gently pressing around the stem – it should give to light pressure when ripe. Place in sealed container in the fridge when ripe – if you leave them exposed to the open air in the fridge, they will wrinkle from dehydration. Peaches, like other stonefruit, ripen from the inside to the outside, so if fruit is soft all over it is more likely overripe. Try peaches for breakfast paired with yogurt or hot/cold cereal, as a topping to a green salad, and as an ingredient in fruit salads. Peaches are also great on the grill, but be sure to use slightly less ripe fruit, it will hold up better without breaking apart/juicing. And of course, peaches bake up fabulously into crisps, pies, and sauces!


Featured Recipe: Kohlrabi, Carrot and Lettuce Slaw

A fresh slaw made with kohlrabi, lettuce and carrot, perfect as a side dish or a light lunch.

Serves 4

Ingredients:

2 large kohlrabi bulbs peeled

2 large carrots peeled

2 cups finely chopped lettuce or combination of lettuce and kale

handful chopped green onion (or diced sweet onion)

1 cup almonds chopped

1 lemon juice retained

salt and black pepper to season

3 tablespoons sesame seeds

your choice of dressing

Instructions:

Grate both the kohlrabi and carrot roughly in a large mixing bowl.

Add the lettuce and toss to mix.

Add the green onion, almonds, lemon juice, seasoning and sesame seeds. Mix well.

Serve your salad with your choice of dressing.

RECIPE NOTES

Great as a light lunch, and quick to prepare as a side dish with your main dish.

Recipe adapted from aninas-recipes.com

Posted on

How to Eat Your BOX! (Week of 7/8/18)

plums

Plums

Great in fruit salads, atop green salads (think Balsamic vinegar, goat cheese, walnuts, red onions) because they’re firm enough to hold up with a little tossing. Try them atop plain Greek or coconut yogurt with a drizzle of honey for breakfast. Plums are particularly delicious in fruit galettes as baking them brings out their sweet-tart flavor. If too firm to use, place in a closed paper bag at room temperature for one to two days. Once ripe, plums can be kept in a plastic bag in the refrigerator up to three days.

Sugar Snap Peas

The sweetness of these crunchy veggie lies in their shell. Unlike shelling peas, sugar snap peas are best enjoyed fresh, shell and all. Simply “snap” off the stem bit, and you’re good to go. Great just on their own, they also go well on top of salad, in with pasta, sautéed (lightly) with any Asian-inspired dish or casseroles. Use within 5 days for best flavor and freshness.


Featured Recipe: Summer Veggie Quinoa Bowls

This Healthy Veggie Quinoa Bowl has freshly-sautéed corn, peas and broccoli mixed with cooked quinoa over a bed of lettuce and a side of avocado! It is vegan and gluten free and perfect for a light healthy lunch. Two choices of dressings. Can be made ahead and eaten cold.

Ingredients:

2 cups uncooked quinoa

2 ears fresh sweet corn (kernels removed—stand cleaned ears on end on a cutting board and slice from the top down, beginning at the base of the ears towards cutting board with paring knife. Continue to cut off the all corn kernels)

0.5 lb. fresh sugar snap peas (rinsed)

2 cups of broccoli (rinsed, roughly chopped)

1-2 green onions, entire part, diced

DRESSING(s):

Version one:

3 tbsp olive oil

½ a squeezed lemon

½ a squeezed lime

1 tsp sea salt

1 tsp pepper

2 tsp onion powder

Version Two, Asian-inspired:

2 tsp olive oil

Low sodium tamari sauce to taste (or soy sauce)

½ a squeezed lemon over the top

Instructions:

Cook quinoa according to directions on your package. Once done cooking, use a strainer and rinse the rice.

Chop your broccoli, remove corn kernels from cob (or use frozen), halve peas, and dice onion then place in a sauté pan on medium heat (wait until the quinoa only has 15 minutes left before starting this step as you don’t want to overcook your veggies).

Once quinoa is done add it to the sauté pan with the veggies, stir together and add your sauce/seasoning of choice. Remove from heat.

Serve with a side of lettuce and avocado or radish slices for extra fiber and to make your meal more filling, healthfully. Serves 4-6 depending on if you serve as a side or main meal.

Recipe adapted from tworaspberries.com

Posted on

How to Eat Your BOX! (Week of 7/1/18)

Red Cabbage

Cabbage is a handy thing to have around. Don’t let it be that vegetable that sits in the bottom of your refrigerator drawer for months on end. There are endless opportunities to use it up. I’m constantly pulling mine out and adding it to my “just about anything”. I like to make cabbage “shavings” by first cutting the cabbage in half, then simply shaving off pieces from along the edges. Also, if you’re like me and rarely use a whole cabbage in one sitting, keep the cut edges from drying out by rinsing and storing in a sealed plastic bag.

Good source of Thiamin, Calcium, Iron, Magnesium, Phosphorus and Potassium, and a very good source of Dietary Fiber, Vitamin C, Vitamin K, Vitamin B6, Folate and Manganese.

—nutritiondata.self.com

Berries

NW berries need to be treated a little gentler than their California counterparts. Always wait to wash until ready to eat, gently pat dry to avoid soggy berries, and try to eat within 3 days of delivery.

Sweet Onions

Sweet onions lack the sulfuric pungency of yellow onions. The best part? They won’t make you cry when you cut them up! This is also why they taste “sweet” – not because they have more sugar than regular onions, but because they lack the Sulphur. Sweet onions are best eaten fresh – cooking them wastes their delicate flavor and you won’t get the “onion-y” flavor that you want with a cooking onion. The mild flavor of these onions makes them perfect for your raw in salads and relishes or chopped as a garnish. If you do cook them, either roast them to caramelize their flavor or make homemade onion rings.

Sweet onions will keep for a week or two at room temperature. For longer storage keep them in an open paper bag in a cool, dark place. You can put them in the veggie drawer of a fridge in a paper bag or on layers of newspaper, but don’t keep them wrapped in plastic, since their juicy constitution makes them susceptible to rot and mold.


Featured Recipe: Roasted Vegetable Protein Rice Bowl

Fiber-rich and full of protein. Serves 4

Ingredients

1 small head of red cabbage

1 large sweet potato

1 sweet onion

1 15-ounce can of chickpeas

4 handfuls of red leaf lettuce, rinsed and chopped

1 1/2 cups of rice

8 ounces 2% yogurt

1 handful of cilantro

1 lime

Olive oil

Spices for Veggies: Onion powder, garlic powder, paprika, cumin and some red chili flakes

Kosher salt

Optional: Feta Cheese

Instructions

Pre-heat your oven to 400F

Note: You can either chop and toss the sweet onions in with the veggies to roast, or, if you are fine with the crunch, serve them raw as a topping. For the veggies, cut the cabbage in 8 wedges. Cut large chunks of sweet potato so they cook around the same time. Cook for about 20 minutes or until al dente-tender. Meanwhile, drain the chickpeas and toss in some olive oil to coat and a couple shakes of the spices and a couple pinches of kosher salt. Throw on a lined baking pan and place in the oven (can bake at the same time as the veggies, but try for 10-15 minutes at 400F.

Meanwhile, cook the rice on stove top or in a rice cooker.

While veggies, chickpeas, and rice are cooking, make the cilantro yogurt sauce. Mix together the yogurt, cilantro, juice of the lime, shake of onion powder (or add in some fresh minced sweet onion!), garlic powder and some salt in a food processor or blender, blend, taste, adjust seasonings.

As soon as the veggies, chickpeas, and rice are done cooking, place everything in a bowl including the red leaf lettuce (optionally, you can mix everything else and dump on top the greens) and mix well, then cover for a few minutes, season with some salt and mix some more.


Recipe adapted from susanstable.com

Posted on

How to Eat Your BOX! (Week of 6/24/18)

Garlic Scapes

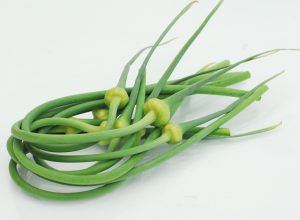
You can use scapes just like you would garlic; their flavor is milder, so you get the nice garlic taste without some of the bite. Use on top of pizza, in pasta, in salsas, and as a replacement for garlic in most other recipes. There are many things you can do with scapes, but my personal preference is to turn them into garlic scape pesto. It’s a sharper, greener take on traditional basil pesto that can be used to add a fresh garlicky zing to just about anything – Spoon it into soups, spread it on sandwiches, toss with cooked pasta, beat it into scrambled eggs, and (best of all) slather it onto pizza dough before adding on the toppings. It freezes beautifully, too, so it’s easy to make an extra-large batch to tide you over until next spring.

Cherries

Although you’ll quite likely find yourself eating them straight from the bag that they traveled to your home from, you should also try serving cherries with dinner over ice. The ice slowly melt into the bottom of the bowl, dragging some of the buoyed little fruits with them. Those ones are the best – completely cold and crisp throughout, melting away the summer heat from the inside.

NUTRITION: Cherries

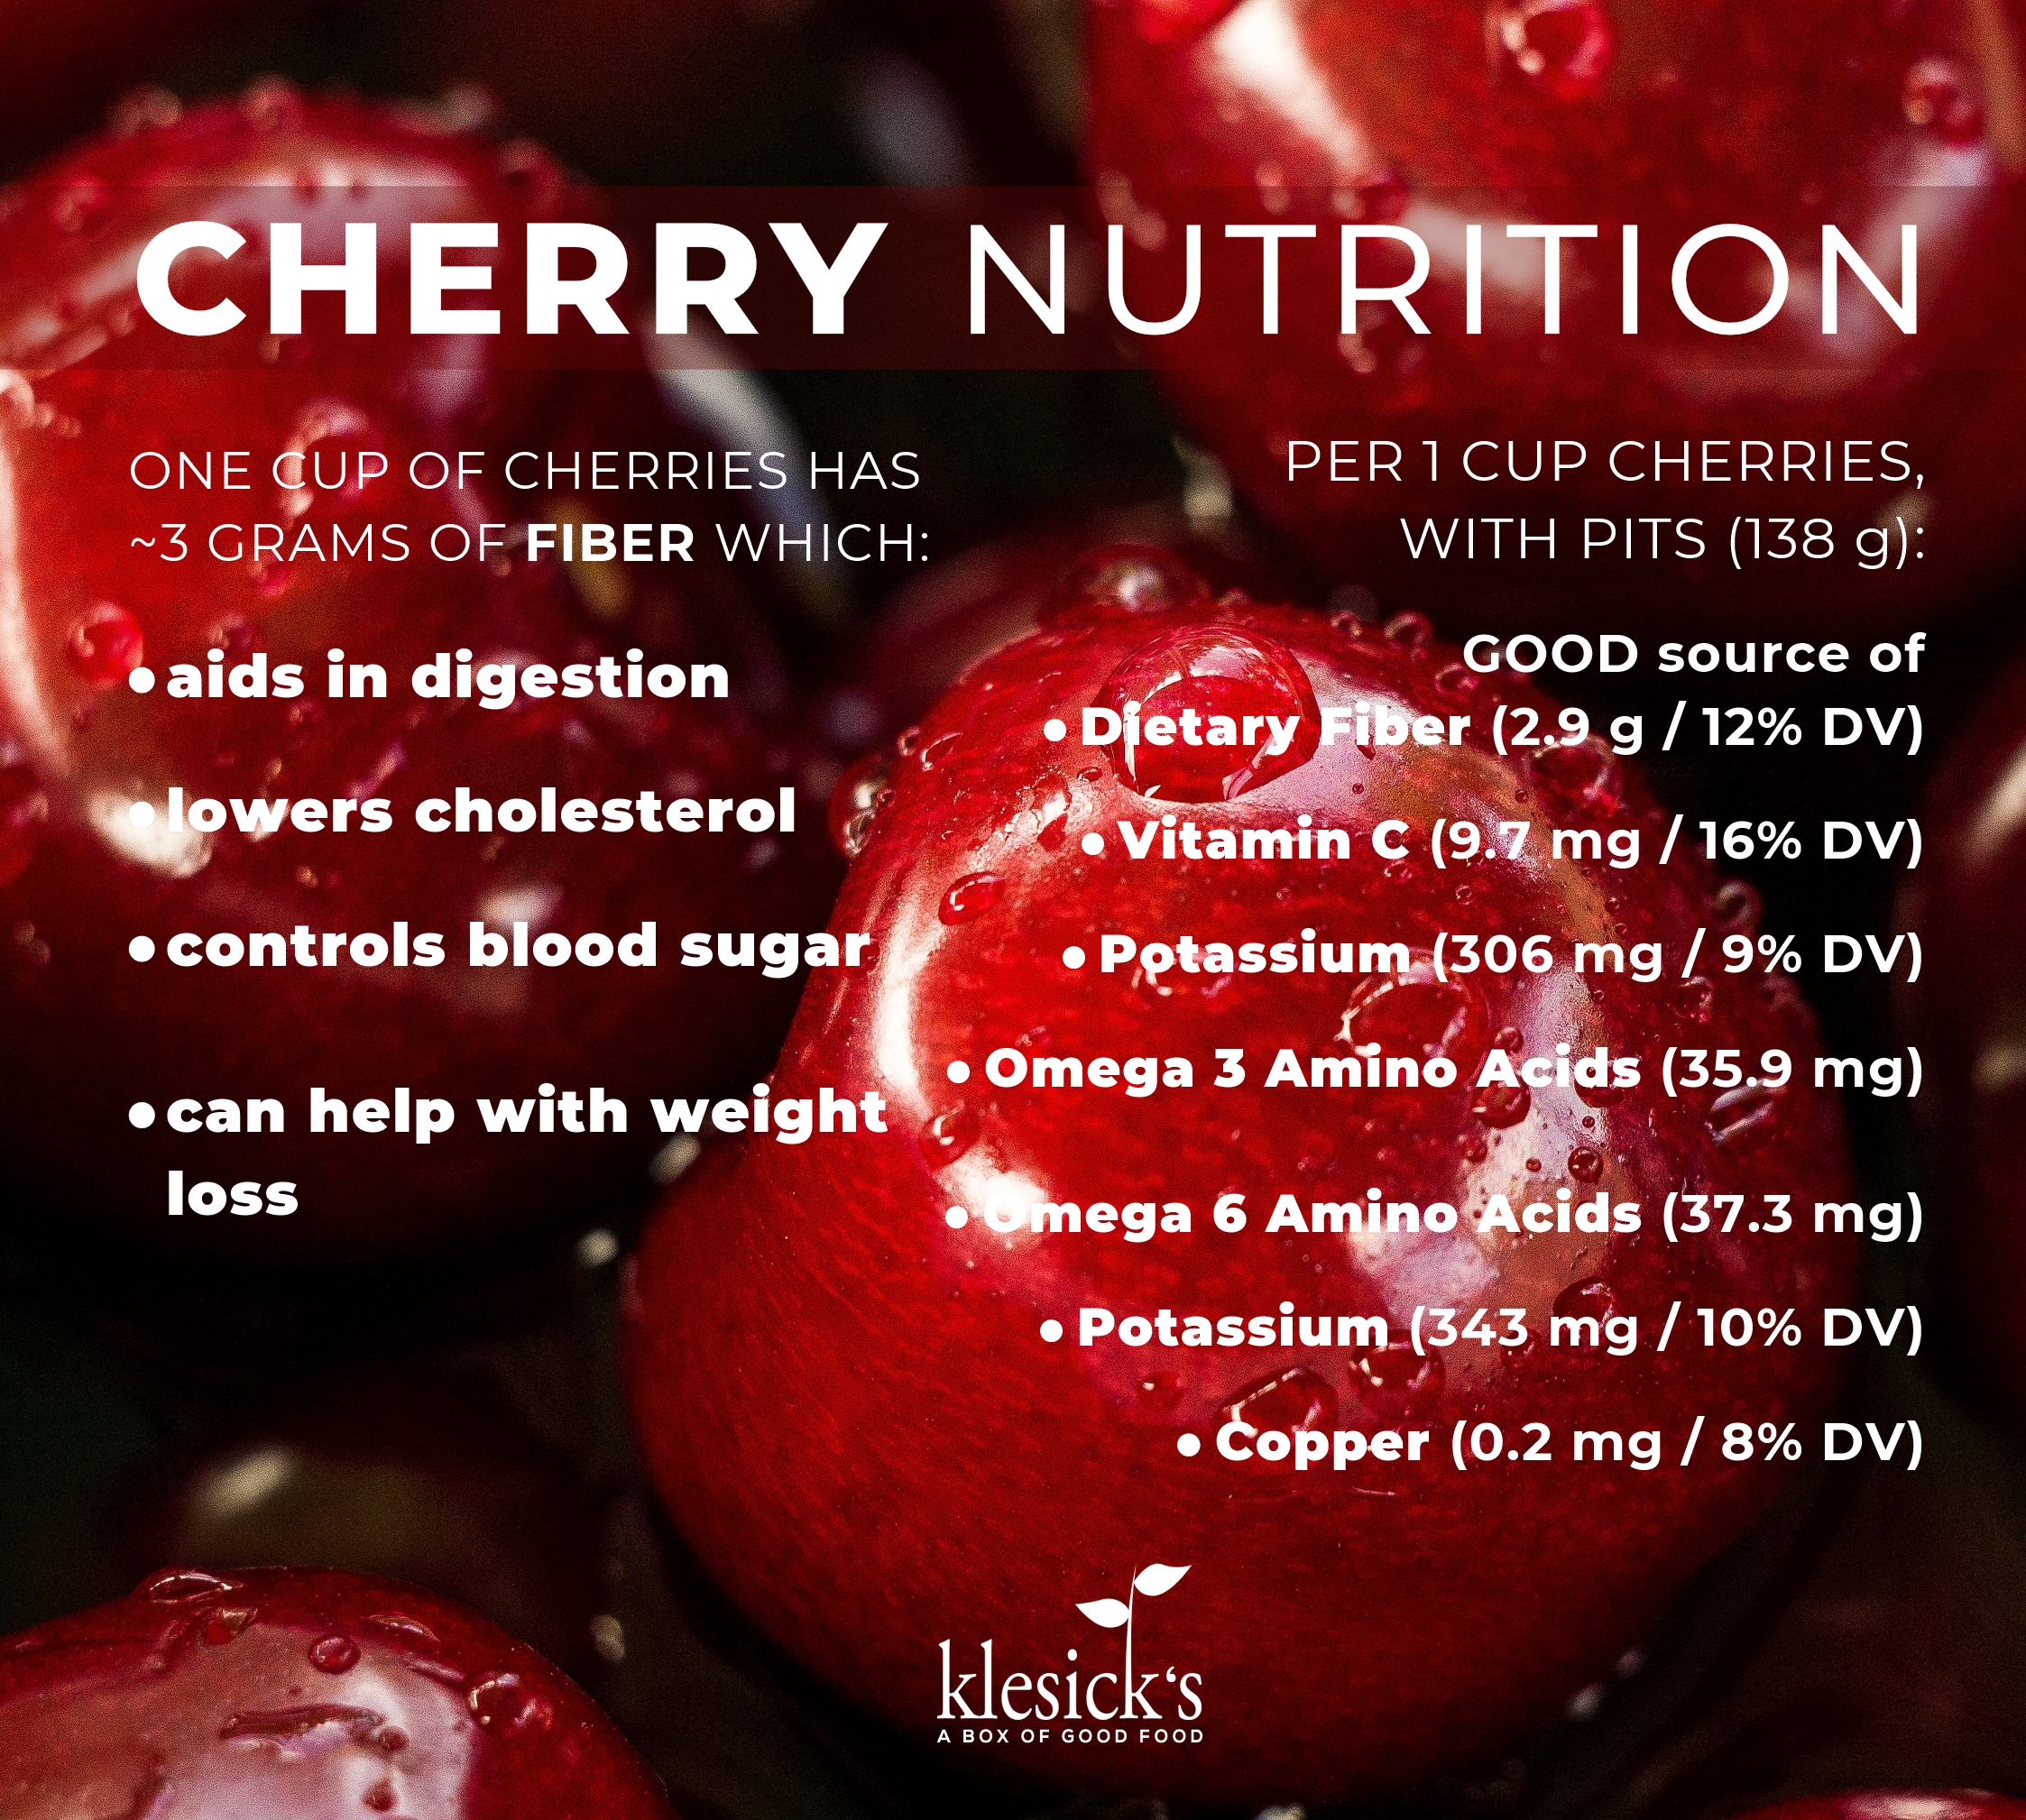
Cherries are a sweet summertime treat, but also a great fruit to enjoy for health and nutrition. Cherries are one of the top antioxidant-rich foods, contain melatonin for a good night’s sleep, and fight inflammation and pain linked to arthritis. A cup of cherries has 3 grams of fiber, which aids in digestion, lowers cholesterol, controls blood sugar and can help with weight loss. —Stemilt.com

Amounts per 1 cup, with pits (138g): Cherries are fat-, cholesterol- and sodium-free. A good source of Dietary Fiber (2.9 g / 12% DV) and Vitamin C (9.7 mg. / 16% DV). Also a source of Potassium (306 mg / 9%), Omega 3 amino acids (35.9 mg) Omega 6 amino acids (37.3 mg).

—Source: nutritiondata.self.com.


Featured Recipe: Garlic Scape and White Bean Dip

Wondering what to do with garlic scapes? Puree them into a quick and creamy, garlicky bean and garlic scape dip! Great as a healthy snack or for a party!

Ingredients:

1 cup garlic scapes

2 15-oz cans white cannellini beans, drained and rinsed

1/4 cup extra virgin olive oil

1/4 cup water

1/4 cup chopped fresh parsley

kosher salt and pepper, to taste


Instructions:

Bring a large pot of water to a boil and set out a bowl of ice water. Add the garlic scapes to the pot and boil for 30 seconds. Drain and plunge the scapes into the ice water. This makes the scapes tender without overcooking them, bringing out their tender flavor. Roughly chop most of the scapes and finely chop a few for topping the dip (set aside for topping along with a sprig or two of parsley).

Add the roughly chopped garlic scapes, white beans, olive oil, water, and parsley to a food processor (or blender) and process until smooth. Add more water if it’s too thick. Taste the dip and add salt and pepper to taste.

Serve topped with a few finely chopped garlic scapes, chopped parsley, and a drizzle of extra virgin olive oil.

Recipe adapted from justalittlebitofbacon.com

Posted on

How to Eat Your BOX! (Week of 6/17/18)

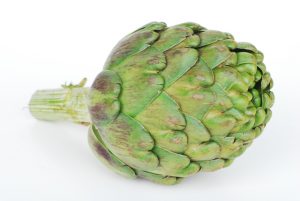
Baby Artichokes

Artichokes can be steamed, boiled, baked or grilled. To bake, cut about an inch off the top and stem of the artichoke. Then cut it in half and remove the fuzzy part in the center with a spoon. Rub the cut side with a half a lemon, squeezing some juice into the fold and the middle. Drizzle with olive oil, sprinkle with salt, pepper and freshly minced garlic. Bake on a cookie sheet for about 25 minutes at 425°. Melted butter or mayonnaise mixed with a little balsamic vinegar is commonly used for a dip but you can be creative and use whatever your taste buds desire!

Nutrition: Artichokes

According to the U.S. Department of Agriculture, a medium-sized artichoke provides about 60 calories and just over 10 grams of fiber, or 41 percent of the recommended daily value. Artichokes are highest in insoluble fiber, the type that stimulates digestion and contributes to bowel regularity. They also contain a significant amount of soluble fiber, which promotes healthy cholesterol levels and helps control blood sugar levels.

Amounts per 1 artichoke, medium (120g): low in Saturated Fat (0% DV) and Cholesterol (0% DV). Also a good source of Niacin (1.3 mg/7% DV), Magnesium (50.4 mg/13% DV), Phosphorus (97.6 mg/9% DV), Potassium (343 mg/10% DV) and Copper (0.2 mg/8% DV), and a very good source of Dietary Fiber (10.3 g/41% DV), Vitamin C (8.9 mg/15% DV), Vitamin K (17.8 mcg/22% DV), Folate (107 mcg/27% DV) and Manganese (0.3 mg./13% DV). —Source: nutritiondata.self.com.

radishes

Radishes:

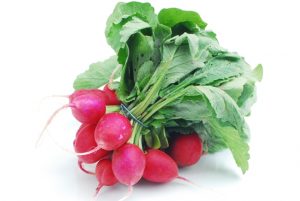
Radishes are a just a great vegetable to have around. Packed with nutrients these little red globes make a great addition to your daily eats. Add them as a topping to your salad, tacos, or as a side to Asian or Mexican cuisine! I recently started wondering about those fancy shaped radish slices that came with my meal at Thai restaurants. They had a definite vinegar flavor to them and that’s when I discovered pickled radishes! They are great and so simple to make! Just let your radishes (thinly sliced) soak in about 2 cups of red or white vinegar with a teaspoon of sugar and salt.  You can also add onions or garlic cloves, peppercorns and chilies for even more flavor. You can let this sit in the fridge overnight or for a whole month if you want.

If you’re not a fan of raw radishes (or even if you are), try one of the alternative recipes below.

Pickled: http://www.epicurious.com/recipes/food/views/pickled-radishes-366455

Or Baked: http://www.hobbyfarms.com/balsamic-roasted-radishes-with-fresh-thyme/


Featured Recipe: Steamed Baby Artichokes with Lemony Brown-Butter Sauce & Chives

A bright, simple sauce that dresses up baby artichokes while letting their delicate texture shine through. Makes 4 servings.

Ingredients:

1 lb. baby artichokes, trimmed

4 Tbs. unsalted butter

2 Tbs. fresh lemon juice

Kosher salt

Freshly ground black pepper

2 Tbs. thinly sliced chives or green onion/scallion tops

Instructions:

Trim the artichokes to remove any prickly outside leaves with a pair of scissors. Bring an inch of water to boil over high heat in a pot fit with a steamer insert. Put the artichokes in the steamer basket, sprinkle with kosher salt, cover tightly, and steam until just tender, about 5 to 6 minutes. The artichokes should be neither crisp nor soft, but exactly in between.

While the artichokes steam, melt the butter in a small (1-quart) saucepan over medium heat. Cook the butter, whisking constantly, just until the milk solids turn a nutty brown color, 3 to 5 minutes. As soon as the butter is brown, take the pan off the heat and carefully pour in the lemon juice. Swirl to combine. Season with 1/4 tsp. salt and 1/8 tsp. pepper, or to taste. Drizzle the sauce over the steamed artichokes and sprinkle with the chives.


Recipe adapted from finecooking.com

Posted on

How to Eat Your BOX! (Week of 6/10/18)


Featured Recipe: Green Beans, Roasted Fennel and Shallots
Serves 4

Instructions

Nonstick vegetable oil spray

2 large fresh fennel bulbs, green stalks removed, ends trimmed (reserve a few feathery fronds for garnish)

3/4 pound shallots or yellow onion, peeled, halved through root end

5 tablespoons olive or coconut oil, divided

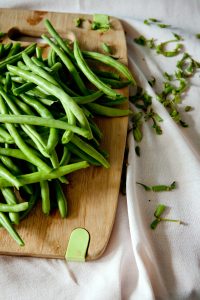
1 pound green beans, trimmed

Instructions

Preheat oven to 450°F. Spray rimmed baking sheet with nonstick spray. Cut fennel bulbs lengthwise in half and then in half lengthwise again (you want them to be approx. ½ inch wide wedges, and leave some core attached to hold them together). Combine fennel and shallots or onions in large bowl. Add 3 tablespoons oil; toss to coat. Arrange veggies in single layer on prepared sheet. Sprinkle generously with salt and pepper. Roast until tender and golden, stirring every 10 minutes, about 35 minutes.

Cook green beans in large saucepan of boiling salted water until al dente, about 3 minutes. Drain. Rinse with cold water and drain again (this stops the cooking, so they stay crisp-tender). Pat dry. Heat remaining 2 tablespoons oil in large skillet over medium-high heat. Add roasted vegetables and beans; toss until heated through, about 3 minutes. Season with salt and pepper, top with a dash of the fennel fronds, minced first. Transfer to bowl and serve.

Stonefruit Tips:
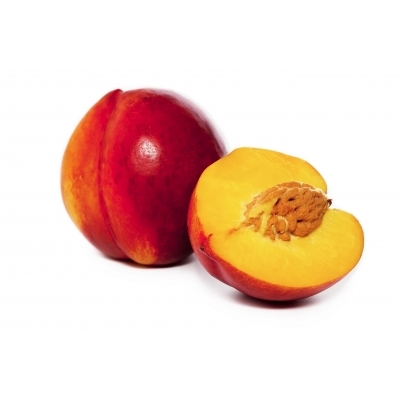
“Stonefruit” refers to members of the genus Prunus, which includes peaches, nectarines, plums, pluots, cherries, and apricots. The season for summer stonefruit is short-lived, and delicious! With the fruit coming and going so quickly, we don’t want you to miss out by having to toss spoiled or improperly ripened fruit. Here’s some tips for proper storage so you can make the most of these short-season gems.

Care: Store unwashed fruit at room temperature until ripe (usually only 1-2 days), then place in sealed container in the fridge.

Ripeness: Gently press around stem and when flesh gives slightly to pressure fruit is ripe. Stonefruit ripens from the inside to the outside, so if fruit is soft all over it is more likely overripe.

Tips for Preventing Spoilage: Stonefruit’s biggest enemy while ripening is moisture coupled with lack of airflow. Set ripening stonefruit on a cloth or paper-covered countertop or in a place where it gets plenty of airflow. Try setting them stem side down to ripen. This lessens the chance of then rolling and bruising. Once your stonefruit is ripe, it deteriorates very quickly. Within a day of being fully ripe, if left out of refrigeration, you can have overripe/spoiled fruit and some very attracted fruit flies. Check daily and place in refrigerator as soon as you notice the stem area has begun to soften. Take special care when handling your stonefruit—never squeeze to check for ripeness! Even a small bruise will be cause enough to turn into a rot/bruised spot on your fruit as it is still ripening. Check for ripeness by gently pressing around the stem area. It should yield to light pressure.

Use: Once fruit is ripe, and you’ve placed in the refrigerator, plan to use within a day or two (this gives you a total keeping time of about 4-5 days). Stonefruit is refreshing as a healthy breakfast paired with yogurt or hot/cold cereal, as a topping to a green salad, and as an ingredient in fruit salads. For grilling, or for topping green salads: use slightly less ripe fruit, it will hold up better without breaking apart/juicing. Stonefruit also bakes up fabulously into crisps, pies, and sauces!

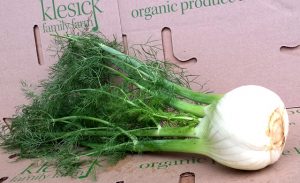
Fennel:

Normally fennel tastes like a cross between celery, cabbage, and licorice. Roasting, however, brings out an entirely new flavor – as if pine nuts decided to join the party. And if you enjoy raw fennel, I recommend roasting some just for the fun of it. To do so, see recipe below. Known for its crunchy texture and mild anise flavor, fennel is best used within 5 days. Keep fennel bulbs wrapped in the fridge to keep out air that will lessen its flavor. Fennel is wonderful braised, roasted, or grilled where its it brings flavor reminiscent of pine nuts to the table, or, sautéed, or used raw in salads, where it is crunchy and sweet.

Posted on

How to Eat Your BOX! (Week of 6/3/18)

Apricots:

Ripen apricots in a paper bag at room temperature for 2 to 3 days. Unripe apricots can be stored at room temperature up to 5 days. Refrigerate ripe apricots in a sealed container up to one week. (Be sure that they are ripened first, as they will not ripen in the refrigerator.)

broccolini

Broccolini:

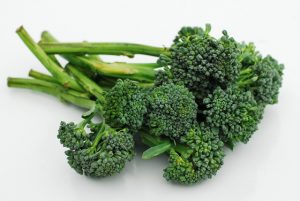
Broccolini is tender enough to enjoy stems and all. Try tossing chopped broccoli florets with olive oil, salt and seasonings of choice. Bake on a cookie sheet at 450° for about 20 minutes, until edges are crispy, and the stems are tender. For extra flavor, drizzle with lemon juice or top with parmesan cheese. Steaming broccolini, until al-dente is a great non-oil alternative. Broccolini is also great in salad, stir-fry, soup, or raw with your favorite veggie dip.

crimini mushrooms

Crimini Mushrooms:

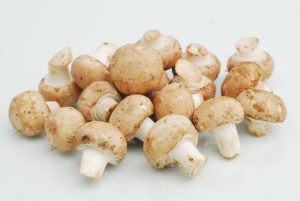
Great raw on salads but absolutely fabulous when sautéed. There really isn’t a better ingredient around that works just as well in a breakfast, lunch or dinner plate. To sauté, heat oil or butter in a skillet on medium high heat. Clean and slice mushrooms in half inch pieces. When oil is hot add them to the pan and cook for about 5 minutes, stirring occasionally.


Roasted Yam and Asparagus Lentil Salad (vegan, gluten free)

Hearty and filling, this roasted yam and asparagus lentil salad is great on its own or as a side dish. Lentils add some healthy plant based proteins. Makes 6 servings.

Ingredients:

2 lbs. Yams, cut into quarters

¾ cup lentils

8 oz. bunch of asparagus

3 Tbsp vegetable oil

1 generous handful chopped spinach or kale

6 sundried tomatoes in oil (roughly chopped)

FOR THE DRESSING:

1 garlic clove, crushed and minced

1/2 tsp of salt

2 tsp wholegrain mustard

4 Tbsp extra virgin olive oil

3 Tbsp lemon juice

1 shallot (optional)

2 Tbsp chopped fresh parsley

Instructions:

Toss yams with 3 Tbsp of vegetable oil and place on a tray, in the oven for 40 mins. Assemble dressing ingredients while yams are cooking.

Heat some water in a saucepan. When the water is boiling, add the lentils and cook for 10-15mins until soft (they should still have a bite). When done drain the lentils and set aside in a large salad bowl.

Snap off the tougher ends of the asparagus and discard. Chop the rest of the asparagus in thirds. 10 to 15 mins before the end of the potatoes cooking time, add the asparagus to the oven tray to roast. When all the vegetables are cooked, add them to the lentils. Toss together with the dressing. Leave everything to cool for 5 mins, then add the chopped spinach leaves and sundried tomatoes. Toss again until everything is well mixed together. Serve warm or at room temperature.


Recipe adapted from www.theflexitarian.co.uk

Posted on

How to Eat Your BOX! (Week of 5/27/18)

Cilantro:

Store cilantro so that they have some breathing room (otherwise they will melt down on you—too much moisture speeds decay). Try removing the band so that they are spread out, wrapping them in a paper towel or cotton cloth, then placing in plastic/airtight—that’s how I’ve had the best luck keeping them fresh. You might also try storing in a jar (used like a vase), but with a bag draped over the leaves, so that the tender leaves don’t dehydrate on you. Most of the flavor in cilantro is in their stalks, so be sure to include that when you dice it up for recipes. Cilantro is a great item to have on hand, it can go with any Mexican-inspired dish as well as your Thai dishes (think lime, curry, coconut, shrimp). Of course, it is great dumped on top of tacos, and can also be mixed in with butter to eat with sweet corn.

Green Beans:

Greens beans make a great side for dinner—try sautéing them in little olive oil and garlic. They are also just as good lightly steamed and topped with ghee or coconut butter. To cook more evenly blanch first by adding to a pot of boiling for 2 minutes. Then drain and put in ice water to stop the cooking process. Sauté garlic in olive oil and add green beans, sautéing until lightly seared. Add salt and pepper to taste. Green beans can also be easily baked in the oven like any other vegetable. Simply spread out evenly on a baking sheet, drizzle with olive oil, salt, pepper, and garlic powder, and toss to coat. Bake at 425° for 15 minutes. Take out after about ten minutes and shake to turn. Sprinkle with some parmesan and serve.

Turnips:

Turnips can be sliced up and eaten raw with a little salt and lemon juice atop a salad. They can also be cooked much the same way as a potato, you can even boil them until tender and make mashed turnips. You can also roast, sauté, or add to soup. To season try a combo of salt, pepper, and lemon or when baking, toss in coconut oil, salt, pepper, ginger and drizzled in honey (roast at 400° until tender). Toppings: butter, salt, pepper, chives and parmesan.

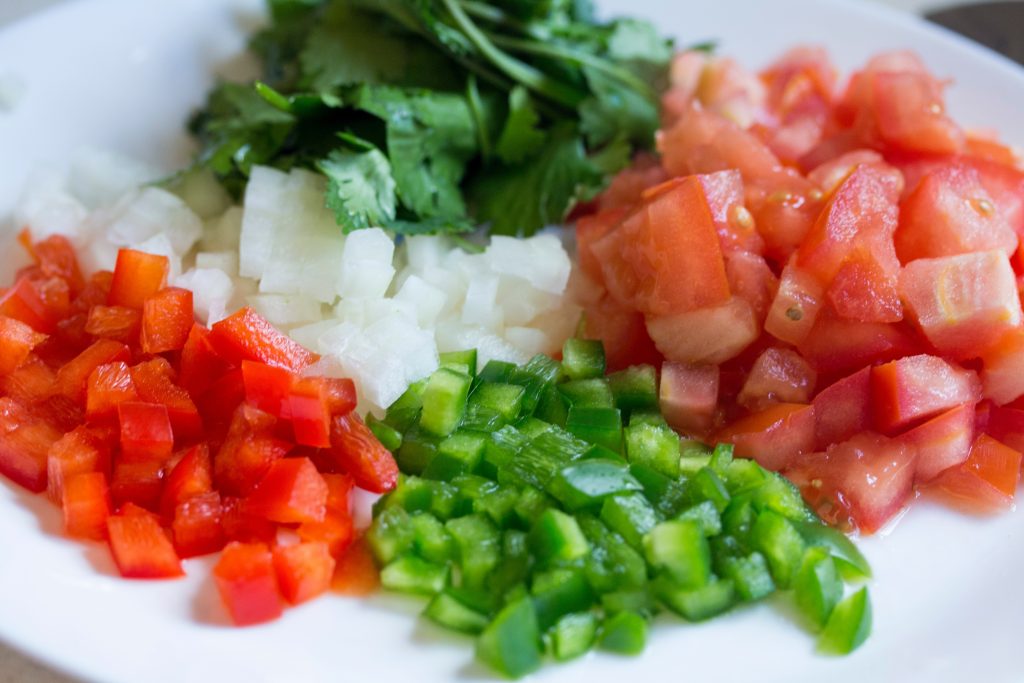
Featured Recipe: Homemade Pico de Gallo

How to make pico de gallo — a fresh tomato salsa — with tomatoes, onion and cilantro. Makes 8 servings or about 3 cups.

Ingredients:

1 1/2 pounds tomatoes, chopped

1 medium onion, chopped (about 2/3 cup)

1-2 jalapeño or serrano peppers, finely diced (seeds and membranes removed for a milder salsa)

1/2 cup finely chopped fresh cilantro leaves

Juice of 1 lime

Salt to taste

Instructions:

Add the tomatoes, onion, cilantro, diced peppers and lime juice to a bowl. Generously season with salt — start with 1/2 teaspoon and go from there. Set the salsa aside for 30 minutes to let the flavors meld.

After 30 minutes, stir the salsa — making sure to distribute the juices left at the bottom of the bowl. Taste and adjust with more salt (hint: you’ll probably need more than you think, so, taste, salt, taste, salt). Store for up to 3 days in an airtight container in the refrigerator.

Recipe adapted from www.inspiredtaste.net