Posted on

How to Eat Your BOX! (Week of 1/7/2018)

Blood Oranges:

With ruby-red to maroon-colored flesh, blood oranges are a surprise when you cut them open; taste-wise, they’re tart-sweet and slightly berry-like. Store: To keep these ruby gems fresh longer, choose refrigeration over the fruit bowl―they’ll only last only a couple of days at room temperature, but up to two weeks in the fridge.

Blood oranges are best eaten fresh―out of hand, or in salads, salsas, or marmalades. If you’re following a recipe you may be asked to section the fruit. To do so, peel the orange, cut between the white membranes to expose the flesh, and remove the sections (for more juice, squeeze the leftover membranes).

Frisée:

You’ve no doubt seen frisée before, perhaps without realizing it, the frizzy green leaves are often tucked away inside a mesclun baby greens mix. Frisée is a variety of chicory, as you’ll be clued in to with the first solo bite: it’s one of those bitters we were talking about in last week’s newsletter. Store: in the fridge for up to five days (rinse first), in plastic or other non-breathable material, so it doesn’t wilt. Use: most often served fresh in salads, try it wilted or sautéed to mellow its bitterness. Frisée pairs well with flavor-packed ingredients and fats: Dress leaves with a warm vinaigrette of roast-chicken pan drippings and sherry or red wine vinegar, toss in browned bits of thick-cut pancetta, ham, or steak tips, or top with a poached or fried egg.

Crimini Mushrooms:

Mushrooms are in a class all their own. Literally, they are quite distinct in nature and classified as their own kingdom, separate from plants and animals. But, they are packed with nutrients and make a great addition to a healthy diet.

Mushrooms are good raw on salads or in an array of cooked dishes. You can dice them and sauté with onions as a base for scrambled eggs or stir fry or in soup. They also blend well with ground beef, enhancing the flavor and making the meat go farther when adding to tacos or in pasta.


Featured Recipe: Frisée-Parsley Salad

1 medium head frisée, trimmed and washed

1/4 cup sweet onion, minced or alternately sliced into very thin rings

1/2 bunch fresh Italian parsley, leaves picked and washed

2 tablespoons extra-virgin olive oil

1 tablespoon red wine vinegar


Combine frisée, onion, and parsley in a medium bowl and toss well.

In a separate small non-metal bowl or pint-size mason jar (works great to store any leftover dressing in if you want to double the batch and have on hand for later), whisk together oil and vinegar, and season with salt and freshly ground black pepper.

Add dressing to greens and, using clean hands, toss to coat evenly. Taste and adjust seasoning as necessary.


Adapted from a recipe by Chef Traci Des Jardins

Posted on

How to Eat Your BOX! (Week of 12/31/17)

Kiwi:

Kiwi is most commonly eaten as is by cutting in half and spooning out the inside, but it can also make a great addition to breakfast food, salad or dessert. It can be used in smoothies (try with bananas and avocado), as a topping for granola and yogurt or cereal, or as a decorative and delicious addition to pie or meringue. It makes a great addition to fruit salad or even a green salad if you’re feeling adventurous. And, kiwi makes for a refreshing drink when added to ice water with mint and/or a squeeze of lemon.


Radicchio, Treviso:

A favorite of Italians, whom it is believed their cultivation originated with, Treviso radicchio look a bit like purple romaine hearts. Italians almost never use radicchios in a mixed salad, but savor them alone with the simplest of olive-oil dressings. Often, they cook radicchio, turning to varieties like Treviso, that are milder in flavor, since the bitterness of radicchio intensifies with cooking. The tonic bitterness, however, is a good contrast to rich or fatty flavors. Radicchio is good braised, grilled, or in a soup. Store: keep radicchio in a tightly sealed bag in the refrigerator for up to one week.


Green Beans:

Greens beans make a great side for dinner, especially if you sauté them in little olive oil and garlic. To cook more evenly blanch first by adding to a pot of boiling for 2 minutes. Then drain and put in ice water to stop the cooking process. Sauté garlic in olive oil and add green beans, sautéing until lightly seared. Add salt and pepper to taste. Green beans can also be easily baked in the oven like any other vegetable. Simply spread out evenly on a baking sheet, drizzle with olive oil, salt, pepper, and garlic powder, and toss to coat. Bake at 425° for 15 minutes. Take out after about ten minutes and shake to turn. Sprinkle with some parmesan and serve.


Featured Recipe: Roasted Treviso

Cook time: 20 minutes. Serves 2-4.

Ingredients:


1 head Treviso

1 to 2 teaspoons extra virgin olive oil or other cooking oil

Sea salt

1 to 2 teaspoons balsamic vinegar

Instructions:

  1. Preheat oven to 450 degrees.
  2. While the oven heats, trim the treviso: cut in half lengthwise. Rub or brush the entire treviso halves with oil. Spread across baking sheet, cut side up.
  3. Cook until the edges are wilted, about 12 minutes. Turn over, and roast until tender, another 8 minutes or so.
  4. Remove from oven, sprinkle the cooked cut-side with salt.
  5. Transfer to a serving platter and drizzle with balsamic vinegar. Serve hot, warm, or at room temperature.

Alternate toppings: parmesan cheese or crumbled blue cheese with or without the balsamic, or, drizzle of rice wine vinegar & hot chile oil, sprinkle with red chile flakes instead of the balsamic.


adapted from recipe by thespruce.com

Posted on

How to Eat Your BOX! (Week of 12/24/17)

Yellow Straight Neck Squash:

Use them just like you would zucchini. Yellow squash are most often used as a cooking vegetable but can easily be enjoyed raw. It makes a great salad when sent through the spiralizer and tossed with carrots, cucumber, and snow peas. Like cucumbers, summer squash are good when marinated for a couple hours in the fridge. Simply toss in lemon juice, olive oil, crushed garlic, salt and pepper, cover and let sit in the fridge for a time. Add freshly chopped basil or parsley right before serving.

Bunch Carrots:

Twist the tops off those carrots as soon as they arrive so that they stay nice and crisp in the refrigerator. If you’re reading this, you’ve chosen organically grown carrots, so give yourself a fist bump. ? Carrots are so important to get organic because conventionally grown carrots are often a concentrated source of heavy metals, nitrates and pesticides. Eating carrots is a healthy alternative to junk food, and just one carrot can boost your willpower that is in resistance to those processed foods. Consider adding bunch carrots on to your order on a weekly or bi-weekly basis. Your body will thank you!

Yams:

Baked yams make one of my all-time favorite snacks. They are also a great added to soups, stir fries, burritos, you name it! Or, just eat them all by themselves as a snack/side dish. I like to dice mine up into small cubes, toss in a little olive oil with a pinch of salt and bake at 425° for about 20-30 minutes, stirring occasionally until tender and edges are browned. Also, very good when sprinkled with cinnamon. Yum!

Featured Recipe: Mediterranean Roasted Vegetables

Loaded with herbs and bursting with flavor. Add them to a hearty grain (rice, quinoa, tempeh, etc.) bowl for optimal nutrition! Serves 6.

Ingredients:

1 lb. potatoes, cut into 1” pieces

2 yellow straight neck squash, cut into 1” pieces

1 onion, cut into 1” pieces

1 bell pepper, cut into 1” pieces

20 cherry tomatoes, halved

2 tbsp extra virgin olive oil

3 garlic cloves, minced

2 tsp Italian seasoning

1 tsp dried thyme

½ tsp crushed red pepper

½ tsp sea salt

½ tsp black pepper


Instructions:

  1. In Preheat oven to 400 degrees.
  2. Layer potatoes, yellow squash, onions, bell peppers, and cherry tomatoes, on two medium baking sheets.
  3. Mix olive oil, minced garlic, Italian seasoning, dried thyme, crushed red pepper, salt and black pepper to small bowl. Mix to combine, then drop spoonfuls of seasoned oil over prepped veggies on both baking sheets, use hands to toss and coat.
  4. Roast in the oven for 18-20 minutes or until all vegetables are cooked through, be sure to check the potatoes with a fork for doneness. Remove both pans and stir after 10 minutes of roasting.
  5. Serve as a side or toss in a power/grain bowl.


adapted from recipe by lemonsandbasil.com

Posted on

How to Eat Your BOX! (Week of 12/17/17)

Fuyu Persimmons:

STORE: Store ripe Fuyu persimmons at room temperature for up to three weeks. They will keep in the refrigerator for up to two months. Persimmons are ripe when they turn a dark orange, they will still be fairly firm.

PREP: Prepare ripe persimmons by hulling them (cutting out their top and its attached flesh), slicing, and peeling them—much like you would a tomato. Remove and discard the large black seeds should you encounter them.

USE: Add sliced persimmons to a salad, whip up a smoothie or make a festive persimmon pudding. They are great sliced up and eaten as is, too!

Ginger:

Ginger and wellness go hand in hand. It has been used in Chinese Medicine for thousands of years and is known to help soothe digestive disturbances, alleviate nausea (often used early on in pregnancy), as well as stimulate the circulatory system.

Try it! To make tea, simmer 3/4 teaspoon (0.5 to 1.0 grams) of chopped ginger (you can peel it with a vegetable peeler or paring knife first) in 1 cup of hot water for five minutes in a closed teapot. Feel free to add a little lemon and honey for a winter tonic tea.

Ginger is also great in soup. Pair it with carrots. Fresh ginger, grated or pureed, brings wonderful zest to hot, creamy winter soups. Another great way to enjoy ginger is in stir-fries—almost every stir-fry could use a little grated or even minced ginger to spice things up.

Arugula:

This peppery green is ubiquitous with fresh salads (try it with blue cheese, walnuts and Asian pears), but it is also great atop pizzas (add just after you remove them from the oven, and allow to wilt slightly), or to wilt atop a winter soup. Arugula pesto has its own following too. Store in the refrigerator and use within 3-4 days to prevent from becoming bitter.


Arugula Salad with Parmigiano Reggiano

This recipe explains how to make a salad that’s on countless Italian restaurant menus. The salad is simple. What makes it so good is the peppery flavor of arugula combined with the nutty, salty flavor of Parmigiano-Reggiano cheese. Serves 3.

Ingredients:


3 Tbsp lemon juice

4 Tbsp olive oil

1/2 tsp salt

1/4 tsp pepper

One bunch arugula, washed and chopped

1/2 head leaf lettuce or romaine, washed and chopped into salad-bite sized pieces

1/3 – 1/2 lb. Parmigiano-Reggiano cheese, grated

Instructions:

  1. In a small bowl, whisk together lemon juice, olive oil, salt and pepper.
  2. In a salad bowl, blend together the lettuce and Arugula.
  3. Drizzle the dressing over the lettuce & arugula. Add the grated cheese. Toss lightly and serve.

adapted from recipe by Jennifer Meier

Posted on

How to Eat Your BOX! (Week of 11/26/17)


Kiwi

Kiwi is most commonly eaten as is by cutting in half and spooning out the inside, but it can also make a great addition to breakfast food, salad or dessert. It can be used in smoothies (try with bananas and avocado), as a topping for granola and yogurt or cereal, or as a decorative and delicious addition to pie or meringue. It makes a great addition to fruit salad or even a green salad if you’re feeling adventurous.

Why it’s GOOD for you: Kiwi is high in Vitamin C (per 100 grams you get 154 % of Vit. C— almost twice that of lemons and oranges), folate, and zinc, so it’s a great fruit to eat during the cold-season months. Vitamin C acts as powerful antioxidant, eliminating free radicals that could cause inflammation or cancer. It also helps in boosting the immunity of the body against harmful pathogens.

Green Cabbage

Try it: sauté cabbage with the portabella mushrooms in this week’s box. Cabbage and mushrooms go well together. In order to pep up sautéed cabbage, add a few sautéed mushrooms and voila! You’ve turned an ordinary side dish into a tasty concoction. Feel free to add a few snips of a favorite fresh herb to this, for example, dill would be great, as would thyme, but maybe not together. ?

Why it’s GOOD for you: a multi-layered veggie parcel and powerhouse of vitamins and minerals! Its high content of Vitamin A, B1, B2, B6, E, C, K, calcium, iron, iodine, potassium, sulphur, phosphorus and foliate makes it a superhero among the category of leafy vegetables. In the Far-Eastern regions, on an average each person consumes about a pound of fresh leafy-cabbage class vegetables per day; either in the form of raw greens, in stews or as pickled (kimchi, sauerkraut).


Featured Recipe: Stuffed Sunburst Squash

You can modify this recipe and adjust the ingredients to fit your taste. You can use many different kinds of vegetables or proteins for the filling, and add additional herbs and seasonings if you like. Some good additions are chopped nuts, carrots, green onion, riced cauliflower, fresh thyme or green chiles. Serves 4.

Ingredients:


4 Small Sunburst Squash

1 Cup of Shredded Chicken (or leftover turkey!)

1 Cup Spinach (or kale, or chard) Leaves

1/2 cup celery (optional, but great if you’re trying to use leftovers), finely chopped

1/2 cup red bell pepper, finely chopped

1/2 cup mushrooms, finely chopped

1/2 Cup Grated Parmesan Cheese

1/2 Chopped Onion

1 Minced Clove of Garlic

2 Tablespoons Oil (EVOO, or Sunflower)

Salt and Pepper to taste


Instructions:

  1. Pour 1 inch of water into a wide skillet, bring to a simmer.
  2. While you’re waiting for the water, slice a small portion of the ends off each squash. This will allow easier access to scoop them out, and also give them a ‘foot’ to stand on.
  3. When the water is ready, add the squash and let cook for five minutes on each side.
  4. When time has elapsed, remove from the water and allow to cool for a few minutes.
  5. Empty the water and dry your pan. Return it to the stove set on a burner at medium-high heat. Add your choice of oil and let it heat up (don’t allow it to get so hot it smokes – there’s no need for it to be so hot is scorches).
  6. In the meantime, scoop out the squash cavities. Save all that scooped out flesh! Use a clean towel to squeeze out the water left in the squash flesh. Chop them up and add them to the veggies in the next step.
  7. Sauté the onion, mushrooms, celery, pepper, and squash until they just start to turn a golden color (4-5 minutes), then add your minced garlic. Cook for 30 more seconds and remove from heat. Allow to cool for 5 minutes.
  8. Once cooled off slightly, add the spinach, chicken or turkey and 1/2 Cup of Parmesan cheese to the mixture. Season to taste with salt and pepper! (Alternately, you can place squashes on a sheet pan under a broiler in the oven for up to 1 minute or until cheese is melted.)


Posted on

Green Cabbage Julienne with Chef David Royer

Green Cabbage Julienne

This recipe is from a family relative & sustainable restaurant chef from France—Chef David Royer. This warming dish serves as a nice starter for winter!

Green Cabbage Julienne with Chef David Royer

Ingredients
  

  • Sauce
  • 6-8 green cabbage leaves
  • 1/4 cup water
  • 1/4 cup white wine
  • 1/8 tsp salt
  • Stir fry
  • Vegetable oil for the pan
  • Remainder of Cabbage julienned
  • 1/4 cup raisins
  • 1/4 cup cashews
  • Salt & pepper to taste
  • Fresh herbs for garnish

Method
 

  1. Rinse and core cabbage. Then, separate 6-8 of the green outer leaves. Take the rest of the cabbage and cut into a fine julienne or grate it. Refrigerate until ready to make the stir-fry portion.
  2. For the Sauce
  3. In a large saucepan over low heat, add water, white wine, cabbage leaves, and salt. Cook cabbage slowly for 2-3 hours. At this point, the cabbage will be very soft. Push cabbage mixture through a chinois (or use a fine mesh sieve + wooden spoon if you don’t have a chinois) to “juice” it. Set aside.
  4. For the Stir-fry
  5. When the cabbage leaf mixture is nearing the end of its cook time, place a large skillet or wok over medium heat and stir-fry cabbage, cashews, and raisins in vegetable oil of choice until cabbage is tender. Season to taste.
  6. To Serve
  7. Place the stir-fried julienne portion into individual deep plates or bowls, pour the juiced cabbage portion over the top and garnish with fresh herbs. Serve.

Tried this recipe?

Let us know how it was!
Posted on

How to Eat Your BOX! (Week of 11/19)

Rio Star Grapefruit

Not only are grapefruit high in fiber and low in calories, they contain bioflavonoids and other plant chemicals that protect us against serious diseases like cancer, heart disease, and the formation of tumors. But the sweet-tart juicy deliciousness that grapefruits bring to the table are reason enough to eat them! Also, grapefruit (especially organic with its fuller flavor) doesn’t need sugar. If you don’t like them halved and eaten with a spoon (the traditional method), try peeling them and eating like an orange. If you prefer a mellower flavor, peel, halve them vertically; slice crosswise into 3/4-inch-thick half-moons, lay on a baking sheet and sprinkle on some cinnamon. Broil them for about 15 minutes. This makes them taste “sweeter” without the sugar.


Easter Egg Radishes

Store radishes in the crisper in a perforated bag. If you’re planning on eating the tops, use within 2 days. If you don’t plan to use the tops, twist them off prior to refrigerating to extend the life of the radish bulbs to a week. Radishes are great fresh, poached, baked, or pickled.

To make pickled radishes (use as a relish or atop salads or in wraps or sandwiches): Combine cleaned radish bulbs (about 10), 2 cups white vinegar, 1 tsp peppercorns, 1 tsp Kosher salt, and 1 tsp sugar in a clean glass quart jar. Cover, label, shake well to dissolve and distribute salt & sugar, then refrigerate at least 3 days-1 week before serving (shake jar once a day for the first 3 days to keep things distributed inside. Keeps up to 3 months.


Garlic Roasted Potatoes

This is one of those go-to recipes that you’ll find yourself coming back to, because its super simple and super tasty!

Serves 4


Ingredients:


4 large russet potatoes

4 tbsps olive oil

1-2 tbsp garlic powder

2 tbsp parsley flakes (or use 3 tbsp fresh)

1 ½ tsps salt (or to taste)

1 tsp black pepper


Instructions:

1.            Preheat the oven to 400°F.

2.            Cut the potatoes into 1-inch cubes and toss into a bowl with the oil, garlic, parsley, salt, and pepper.

3.            Spread the potatoes on a prepared baking sheet. Bake for 25-30 minutes.

4.            If necessary, flip over and bake for another 10-15 minutes. Serve.

Posted on

How to Eat Your BOX! (Week of 11/12/17)

How to EAT…

Celery Root (Celeriac):

Celery root or celeriac is prized for its distinctive flavor which is somewhere between celery and parsley. Although cooked celery root is excellent in soups, stew, and other hot dishes, it can also be enjoyed raw, especially grated and tossed in salads. Raw celery root has an intense flavor that tends to dominate salads, so pair it with other strongly flavored fruits and vegetables, such as carrots, beets, and apples. Before using celery root, peel and soak briefly in water with a little vinegar or lemon juice to prevent cut surfaces from darkening.


Green Onions (Scallions):

Don’t be afraid to use the entire green onion! Green onions, also called scallions, make an excellent garnish to soups, salads, noodle or rice dishes.

STORE: Store green onions in a plastic bag in your crisper for five to seven days. Be sure to keep them away from fruits and veggies that absorb odors easily like mushrooms, corn and apples.

PREP: Rinse your green onions in cold water; trim off roots and the very tops of the greens. Dice into thin or slightly thicker rounds depending on your preference.


Featured Recipe: Cauliflower & Celery Root Soup

Makes 8 servings


INGREDIENTS


1 tablespoon olive oil

8 cups cauliflower florets with stems chopped into ½-inch pieces (1 large head)

4 cups chopped celery root (½-inch pieces), about 1 medium root

2 large carrots, peeled and diced into ½-inch pieces

1 bunch green onions, thinly sliced, or 1 red onion, chopped

3 garlic cloves, finely chopped

8 cups organic vegetable or chicken broth

¼ teaspoon ground ginger

1 teaspoon turmeric

1 teaspoon sea salt, or to taste

½ teaspoon black pepper, or to taste

½ teaspoon ground cumin

¼ teaspoon ground green cardamom

½ teaspoon red pepper flakes

1 can (13.5 ounces) coconut milk


For Garnish: Breadfarm bread cubes (optional), peppers, finely chopped green onion or chives, lime wedges


INSTRUCTIONS

1. Preheat oven to 400 degrees Fahrenheit.


2. Chop cauliflower, celery root, carrots, green onion and garlic. Place a heavy bottomed sauce pan on medium heat. Drizzle in olive oil. When shimmering, add onions, and carrots. Cook for about 3 minutes, add garlic, and cook another 2 minutes, stirring often to keep garlic from burning. Toss in the cauliflower and celery root. Pour in broth; add your spices, and stir well. Bring to a boil, reduce heat, cover and simmer for 25 to 30 minutes or until vegetables are fork tender.


3. Stir in the coconut milk. (Note: if you like your soups more brothy, you may opt to skip this step which makes the soup thicker and more like a chowder.) Remove half of the vegetables from pot. Use an immersion blender to puree the remaining soup in the pot. Alternately, add remaining soup to a blender, in batches, and blend until smooth. Return blended soup to pot along with reserved vegetables and stir well to combine. Taste soup for seasoning, adding more salt or pepper to taste. Divide soup between 8 large soup bowls. Top with croutons and garnish with peppers and onions. Squeeze a bit of lime juice over the bowls, to taste.

Posted on

How to Eat Your BOX! (Week of 11/5/17)

Kale:

Kale is just wonderful and it’s so good for you! One great thing about kale as a salad is that it keeps well in the fridge, so you can make ahead of time and not worry about it wilting. Kale can be a little tricky because it can be a bit tough and sometimes bitter. To prevent that, first, make sure to make sure to remove all large ribs and stems (They make a great addition to a stir-fry or soup stock!); chop the leaves small; sprinkle with salt to cut the bitterness; “tenderize” the leaves by massaging them with your hands (only takes about half a minute); lastly, massage in the olive oil or salad dressing. This turns the kale bright green and ensures it’s evenly covered. For the dressing, I like to use a combination of vinegar and olive oil. Once you have prepped your kale and worked in the dressing, add your toppings. Try with apple or pear slices. Cashews, almonds and dried cranberries also taste great with this combination!


Parsnips:

Parsnips have an almost peppery sweet flavor to them that comes out nicely when roasted. They make a great addition/alternative to the more traditional baked or sautéed root vegetable. Try these diced into bite size chunks or julienned, drizzled with olive oil and tossed in a bowl with a little salt and cayenne (or other spices). Bake on bottom rack at 450° for 20-30 minutes, stirring occasionally, until edges are browned and crispy.

Posted on

How to Eat Your BOX! (Week of 10/29/17)

Radishes:

Radishes are a just a great vegetable to have around. Packed with nutrients these little red globes make a great addition to your daily eats. Add them as a topping to your salad, tacos, or as a side to Asian or Mexican cuisine! I recently started wondering about those fancy shaped radish slices that came with my meal at Thai restaurants. They had a definite vinegar flavor to them and that’s when I discovered pickled radishes! They are great and so simple to make! Just let your radishes (thinly sliced) soak in about 2 cups of red or white vinegar with a teaspoon of sugar and salt.  You can also add onions or garlic cloves, peppercorns and chilies for even more flavor. You can let this sit in the fridge overnight or for a whole month if you want.

Cauliflower:

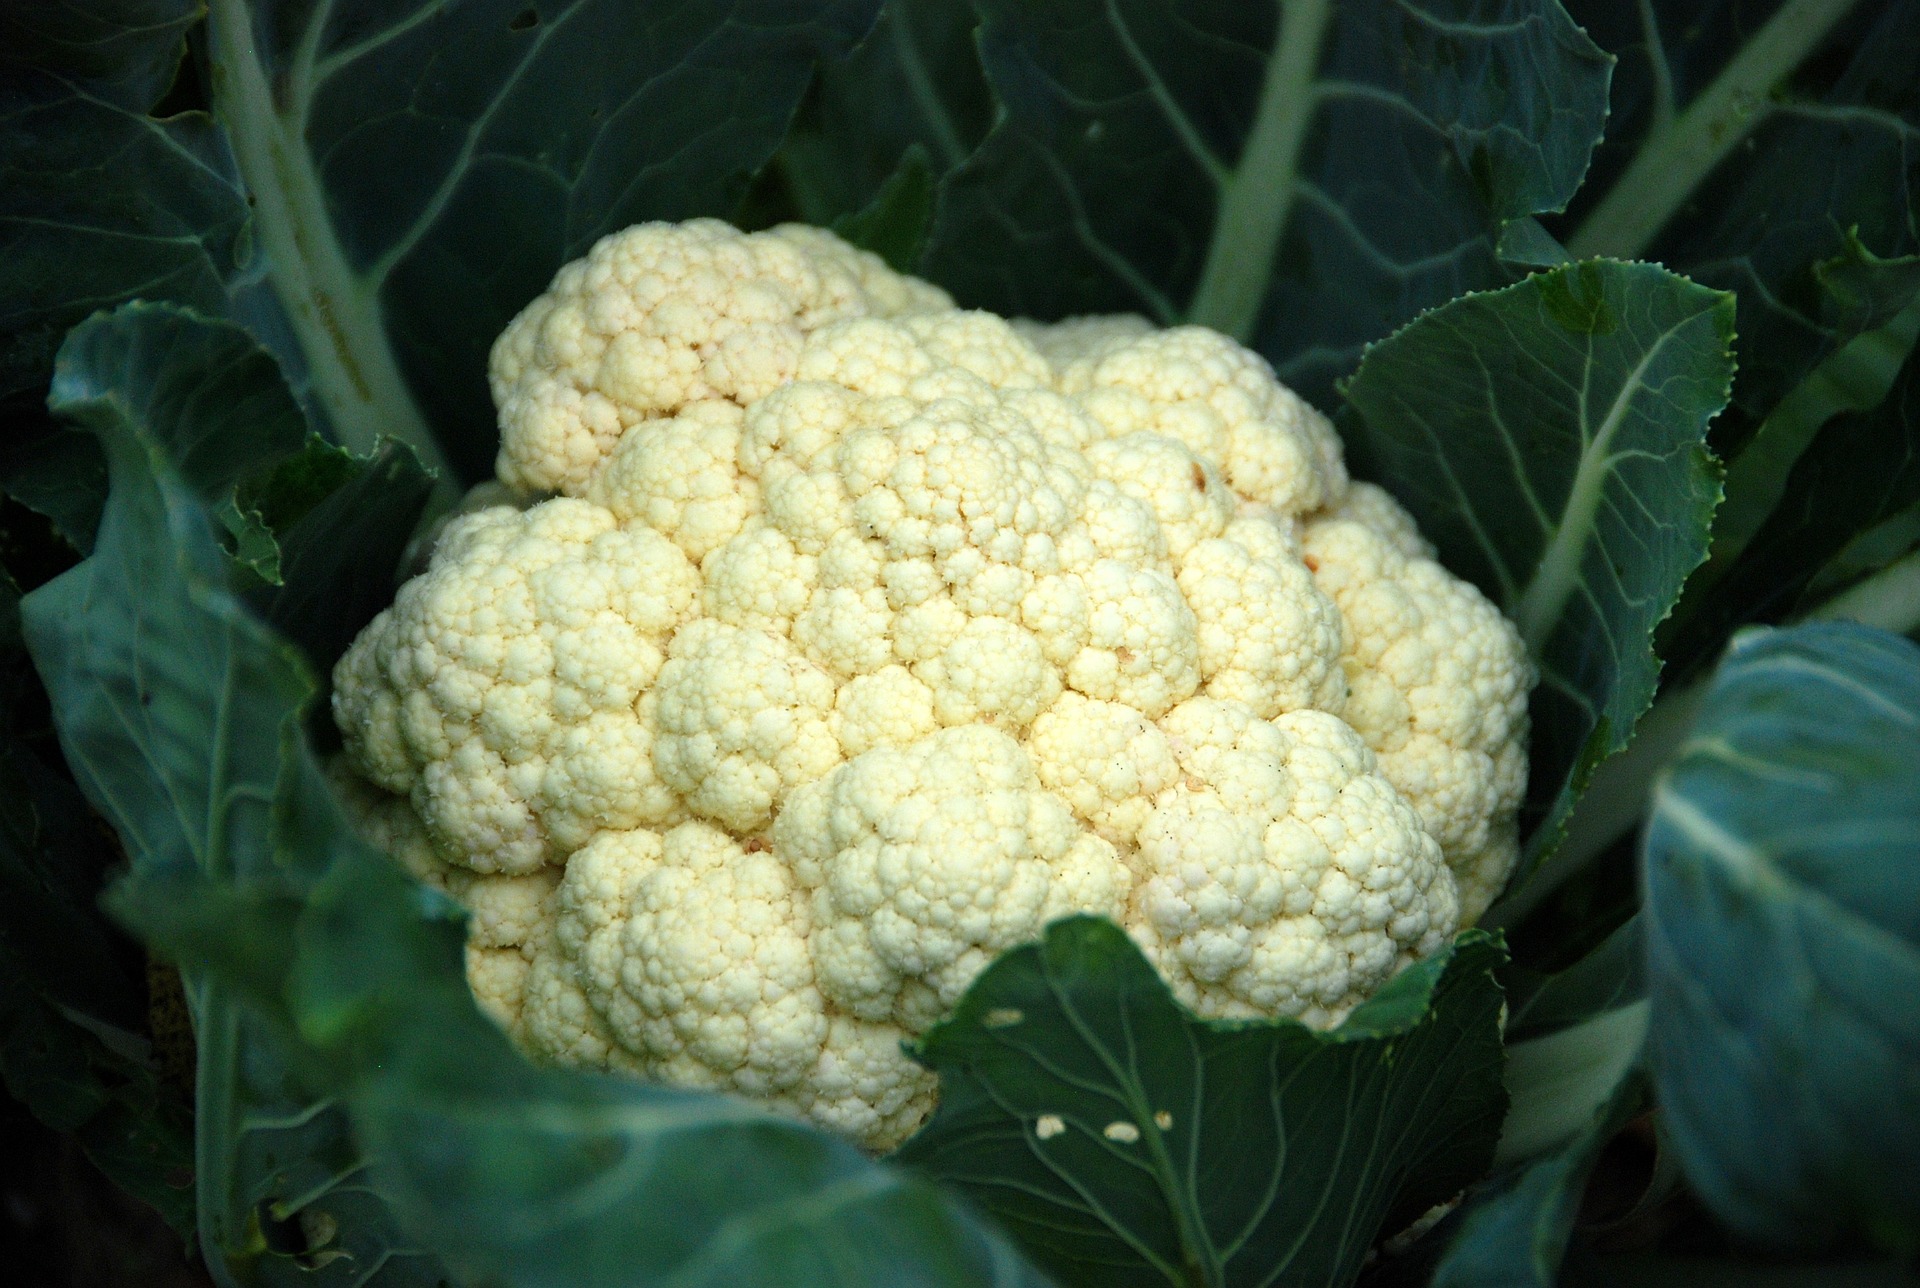
We’re always talking about how versatile this vegetable can be! But cauliflower really is fantastic for soaking up and blending with whatever flavors surround it, fitting right in just about anywhere. But is also great all on its own! Simply break it up into small pieces, toss in some olive oil and garlic salt, spread on a baking sheet and bake at 400° for about 15-20 minutes until golden brown.


Recipe: The Best Cauliflower & Broccolini Cheese

“Cauliflower cheese has always been a big favorite in the Oliver household. It’s such a staple I never thought I could do it better, but this version really has the edge.” -Jamie Oliver

This one’s for the kids (of all ages).

Ingredients:


2 cloves of garlic

2-3 TBSP unsalted butter

¼ cup plain flour

2 ½ cups organic milk

1 full bunch broccolini, stems included, cut up (edges trimmed)

2/3 cup mature cheddar cheese

1 large head cauliflower, cut into florets

2 slices of ciabatta or whole-grain stale bread

2 sprigs of fresh thyme

1 TBSP flaked almonds

olive oil


Instructions:

  1. Preheat the oven to 180°C/350°F/gas 4.
  2. Peel and finely slice the garlic and put it into a medium pan on a medium heat with the butter.
  3. When the butter has melted, stir in the flour for a minute to make a paste, then gradually add the milk, whisking as you go, until nice and smooth.
  4. Add the broccolini pieces and simmer for around 15 minutes, or until the broccolini is cooked through and starts to break down, then mash or blitz with a stick blender (adding an extra splash of milk to loosen, if necessary). Grate in half the Cheddar and season to taste.
  5. Arrange the cauliflower in an appropriately sized baking dish, pour over the broccoli white sauce and grate over the remaining Cheddar.
  6. Blitz the bread into breadcrumbs in a food processor, then pulse in the thyme leaves and almonds. Toss with a lug of oil and a pinch of salt and pepper, then scatter evenly over the cauliflower cheese.
  7. Bake for 1 hour, or until golden and cooked through, then enjoy!
Posted on

How to Eat Your BOX! (Week of 10/22/17)

Spitzenburg Apples:

To store, keep apples as cold as possible in the refrigerator. To clean, gently rub the apple as you run warm water over it. Peel and cut your apple into slices or cubes. To prevent apples from browning for a longer time, brush with a lemon juice-water solution (1 cup water mixed with 1 teaspoon lemon juice). This dessert apple is great for cider, apple pies or eating out of hand. It is also rumored to have been a favorite of President Thomas Jefferson!

Carnival Squash:

Try roasting your halved carnival squash seasoned with a little butter and drizzle of maple syrup. It tastes nutty and sweeter than butternut squash but not as dry in texture as kabocha squash. Carnival squash is at its best when roasted which really brings out its flavor, but it can also be steamed or puréed. Roast and eat the seeds just like with other winter squashes. Its small, compact size makes it easy to cut through and is great for serving one or two people. Carnivals are also great to throw into stews, curries, soups, or even veggie chilis. Use them in any recipe calling for butternut or acorn squash.


Recipe: Carnival Squash with Apples and Thyme

Ingredients:


2 carnival or acorn squash

2 tablespoons melted butter or coconut oil

4 sprigs fresh thyme

4 Spitzenburg apples (Note: if subbing a larger tart apple, like Granny Smith, use 2 apples)

½ teaspoon cinnamon

2 tablespoons maple syrup or coconut sugar


Instructions:

  1. Heat the oven to 375°. Cut the squash in half and scoop out the seeds. Place on a cookie sheet and brush with a little of the butter and season with a little salt. Place a thyme sprig in each half and bake for 15 minutes.
  2. Meanwhile, mix together the apples, the remaining melted butter, the sugar and the cinnamon.
  3. Remove the squash from the oven. Fill each squash with the apple mixture. Put them back in the oven for 15-20 minutes more, or until the squash and the apples are soft and caramelized.
Posted on

How to Eat Your BOX! (Week of 10/15/17)

Asian Pears:

Crunchy, juicy, and sweet. Try adding pears to a salad this week! Cut into wedges or cubes they would make a great addition to this week’s salad. For dressing, try mixing a tablespoon of balsamic vinegar with a little bit of Dijon mustard and about an eighth cup of maple syrup. Mix together with a wire whisk and beat in an eighth cup of olive or avocado oil. I would probably double the recipe if serving more than 3 people. Can also be topped with gorgonzola, feta, or goat cheese and pecans (or walnuts).

Parsnips:

Parsnips have an almost peppery sweet flavor to them that comes out nicely when roasted. They make a great addition/alternative to the more traditional baked or sautéed root vegetable.

Try these diced into bite size chunks or julienned, drizzled with olive oil and tossed in a bowl with a little salt and cayenne (or other spices). Bake on bottom rack at 450° for 20-30 minutes, stirring occasionally, until edges are browned and crispy.


Featured Recipe: Roasted Potatoes, Carrots, Parsnips, and Broccoli

Prep time: 20, Cook time: 40, Ready in 60 minutes. Serves 6.

Ingredients:


1/3 cup extra-virgin olive oil

3 medium carrots (about 3/4 pound), cut into 1 1/2-inch thick circles

1 1/2 cups Broccoli cut into 1 1/2-inch thick pieces

4 cups potatoes (about 1 pound), cut into 1 1/2-inch thick slices

3 medium parsnips (about 1 pound), cut into 1 1/2-inch thick slices

1 cup sweet potatoes (about 1 pound), cut into 1 1/2-inch thick slices

1 tablespoon dried oregano

1 tablespoon dried rosemary

1 teaspoon dried thyme

1 teaspoon dried basil

1/4 teaspoon sea salt

1 teaspoon freshly ground black pepper


Instructions:

  1. Preheat oven to 400 degrees F.


  1. Grease an 11 by 17-inch baking sheet pan with extra-virgin olive oil. Place vegetables in baking sheet and add the dried herbs, salt and pepper. Toss well, evenly coating all the vegetables with the seasonings and oil. Add more oil if the vegetables seem dry.


  1. Spread the vegetables evenly on a large baking sheet. Place on middle rack in oven and bake for 35 to 40 minutes.


Recipe adapted from: giadzy.com

Posted on

How to Eat Your BOX! (Week of 10/8/17)

Jonagold Apples:

Fun fact: The name Jonagold combines the apples two parents: Jonathan and Golden Delicious. Both Jonagold and King David apples are fantastic baking apples, with that classic old-fashioned “apple flavor.” Apples are one of those quintessential healthy eating choices! You can dice them up and throw them into your hot cereal with some cinnamon for a fresh take on breakfast, toss them in smoothies, slice them atop green salads to sweeten them up and add texture, dip them in nut butter or yogurt for a snack, roast with savory fall veggies, bake with a topping of your favorite granola – so many ways to enjoy them! And perhaps the best part? Antioxidants and phytochemicals in apples have been linked to help prevent a number of chronic diseases, including: Alzheimer’s, lung cancer, heart disease, breast cancer, diabetes and more. Store unwashed apples in the coldest part of your refrigerator. Be sure to store separately from strong-smelling veggies like onions or garlic, as apples will take on their strong flavors.


Green Cabbage:

Cabbage is a handy thing to have around. Don’t let it be that vegetable that sits in the bottom of your refrigerator drawer for months on end (Although it will keep nearly that long!). There are endless opportunities to use it up. I’m constantly pulling mine out and adding it to just about anything. I like to make cabbage shavings by first cutting the cabbage in half, then simply shaving off pieces from along the edges. Also, if you’re like me and rarely use a whole cabbage in one sitting, keep the cut edges from drying out by rinsing and storing in a sealed plastic bag.


Peru Purple Potatoes:

These little taters are the perfect size for making smashed potatoes. Google smashed potatoes or a basic recipe. Martha Stewart has a good one. Potatoes have gotten a lot of flak from the health community but when eaten in moderation (and without the host of other unhealthy ingredients they often come with), potatoes are actually good for you! They are rich in potassium and vitamin C. True, they are high in starch, but nothing that your body can’t easily process when eaten in healthy portion sizes along with a meal.

Braised Cabbage, Carrots, and Onions
Ready in 30 minutes. Serves 4

Ingredients:

1/2 cabbage (chopped or shredded coarsely)
2 carrots, grated
2 onions, chopped
1/4 cup butter or ghee
1/2 cup parsley
1 teaspoon salt
1/4 teaspoon pepper
1 cup chicken broth

Instructions:

  1. Add cabbage, carrots and parsley, to butter in a medium sauce pan, and mix until well coated with butter. 2. Stir in salt, pepper and broth.
    3. Cover, bring to a boil, reduce heat to low and cook for 10 to 15 minutes or until vegetables are tender-crisp and still quite bright in color. 4. If too much liquid remains in skillet near the end of the cooking time, uncover and increase heat to high for a minute. 5. Stir often while liquid evaporates.


Recipe from: geniuskitchen.com


Posted on

How to Eat Your BOX! (Week of 10/1/2017)

Broccoli:

Baked broccoli is one of my favorite dinner sides. I like it best roasted to crispy perfection with a little garlic, salt and pepper. Try tossing chopped broccoli florets with olive oil, salt and seasonings of choice. Bake on a cookie sheet at 450 °F for about 20 minutes, until edges are crispy and the stems are tender. For extra flavor, drizzle with lemon juice or top with parmesan cheese. Broccoli is also great in salad, stir-fry, soup, or raw with your favorite veggie dip.


Celery:

Because of its boat-like shape, celery works great with a filling as a fun and healthy snack. You can get creative when it comes to what you to pair it with. Peanut butter is a common ingredient, but you can stuff your celery with things like cream cheese with chopped nuts and raisins, garlicky chicken spread, or a nut butter with seeds and honey. When making a celery themed salad, you can either go sweet (with thinly sliced apples, pecans, raisins, yogurt or sour cream, honey and a pinch of cinnamon) or savory (adding it to your everyday green salad or making a chicken salad with it).


Delicata Squash:

There are many ways to cook and use this squash: they make a great side to almost any dish or can be added to pasta, soups, salad, sautéed, or stuffed. To bake, cut in half lengthwise, remove seed and cut halves crosswise into ½ inch wedges (or skip this step and leave in halves). Toss/slather in melted butter or coconut oil and about ½ tsp of salt. Spread out on a cookie sheet and roast in the oven at 425 °F for about 25-30 minutes, tossing once or twice, until browned.


Savory Quinoa Stuffed Delicata Squash

Easy to make and deliciously sweet and savory! Serves 3-4.

Ingredients:

2 Delicata squash

1/2 C uncooked quinoa

1 C vegetable broth

1 Tbsp plus 1 tsp olive oil

6 oz. sliced button mushrooms (OR use broccoli florets or even chopped celery if your box doesn’t contain mushrooms)

1/2 C chopped onion

1 clove minced garlic

1/8 tsp rosemary

1/4 tsp thyme

Pinch salt

Pinch black pepper

Instructions:

1. Preheat the oven to 400 ºF. Meanwhile, cut the Delicata in half and remove the seeds. The seeds can be discarded, but they can also be reserved for roasting, much like pumpkin seeds. Lightly brush olive oil over the insides and outsides of the squash bottoms and tops and season with salt and pepper to taste. Bake for 25-30 minutes. The squash are done when the inner flesh is tender.

2. Once squash are in the oven, make the quinoa. First rinse the quinoa well and then combine in a sauce pan with vegetable broth. Bring to a boil, then reduce to a simmer and cook covered until all of the liquid is absorbed, 15 to 20 minutes.

3. Meanwhile, sauté the mushrooms (or broccoli florets) and onion in 1 teaspoon of olive oil for about 5 minutes, or until tender. Add the garlic, rosemary, and thyme to the pan and cook 1 more minute. Season with the salt and pepper. By now the quinoa should be done cooking. Measure 1 cup of cooked quinoa into the skillet with the mushrooms and onion. Stir to evenly combine.

4. Remove the cooked squash from the oven and spoon the quinoa pilaf evenly into each half. Consider garnishing with a little parsley for added color. Serve immediately.

Recipe adapted from: simpleseasonal.com


Posted on

How to Eat Your BOX! (Week of 9/24/17)

Conference Pears:

As with all new crop pears, these will need to be ripened for 4-7 days before they are ready to eat. Check the neck for ripeness by gently pressing your thumb near the stem end of the pear. When it gives slightly, the pear is ripe.

Leeks:

Besides potato leek soup (recipe below), there are other delicious ways to eat leeks. Used as an onion swap they make a great base in just about anything. Cook in a little oil until tender as a base for a sauce, sauté, scrambled eggs, soup, etc. The flavor is milder than an onion so I don’t mind having larger chunks. I like to cut them into quarter inch rounds. Leeks are cousins to the old, familiar onion, but have a sweeter, more delicate flavor reminiscent of garlic or chives and are delicious no matter how they’re cooked. Additionally, leeks contain generous amounts of vitamins, minerals and antioxidants, making the vegetable a great addition to a healthy diet. You can cook leeks by poaching them in chicken broth, pan-frying them in a little oil, or boiling them until tender.

Potatoes:

Packed with nutrition, potatoes are among the most popular of all the root vegetables. Low in fat and high in health and beauty-promoting dietary fiber, potatoes are a rich source of B vitamins as well as vitamin C, and vitamin K. Potatoes are an excellent source of healthy, energy-giving complex carbohydrates, and contain good amounts of certain essential minerals like iron, manganese, magnesium, phosphorous, copper and potassium. Be sure to store potatoes in a cool dark place so they don’t develop green spots (from exposure to light) or sprout.


Simple Potato Leek Soup

You will be able to make this simple soup in no time flat, and can feel good about filling up your belly with healthful ingredients!

Ingredients:


2-3 large leeks, white and light green parts only

2 tablespoons olive oil

2 tablespoons butter

4 garlic cloves, roughly chopped

Kosher salt

6 medium-to-large potatoes

8 cups low-sodium chicken broth (or homemade vegetable stock or water)

Freshly ground black pepper, to taste

Fresh parsley, chopped, for garnish

Sour cream, for serving (optional)


Instructions:

  1. Slice leeks in half lengthwise and wash thoroughly. Cut crosswise into 1/4-inch-thick half-moons. Heat olive oil and butter over medium heat in Dutch oven or heavy-bottomed pot. Add leeks and garlic and sprinkle with 1/2 teaspoon salt. Cook, stirring occasionally, until leeks are softened but not browned, about 10-12 minutes.
  2. While leeks are cooking, fill large bowl halfway with cold water. Peel potatoes, placing each in bowl of water immediately after peeling to prevent browning. Cut each potato in half lengthwise and slice into 1/2-inch-thick half-moons. Drain potato slices and add to pot along with stock and a few generous grinds of pepper. Raise heat to high and bring soup to a boil. Reduce to a simmer, cover, and cook until potatoes are very soft, about 20 minutes.
  3. Puree soup with an immersion blender or in batches in standing blender. If you like your soups on the hearty side, you can skip this step, or lightly puree (some pureeing makes for that lovely creamy texture, so don’t skip it completely). Season to taste with salt and pepper and serve with parsley and sour cream if desired. Soup reheats well and will keep in refrigerator for up to one week.
Recipe adapted from seriouseats.com

Posted on

How to Eat Your BOX! (9/17/2017)

D’Anjou Pears:
The d’Anjou is a truly an all-purpose pear. They are juicy when ripe, and their subtle sweetness hints at a refreshing lemon-lime flavor. Their dense flesh holds up well in heated applications like baking, poaching, roasting, or grilling and they are delicious when sliced fresh in salads or eaten as an out-of-hand snack. The most important thing to know about d’Anjou pears is that they do not change color as they ripen, unlike Bartletts, whose skin color changes to yellow during ripening. Check the neck for ripeness by gently pressing your thumb near the stem end of the pear. When it gives slightly, the pear is ripe.

Fennel:
Known for its crunchy texture and mild anise flavor, fennel is best used within 5 days. Keep fennel bulbs wrapped in the fridge to keep out air that will lessen its flavor. Fennel is wonderful braised, roasted, or grilled where its it brings flavor reminiscent of pine nuts to the table, or, sautéed, or used raw in salads, where it is crunchy and sweet.

Beets:
In the cooking world, beets are often referred to as “nature’s multivitamin” for their incredible range of vitamins, minerals and antioxidants. Although beets can be cooked in a variety of ways (including as a secret ingredient for deep dark chocolate cake-Google it!), roasting beets is one of the easiest and most delicious. Roasting beets intensifies their flavor, brings out their earthy sweetness, and makes their skin tender and easy to peel off. Roasted beets are particularly delicious in beet salads or just as a complementing side dish. Check out the recipe below for easy Roasted Beets.

Roasted Beet and Fennel Salad
“The good news: Beets are packed with folate and potassium, and the red ones deliver lots of cancer-fighting antioxidants.” – Food & Wine

Ingredients:

4 beets, peeled and cut into 1/2-inch wedges (~1 1/2 pounds)
2 thyme sprigs or 2 tsp dried
2 tablespoons water
2 tablespoons extra-virgin olive oil
Salt and freshly ground pepper
1 large fennel bulb with fronds—bulb cut into 1/2-inch wedges, 1 tablespoon chopped fronds
1 teaspoon sherry vinegar or balsamic

Instructions:
1. Preheat the oven to 400 °F. In a medium baking dish, toss the beets with the thyme, the water and 1 tablespoon of the olive oil. Season with salt and pepper. Cover with foil and cook for about 40 minutes, or until tender. Let cool slightly. Discard the thyme.
2. Meanwhile, in a small baking dish, drizzle the fennel wedges with the remaining 1 tablespoon of olive oil and season with salt and pepper. Cover with foil and bake for 15 minutes. Uncover and bake for 15 minutes longer, or until tender and lightly browned.
3. Pour the beet juices into a bowl and whisk in the vinegar. Add the beets, fennel wedges and fronds and season with salt and pepper. Serve warm or at room temperature.


Recipe adapted from: foodandwine.com

Posted on

How to Eat Your BOX! (Week of 9/10/17)

Pluots:
These sweet Dapple Dandy Pluots can be eaten out of hand, as a fresh topping for yogurt, dehydrated into dried pluots or made into jam. You can also experiment by substituting them for plums in recipes (after all, they are the delicious hybrid of the plum and apricot). Pluots will continue to ripen once off the tree. Turn them upside down and leave them on the counter away from the sun. When ripe, store them unwrapped in the refrigerator for up to three days. If stored in the refrigerator, remove your pluots before eating and let them return to room temperature. As with cheese – their flavor is best if allowed to warm slightly. Rinse and leave whole, slice into wedges or cut into chunks.

 
Petite Onions:
Most of my dishes start with onions! A great go-to soup during the week is “Sopa a la Minuta” a.k.a. “The Soup”. To make, sauté 1 finely chopped onion in a little bit of olive oil until golden brown. Add 2 cloves minced garlic. Add 1 ground meat of your choice and cook until brown. Add 1.5 cups of diced tomatoes. 2 tbs oregano, and cook until tomato turns darker in color. Add salt and pepper. Taste. Add 6 cups beef broth and 4 cups of water. Bring to a boil. Add 2 diced potatoes. Boil until potatoes are tender. Rectify seasoning and dinner is ready!

 
Cauliflower:
Cauliflower is enjoying its spot in health limelight these days for good reason: not only is it a cancer-fighting veggie, it lends itself as a replacement for starchy carbs, grains, and you name it! There are so many ways to use this vegetable: it can be chopped up and added to salad or soup, roasted in the oven, tossed in a stir fry, boiled and pureed as a stand-in for mashed potatoes or to make a creamy soup, baked into a pizza crust as a flourless alternative, or simply eaten raw. The options are endless! You don’t even have to cut it up. Try baking it whole by simply cutting off the leaves and stem so it can sit upright, baste in olive oil, salt and spices of your choice, and bake on a cookie sheet or cast iron skillet at 450° for about 45-60 minutes or until a knife can be inserted easily. Because of its mild flavor, cauliflower goes well in spicy dishes or curries as it soaks up all the other flavors.


Recipe: Glazed Petite Onions
Active time: 20 minutes Total time: 45 minutes Serves 6
Ingredients:

2 pounds Klesick’s petite onions
3 tablespoons unsalted butter or coconut oil
1 tablespoons sugar or maple syrup
Kosher salt
2 tablespoons finely chopped fresh parsley leaves
Instructions:
1. Using a paring knife, trim off the ends of each onion and score a light “X” into one cut side. Bring a medium pot of water to a boil over high heat. Add onions and cook until outer layers are soft, about 1 1/2 minutes. Drain onions and run under cool water until cold enough to handle. Peel onions with your fingers and discard peels.
2. Transfer onions to a large saucepan or high-sided sauté pan and cover with water. Add butter and sweetener. Bring to a boil over high heat, reduce to a simmer, and cook, stirring and shaking pan occasionally, until onions are completely tender and sauce water has reduced and emulsified with the butter into a glossy glaze, about 25 minutes (if butter looks greasy or broken, add 2 tablespoons of water and shake pan to bring glaze back together). Season to taste with salt. Stir in parsley, and serve.

Recipe adapted from: seriouseats.com