
Posted on

How to Eat Your BOX! (week of 1/1/2017)

Baby Broccolini:

Broccolini is not a form of baby broccoli but actually a hybrid between broccoli and Chinese kale. It can be cooked much the same way as regular broccoli but is more tender and takes less maintenance. Simply cut off the ends (I like to take a good inch or two because the ends can be tough and chewy), and either bake in the oven or toss in a stir fry. Try sautéing along with chopped garlic in a about a tablespoon of olive oil. Like other vegetables, these are often blanched first, before adding to the frying pan. Do this by adding to boiling water and simmering for about two minute then drain and transfer to a bowl of ice water. Return your pan to the stove and sautee the garlic, then add the broccolini back in to reheat. To bake, toss in olive oil and spread evenly on a baking sheet. Bake at 425°F for 10-15 minutes until tender.

Kiwi:

Kiwi is most commonly eaten as is by cutting in half and spooning out the inside, but it can also make a great addition to breakfast food or dessert. They can be used in smoothies (try with bananas, yogurt and avocado), as a topping for granola and yogurt, or with dessert (I like topping meringue with a little whip and a slice of kiwi). Kiwi can also be added to ice water with mint and lemon for a refreshing drink.

Carnival Squash:

Carnival squash is a hybrid between sweet dumpling and acorn squash. Try roasting your halved carnival squash seasoned with a little butter and brown sugar. It tastes nutty and sweeter than butternut squash but not as dry in texture as kabocha squash. Carnival squash is at its best when roasted which really brings out its flavors, but it can also be steamed or pureed. The seeds can be roasted and eaten just like with other winter squashes. I like its small compact size, which makes it easy to cut through and is great for serving one or two people. They are also great to throw into stews, curries, soups, or even veggie chilis. Use them in any recipe calling for butternut or acorn squash.

Recipe: Carnival Squash with Apples and Thyme

Celeriac:

Celery root or celeriac is prized for it’s distinctive flavor which is somewhere between celery and parsley. Although cooked celery root is excellent in soups, stew, and other hot dishes, it can also be enjoyed raw, especially grated and tossed in salads. Raw celery root has an intense flavor that tends to dominate salads, so pair it with other strongly flavored fruits and vegetables, such as carrots, beets, and apples. Before using celery root, peel and soak briefly in water with a little vinegar or lemon juice to prevent cut surfaces from darkening.

Recipe: Mashed Celeriac

Posted on

How to Eat Your BOX! (Week of 12/25/16)

How to Eat your BOX


Bananas

It was not until recent years that I discovered the magic of frozen bananas! Peel, break them into pieces and place in a zip-lock bag and store them in the freezer. Next time you’re making a smoothie, use them instead of ice, add a dollop of nut butter, a couple of dates, almond milk and sip away! Reduce the amount of milk in your smoothie and you have instant soft-serve ice cream. Add cocoa powder and now you have chocolate soft-serve ice cream!


Red Bell Peppers

We eat red bell peppers almost every week (within season). We love them raw, stuffed and baked, or in stir fry’s. A household favorite, fried rice: 3-4 eggs scrambled (set aside), chop 1 red bell pepper, 1 onion and mushrooms or any veggies you have available. In a hot pan, add a splash of sesame oil along with your veggies and sauté for a few minutes until cooked. Then add cooked rice, eggs, salt, pepper and 1 tsp of honey (shhh… this is my secret!). Sprinkle with chopped green onions and serve!


Yellow Onions

Most of my dishes start with onions! Our go-to soup during the week is “Sopa a la Minuta” or what we call “The Soup”. My husband likes it so much, he learned how to make it himself! Sauté 1 finely chopped onion in a little bit of olive oil until golden brown. Add 2 cloves minced garlic. Add 1 ground meat of your choice and cook until brown. Add 1.5 cups of diced tomatoes. 2 tbs oregano, and cook until tomato turns darker in color. Add salt and pepper. Taste. Add 6 cups beef broth and 4 cups of water. Bring to a boil. Add 2 diced potatoes. Boil until potatoes are tender. Rectify seasoning and dinner is ready!


With love and gratitude,

Sara Balcazar-Greene (aka. Peruvian Chick)

Peruvian Food Ambassador

Posted on

How to Eat Your BOX! (Week of 12/18/16)

How to Eat your BOX

Yams:

If it were up to me I would put yams/sweet potatoes in the boxes every week! 😉 They make one of my all-time favorite snacks and are also a great side for any meal. I like to slice them into quarter inch rounds or strips (a mandolin comes in handy here), toss them in a little olive oil and any desired seasoning (sage, rosemary, and thyme are great with yams) and bake at 400° for about 30 minutes, until tender. You can also bake them whole. Make sure to thoroughly clean first and pat dry. Prick with a fork and bake for about 40-60 minutes at 425°.

Beets:

Beets can be cooked just about any way you like. They are great boiled or baked, sautéed or stewed. Usually I cut them into bite size pieces to bake in the oven because I love roasted beets! Simply coat in olive oil, sprinkle with salt and pepper, and bake at 375° for about 35 minutes (try adding some parsley when they’re done). But they can just as easily be cooked in a frying pan along with other veggies. The beet greens are great sautéed as well so don’t throw them out! Try cooking the greens in a little olive oil with garlic, salt and pepper on medium heat until bright green. Don’t let cook them too long though or they’ll get ‘slimy.’ Check out this recipe for sweet potato and beet chips!

Pears:

Try adding pears to a salad this week! Cut into wedges or cubes they would make a great addition to this week’s salad mix. For dressing, try mixing a tablespoon of balsamic vinegar with a little bit of Dijon mustard and about an eighth cup of maple syrup. Mix together with a wire whisk and beat in an eighth cup of olive or avocado oil. I would probably double the recipe if serving more than 3 people. Can also be topped with Gorgonzola, feta, or goat cheese and pecans (or walnuts).

Mushrooms:

Mushrooms are in a class all their own. Literally, they are quite distinct in nature and classified as their own kingdom, separate from plants and animals. But, they are packed with nutrients and make a great addition to a healthy diet. Mushrooms are good raw on salads or in an array of cooked dishes. You can dice them and sauté with onions as a base for scrambled eggs or stir fry or in soup. They also blend well with ground beef, enhancing the flavor and making the meat go farther. Great for tacos or in pasta.

Parsnips:

Parsnips have an almost peppery sweet flavor to them that comes out nicely when roasted. They make a great addition/alternative to the more traditional baked or sautéed root vegetables! Try these diced into bite size chunks or julienne, drizzled with olive oil and tossed in a bowl with a little salt and cayenne(or other spices). Bake on bottom rack at 450° for 20-30 minutes, stirring occasionally, until edges are browned and crispy.

Papayas:

Papayas are ready to eat when they take on a yellow/orange-y color and are slightly soft. Leave on the counter in paper bag for a few days to ripen. The skin looks like it is going bad when ripening, but don’t throw it because it looks bad. Opening a rough-looking papaya often reveals a perfectly good piece of fruit. Once ripe, store in the refrigerator but try to eat within day or two for best flavor. Unripe/green papaya can be eaten it green salads or cooked dishes. After washing this fruit, cut it lengthwise, scoop out the seeds and eat with a spoon. For a little extra zest, squeeze lemon or lime juice on top. Cut papaya into smaller pieces for fruit salad or recipes, but first peel it with a paring knife. You can also use a melon baller to scoop out the fruit of a halved papaya. If you are adding it to a fruit salad, you should do so just before serving as it tends to cause the other fruit to become soft. (Thanks to all those good-for-you enzymes.)

While most people discard the big black seeds, they are actually edible and have a peppery flavor. They can be chewed whole or blended into a creamy salad dressing.

Try a mix of diced papaya, cilantro, jalapeno peppers and ginger together to make a unique salsa that goes great with shrimp, scallops and halibut.

Or try adding papaya to your smoothie. Combine with strawberries and or other fruit and yogurt in a blender. The papaya gives it a wonderfully creamy texture.

Posted on

How to EAT Your BOX! (Week of 12/11/16)

Broccoli:

Broccoli is such an easy vegetable to use. It’s great on salad, in stir-fry and soup, or served by itself as a side dish. We always boiled our broccoli and served it with a little butter and salt. Nowadays I like it best roasted to crispy perfection with garlic and other seasonings. The flavor of broccoli comes out well in the oven. Try tossing chopped broccoli florets with olive oil, salt and garlic slices. Bake at 450° for about 20 minutes, until edges are crispy and the stems are tender. Cutting the florets in half and laying them flat on the baking sheet results in a more caramelized effect. For extra flavor try drizzling with lemon juice or topping with Parmesan cheese.

Eggplant:

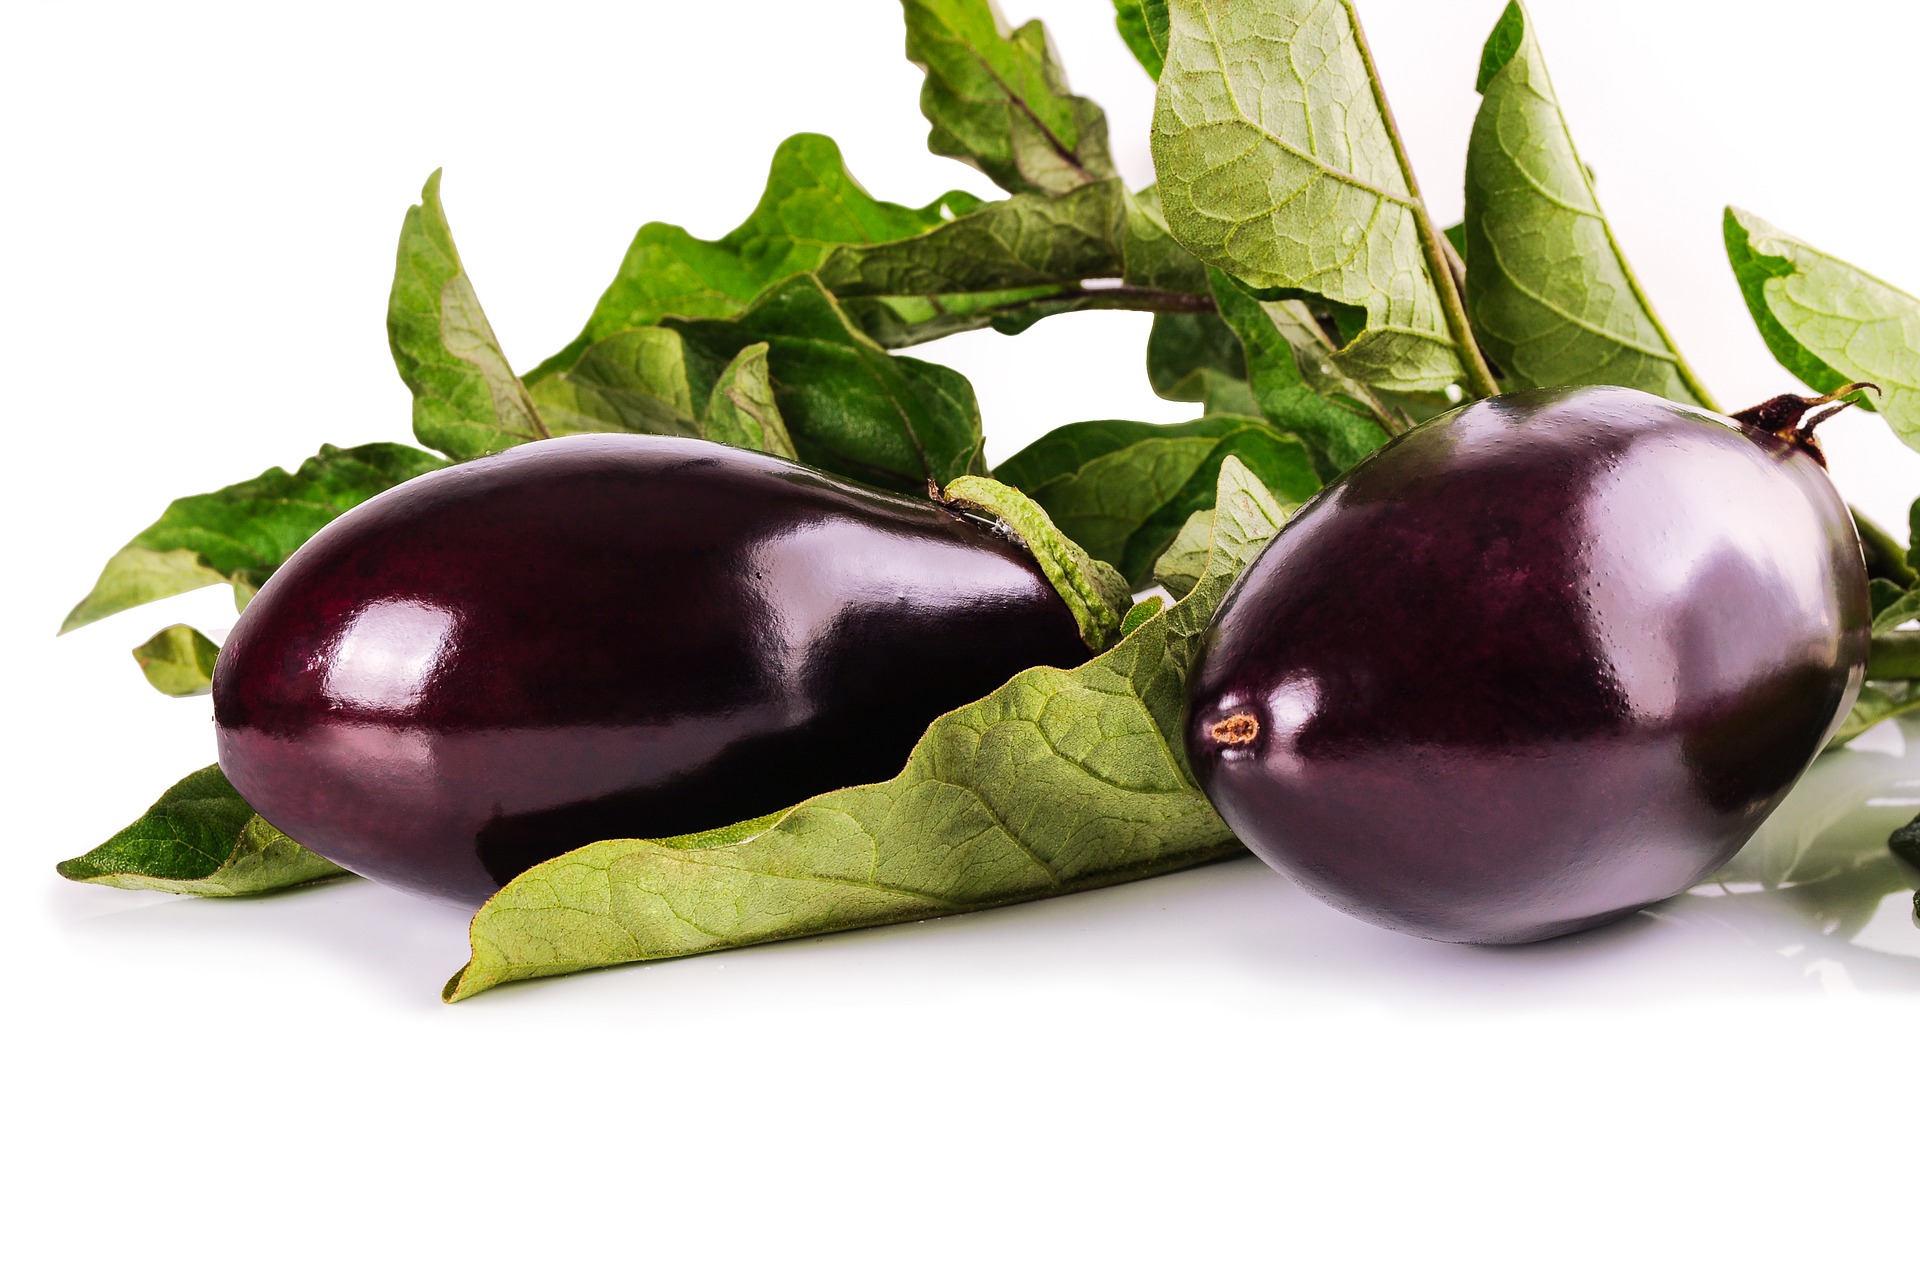
I’ve found that the oven is easiest to use when cooking this particular vegetable. Because eggplant soaks up oil like a sponge, cooking in a frying pan with oil can be difficult. Best to use a non-stick pan and cook at a higher heat. Try baking your eggplant separately and then adding it to whatever dish you’re making. Start by dicing your mostly peeled eggplant into bite size pieces. Toss with olive oil and cook on a baking sheet at 425° for about 30-40 minutes, stirring halfway through. Sprinkle with salt and pepper. Serve as is or add to pasta, stir-fry, curry, on top of rice, etc)

Or, try making an eggplant tomato bake! Cut your peeled eggplant into ½ inch rounds, arrange on a baking sheet. Top each eggplant round with a slice of tomato. Drizzle with olive oil and season with oregano, salt, and pepper. Sprinkle with Parmesan cheese and bake at 375° until the cheese begins to brown, about 30-40 minutes. Switch oven to broil and bake for another 5 minutes.

Leeks:

Besides potato leek soup, there are plenty of ways to eat leeks. Used as an onion substitute it makes a great base in just about anything. Cook in a little oil until tender as a base for a sauce, sauté, scrambled eggs, soup, etc. The flavor is milder than an onion so I don’t mind having larger chunks. I like to cut them into quarter inch rounds.

Delicata Squash:

This is one of my favorite winter squash. First because it’s so delicious and Second because it’s so easy to prepare! All you have do is cut it in half and throw in the oven. You don’t even need to worry about the skins. Because they are tender enough, you can eat them right along with the flesh. They are also a much easier squash to cut than their larger counterparts so you don’t have to feel like you’re going to skewer yourself trying to slice the thing open. There are many ways to cook and use this squash: they can be baked, steamed, grilled or sautéed. They make a great side to almost any dish or can be added to pasta, salad, sauté, or stuffed. You can also add the creamy flesh to soup which makes for a thick smooth texture (and a wonderful nutty flavor!). My sister recently steamed up some delicata and added it to tomato soup as the base for her vegetable soup. It was a match made in heaven! It added a wonderful thick creamy texture and the flavor was fantastic.

Posted on

How to Eat Your BOX! (Week of 12/4/16)

Baby Bok Choy:

This Asian vegetable is in a class all on its own. It has a delicate and almost foam like texture and can be quite versatile. Try sautéing in a little olive oil and freshly minced garlic. To add more flavor you can use a combination of lemon and tarragon, or try soy sauce, sesame oil or coconut aminos, sesame seeds and ginger for an Asian spin. Roasting is also a great way to cook bok choy. Look up recipes online or check out the links here and here.

Cauliflower:

There are so many ways to use this vegetable I don’t even know where to start. They can be chopped up and added to salad or soup, roasted in the oven, tossed in a stir fry, boiled and pureed as a stand-in for mashed potatoes or to make a creamy soup, baked into a pizza crust as a flourless alternative, or simply eaten raw. The options are endless! You don’t even have to cut it up. Try baking it whole by simply cutting off the leaves and stem so it can sit upright, baste in olive oil, salt and spices of your choice, and bake on a cookie sheet or cast iron skillet at 450° for about 45-60 minutes or until a knife can be inserted easily. Because of its mild flavor, cauliflower goes well in spicy dishes or curries as it soaks up all the other flavors. Here’s a source for recipes.

Celery:

I still remember making ants on a log at grandma’s house. Whoever came up with celery sticks filled with peanut butter and topped with raisins is a might more creative than I. Nowadays my favorite way to eat celery is in chicken soup. Chicken and celery were just meant to be together. There’s something about that flavor combo that touches the soul. Try using your celery along with onion, cilantro and cauliflower from this week’s box to make chicken soup!

Cabbage:

What can I say? Cabbage is just a great thing to have around. Don’t let it be that vegetable that sits in the bottom of your refrigerator drawer for months on end. There are endless opportunities to use it up. I’m constantly pulling mine out and adding it to my just about anything. I like to cut mine into little cabbage “shavings”. First cut the cabbage in half, then simply shave off slivers from along the inside edge. I rarely ever use a whole cabbage in one sitting so to keep the cut edges from drying out I make sure to store sealed in a plastic bag or plastic wrap.

Mangos:

Mangos are one of my all-time favorite fruits. They have a unique flavor and creamy texture unlike any other fruit. They also pair well in cooked savory dishes. Mango fried rice is simply amazing. Mangos also are great on salads, stir-fries, or added to sauces or salsa. If you have a dehydrator they are so good dehydrated or made into fruit leather. You can order a whole case and dehydrate them or try freezing to use in smoothies.

Turnips:

Northwest box Only This time of year our NW box comes well stocked in root vegetables. This hearty box is a great way to

experience locally grown food all year round. The turnip reminds me of a mix between a potato and a radish….and maybe a beet. It can be cooked much the same way as a potato, you can even boil them until tender and make mashed turnips! They can be roasted, sautéed, added to soup or even sliced up and eaten raw with a little salt and lemon juice. To season try adding a combo of salt, pepper, and lemon or when baking, toss in coconut oil, salt, pepper, ginger and drizzled in honey(roast at 400° until tender), or mashed you can top with butter, salt, pepper, chives and Parmesan.

Posted on

How To Eat Your BOX! (Week of 11/27/16)

Sugar Pie Pumpkins:

The first time I roasted a pumpkin, I failed to realize that the stringy insides are actually not the part we want to eat. Lucky for me (and you) I’ve come a long way since that first roast.

Sugar Pie Pumpkins are ideal for…you guessed it: pie! They are sweet and have a soft silky texture when roasted.

To roast, preheat your oven to 350°F. Cover a large sheet pan with parchment paper.

Okay, so here’s where I admit that roasting pumpkins or squash often terrifies me. Really it’s just the part where you have to hack it in half. I always fear that I’ll walk away less a finger or two. That’s why I roast the pumpkin whole (or even microwave for a couple of minutes) for 10 minutes before cutting in half. The pumpkin starts to soften so the knife slides through the skin and flesh without much pressure. Let it cool slightly then cut in half and scoop out the stringy bits and seeds. Return the pumpkin to the oven, flesh down, and continue to roast until a fork easily slips through the skin and flesh.

Once cool, peel away the skin using a spoon to help scoop out the soft flesh. Pureé the pumpkin in a blender or food processor then use as you would canned pumpkin.

Breads, muffins, cakes and such are all lovely places for pumpkin pureé to live, but let’s not forget about milkshakes (a scoop of pureé along with organic vanilla ice cream and a bit of pumpkin pie spice) or smoothies (pumpkin pureé mixed with plain yogurt blended with honey or dates along with pumpkin pie spice and perhaps a banana if you’d like).

Or, take your pumpkin down the savory route by combining it with a flavorful stock and a bit of paprika. Warm it up, season and stir in a bit of sour cream or créme fraiche for a rich tang. I like to stir a bit of the pureé into my homemade macaroni and cheese, it adds a bit of rich flavor and nutrition that kids never complain about.

We’ve covered dessert, lunch and dinner, but let’s not forget about breakfast. Stir a bit of pureé into yogurt or oatmeal, sweeten with maple syrup and add a bit of cinnamon or pumpkin pie spice.

Posted on

How to Eat Your BOX! (Week of 11/20/16)

Green Beans:

Who hasn’t eaten green bean casserole for Thanksgiving? My family serves this dish every year. It’s tradition. And, along with that tradition comes a long list of canned and processed ingredients, full of sodium and preservatives. Now, I don’t want to spoil your Thanksgiving, especially if you have that one Aunt who always brings this dish – and it will to start a family feud if you say anything – I would rather you enjoy your time with family and not worry about this one day out of the year. However, if you are the chef, I would highly recommend your opting for fresh, healthier ingredients. It will take (a little) more time to prepare, but honestly, your health is worth it. Besides, it tastes way better! Canned, processed foods just don’t taste good to me anymore. I can feel my body objecting when I eat that food because I am not desensitized to it anymore. Once you rid your body of chemicals your brain can function the way it should, and warn you when you’re eating something that is not compatible with your body. I’m not temped to buy junk anymore, because it just doesn’t look appealing to me. This Thanksgiving, why not change up the traditional dish and use those fresh green beans from your box. While you’re at it, opt for your own homemade sauce instead of that can of mushroom soup. You can even make your own version of the French onions that everyone loves. Try one the recipes I’ve linked here and here:

Broccolini:

I love this miniature broccoli/asparagus (though not actually related to asparagus-it just looks this way)! I tend to prefer it over broccoli because it is so easy to cook and requires little prep. Simply cut off the ends (I like to take a good inch or two because the ends can be chewy), toss in some olive oil or lemon juice and throw in the oven. It’s more delicate than its cousin and requires less cook time. I don’t want to tell you how many times I’ve burned this vegetable. :/ Try baking at 425°F for 10-15 minutes until tender. Or, you can add it to a boiling pot of water and let cook for 2-5 minutes, depending on how tender vs crunchy you want. Add to sautéed garlic or onions (and pine nuts if you have them). You can run your broccolini under cold water to stop the cooking process while sautéing, then heat them up again with the garlic.

Spinach Mix:

Spinach is so great in salad. I enjoy adding apple slivers or dried cranberries to mine but the list is endless when it comes to toppings. Try using thinly sliced red onions, carrots, and apples from this week’s box. For dressing, mix apple cider or balsamic vinegar with olive oil and Dijon to taste.

Spinach isn’t just for salad. It is used in cooking just as often or more often than used fresh. If I have something like this mix in my fridge I’ll find myself adding it to just about anything: scrambled eggs, sandwiches, tacos, wraps, pasta, sautés, or even my smoothies.

This recipe comes with an Asian spin. I’m going to have to try to make their dressing!

Brussels Sprouts:

The first time I ever tasted caramelized Brussels sprouts, I was sold! It was at one of the Klesick dinners and out of all the dishes, it stole the show. I don’t think I’d ever tasted such a decedent vegetable in my life! Here’s how to cook them in the oven (they also caramelize well when sautéed!):

Preheat oven to 425°F. Trim off the bottom(don’t take off too much or they simply fall apart) and outer leaves and slices lengthwise. Toss with olive oil(about a tablespoon), salt, pepper, and mix until coated thoroughly. Roast on a baking sheet until tender and caramelized, about 20 minutes. Now, you can just eat them like this but if you want to make them truly amazing try drizzling with equal parts olive oil and balsamic vinegar and a little honey. Mix together and add salt to taste. I can’t wait for Thanksgiving so I can serve this dish!

Delicata Squash:

This is one of my favorite winter squash. For one, because it’s so delicious and two, because it’s so easy to prepare! All you have do is slice it and cook it. You don’t even have to worry about the skins because they are tender enough that you can eat them right along with the flesh. They are also a much easier squash to cut than their larger counterparts so you don’t have to feel like you’re going to skewer yourself trying to slice the thing open. There many ways to cook and use this delicate squash: they can be baked, steamed, grilled or sautéed. They make a great side to almost any dish or can be added to pasta, salad, sauté, or stuffed. You can also add the creamy flesh to soup which makes for a thick smooth texture (and a wonderful nutty flavor!). My sister recently steamed up some delicata and added it with tomato soup as the base for her vegetable soup. It was a match made in heaven! It added a wonderful thick creamy texture and the flavor was fantastic.

A fast and simple way to eat Delicata squash is baked. Cut in half lengthwise, remove seed and cut halves crosswise into ½ inch wedges (or skip this step and leave in halves). Toss/slather in some softened-to-melted butter and about ½ tsp of salt. Spread out on a cookie sheet and sprinkle with brown sugar. Roast in the oven at 425°F for about 25-30 minutes, tossing once or twice, until browned. The seeds can be roasted as well, the same way you would do pumpkin seeds.

Try this recipe with roasted delicata and red onions for a savorier dish.

Anna – Menu Planner

Posted on

How to Eat Your Box! (week of 11/6/16)

How to Eat Your Box! (week of 11/6/16)

Get to know: Zucchini!

I must admit, I never used to like zucchini. But I’ve come to realize that often, the problem isn’t what it is, but how it’s cooked! Now, I absolutely love zucchini because I’ve discovered ways I like to eat it. For example, I enjoy eating it raw! Who knew? It’s great in salads or with dip. I also like adding it to stir fry or making zucchini patties (see recipe link below–amazing!). The key for me was to shred or “noodle” my zucchini when I cooked it. Chopping it into chunks always yielded the same mushy texture that just didn’t suit me. Whereas, if I shredded it, suddenly it was a whole new experience. Also, it doesn’t need to cook long. I add it last to my stir fry or as the noodle to my “spaghetti”. Simply stir it in and turn off the stove. Experiment yourself to find how you like it best!

Lettuce-less Salad!

This week’s box may not include lettuce but don’t let that stop you. There are many health benefits to eating salad and it’s such a fun and easy way to get those raw fruits and veggies. Try one of these lettuce-less ideas using this week’s ingredients!

  • Apple Kale Salad: (Kale, Apple, Pear, Red Bell Pepper, Green onion, Carrot….) Recipe here.
  • Kale is just wonderful and it’s so good for you! It keeps well in the fridge, so you can make it ahead of time and not worry about it wilting. Kale can be a little tricky because it tends to be a bit tough and sometimes bitter. Here are a few tips that have helped me: make sure to remove all large ribs and stems (though these can make a great addition to a stir-fry!); chop the leaves small; sprinkle with salt to cut the bitterness; “tenderize” the leaves by massaging them with your hands (only takes about half a minute); and lastly, massage in the olive oil or salad dressing. This turns the kale bright green and makes it so it’s evenly covered. For the dressing, I like to use a combination of vinegar and olive oil. Once you have prepped your kale and worked in the dressing, add your toppings. Try apple or pear slices. Cashews, almonds and dried cranberries also taste great with this combination!
  • Cucumber Salad: Now we’ve probably all had cucumber salad at some point but I still tend to forget that it makes a great main ingredient for salad, not just as a topping. Try marinating thinly sliced cucumber, onion, bell pepper, crushed garlic cloves in a one to one mixture of water and white (or cider) vinegar and a tablespoon of sugar. Cover and let sit in refrigerator for a couple hours. If you leave it overnight the flavors come out even more! Drain and enjoy. Try adding a garnish of freshly chopped parsley or dill.

Roast in the Oven:

  • Rainbow Carrots: Rainbow carrots work wonderfully roasted in the oven because they tend to be skinnier and they have such a beautiful color so they look great too!
  • Acorn Squash: To bake, simply cut in half, remove seeds (save for roasting!), spread butter or coconut oil on the inside of each half, sprinkle with brown sugar, salt, pepper and any other desired spices (try cinnamon and nutmeg, or nutmeg and thyme) and bake for an hour (cut side up!). Oh, and don’t forget the seeds! They are so fun and yummy roasted! Or, try one of these recipes online!
  • Baby Bok Choy: For you Harvest and Vegetable box people Bok choy is on the menu! You can add it to a stir fry or try baking it! Here’s a great recipe I found online: Preheat oven to 450 °F. Toss Bok choy in about a tablespoon of olive oil, one clove of garlic (minced) and salt in a roasting pan. Roast on lowest rack, stirring twice, until wilted and tendercrisp, about 6 minutes. For added flavor, whisk lemon zest and juice of half a lemon, 1 ½ teaspoons tarragon, 1 teaspoon mirin and pepper (to taste) in a small bowl. Drizzle over the roasted Bok choy. Here’s a recipe for roasted baby bok choy.
Posted on

How To Eat Your Box! Week of 10/30/16

How to Eat Your BOX!

Get to know: Plantains

If you didn’t get this in your box I would highly recommend adding it to your next delivery!

This versatile fruit is eaten cooked (not raw like its popular cousin, the banana) and can be steamed, boiled, grilled, fried or baked! A common staple in most Latin American countries, plantains are typically served in two different ways; as Tostones or Maduros. The most important distinction between these two recipes is not necessarily the way you cook them, but when you cook them. Tostones are made using green plantains (unripe, starchy) whereas making maduros requires you to wait until they turn completely black (over-ripe). As the plantain ripens, it becomes sweeter and its color changes from green to yellow to black, just like a banana. When the outer skin turns completely black and the inside turns deep yellow and soft, it’s at its sweetest. Look up more recipes online or check out this website for more fun ways to eat plantains!

I usually wait until my plantains ripen to a yellow and blotchy coloring (not completely black). I feel like it’s a happy medium between the starchy potato like texture of a green plantain and the sticky sweetness of a black one. They can be difficult to peel so I like to cut them in half and makes strips length-wise with a knife. I then slice these into half inch “coins” which I fry in some coconut oil until golden brown on both sides. Blot with a paper towel to take off any extra oil, add a little salt and voila! One of my all-time favorite snacks!

Make a Salad! (Romaine lettuce, Carrot, Tomato, Avocado, Cucumber)

I don’t know about you, but I love having salad for lunch! It can be so much more than a side for dinner! Simply top your salad with a protein (salmon or chicken are my favorite), dressing, and you have a complete meal! I prefer to mix my own salad dressing because so many store-bought brands are loaded with sugar and who knows what else. My favorite combination is to mix olive oil and balsamic vinegar with a dash of pepper and or whatever else piques my interest….mustard is always a good idea. 🙂 Mix your dressing in a separate bowl/cup first to get it just right. Salad items this week include romaine lettuce, carrots, and beefsteak tomatoes as well as avocado and cucumber in some boxes. You could even add some broccoli if you’re feeling extra fancy. I also enjoy putting fruit, nuts, and seeds in my salad….it can be quite the smorgasbord;)

Make a Soup! (Potato and Leek)

Two words: LEEK SOUP! What could be more comforting this time of year than a warm bowl of potato soup? Potato leek soup is a classic and so easy to make! You simply saute chopped leaks in butter until soft, then add diced potatoes, stock, and herbs, bring to a simmer and cook until potatoes are done. You don’t even need to add cream to make this soup creamy, just blend some or all the of the soup to thicken. Simple, delicious, and satisfying. Find the recipe here.

Roast your Vegetables! (Broccoli, Carrot, Potato, Leek (If you have any beets and parsnips left over from last week they are fantastic served up this way!)

One of my favorite ways to eat root vegetables is baked in the oven. It’s so easy and such a great way to use up those leftover veggies in your fridge. Simply chop everything into roughly the same size chunks, toss with a bit of olive oil, salt, pepper, other fresh herbs (thyme, parsley, dill, rosemary, and or sage). Bake at 400 °F for about 45 minutes, stirring once or twice until the vegetables are tender and browned.

Corn on the Cob! (Only in the Harvest and Vegetable boxes this week)

The easiest and most common method to cook your corn is to boil it. Simply put a pot of water on the stove on high, once it starts to boil add your corn (make sure there is enough water to cover). After the water starts boiling again, it’s done! Now, corn is wonderful this way, but, if you’ve ever been to Mexico and happened upon a vendor selling Elotes, you know what you’re missing out on! It takes a little extra work and ingredients but the result is totally worth it! An elote is simply corn that is grilled and typically topped with mayonnaise, cotija cheese or queso fresco, chile powder or hot sauce (my favorite is tapatio), and lime juice.

First set your grill to medium high. Grill corn, rotating until hot and lightly charred all over, about 7-10 minutes. Then add toppings! These can vary depending on your taste. The traditional selection is mayonnaise (Mexican mayo tastes much better;) but you can use butter instead and some people add cilantro. I’ve also seen it where they mix all the topping together and then spread in on their corn that way, but I like to add them in layers. Enjoy!

If you don’t have a grill you can easily cook them in the oven! Here’s one take on it that I liked.

Posted on

Breast Cancer Awareness Month

The Month of October is dedicated to Breast Cancer Awareness. In doing research for this article I came across this article from everydayhealth.com. Cancer is complicated and if you or a someone you know is battling cancer, you are in a fight. I have copied and pasted the opening paragraph from the article below.

A cancer diagnosis can often be directly linked to your family medical history, your lifestyle choices, and your environment. You can’t control your family medical history, and only some aspects of your environment are up to you. But lifestyle choices like diet, weight, activity level, and smoking are yours to manage.

“Preventive measures are so heavily underutilized by people. And yet they work. Everything in moderation really works,” says Richard R. Barakat, MD, chief of the gynecology service at Memorial Sloan-Kettering Cancer Center in New York City. (Emphasis mine)

Diseases like Cancer are heart-wrenching and emotionally, physically and financially devastating. I hate what it does to individuals and families. I know that “hate” is a strong word, but what Cancer does to an individual and their family is devastating.

At Klesick farms, we have a plan to come alongside and help. Our Klesick Farms Cancer fighting plan is:

  1. We pray on a daily basis for our customers. If you would like us to pray specifically for you or someone you know who is fighting Cancer (or anything else) Email mike@klesickfarms.com. He organizes our prayer time and customer interactions. All of us care, but Mike is gifted when it comes to caring.
  2. Everything we sell is a part of the solution. We don’t carry GMO products and 95% of what we provide is fruits and vegetables.
  3. Some customers have joined together to fund a families account that is fighting cancer so that they don’t have to shop or think about it. Home delivery is great way to come along side and add tangible help. Call us to set up an account for a friend, co-worker or family member.
  4. Lastly, we have discount program for families fighting cancer or heart disease. If you are in the fight of your life, let us know so we can add the health discount to your account. If you would like to donate towards this, we will make sure your donation gets applied to a family fighting Cancer. We are here to help and be a part of the solution.


Farmer/Health Advocate

Tristan


Recipe: Fried Cabbage with Bacon, Onion, and Garlic

Ingredients:

6 slices bacon, chopped

1 large onion, diced

2 cloves garlic, minced

1 large head cabbage, cored and sliced

1 teaspoon ground black pepper

1/2 teaspoon onion powder

1/2 teaspoon garlic powder

1/8 teaspoon paprika

Directions:

Place the bacon in a large stockpot and cook over medium-high heat until crispy, about 10 minutes. Add the onion and garlic; cook and stir until the onion caramelizes; about 10 minutes. Immediately stir in the cabbage and continue to cook and stir another 10 minutes.

Season with salt, pepper, onion powder, garlic powder, and paprika.

Reduce heat to low, cover, and simmer, stirring occasionally, about 30 minutes more.

Recipe adapted from allrecipes.com


Know Your Produce: Sugar Pie Pumpkins

It’s October and pumpkin season is in full swing (or maybe just pumpkin spice season?). Sugar Pie pumpkins are a dwarf variety pumpkin bread specifically for use in cooking, especially pies, cheesecake, pancakes and flan. One of the sweetest varieties, its bright orange flesh is known not only for its flavor but for its firm flesh that cooks down to a smooth consistency.

Hollow out, stuff and bake as you would an acorn squash. Cubed and roasted, it makes an excellent side dish. Slice into wedges and grill. Cooked down it can be used to make gnocchi, chili, empanadas and curries.

Nutritionally, pumpkins are low in calories & fat, high in fiber, vitamin A and alpha & beta carotenes and packs in some protein. Tasty and good for you!

Posted on

Fall

What happened? One day I am in shorts and a T-shirt and the next I am in my wool L.L. Bean farm coat, which I have been secretly longing to wear again. I got the coat off eBay last year and absolutely love it. I also love the fact that it is 60 years old and was made when life was a little simpler.

Simpler times – doesn’t that sound nice? Everything is so complicated and fast paced. It takes effort just trying to “unplug.” Having lived in both centuries, I realize that we do have more choices with technology now, but I also think life was pretty crazy during the simpler times as well. It might have more to do with expectations, choices, or circumstances, than the actual era we are living in. And besides we are not rolling the clock back to the first Full House or Leave it to Beaver, either. So we have to figure it out for today.

Good things take time and often take time to plan. It is the same with living a healthy life. Living a healthy life takes a little planning and a little work and then with each small intentional step we build, maintain, and increase our health and our family’s health.

But those small steps can seem like big ones, especially in our minds, when the pressure of life is pressing in upon us: laundry, mowing the lawn, soccer practice, school activities, church, connecting with children or parents, doctor appointments, the list can stretch for miles.

I know that it is easier to eat the “organic” (or nonorganic) version of a health bar, a bag of chips, a pre-frozen meal or some snack foods than it is to make a meal from scratch. Processed foods are just more convenient and quite honestly just easier. And we often console ourselves with, “well at least it is organic.”

And, yes organic processed foods are better options, but what if we could make cooking with fresh fruits and vegetables more of a priority? What would be the benefit? A slower pace of life would be one, at least at that moment when we are preparing and cooking dinner or preparing lunches for the next day. Even if the kiddos wolf it down in five minutes or less. Anther benefit is that eating more fruit and vegetables in their minimally processed forms can lead to weight loss, lower blood pressure and an overall increase in vitality.

Maybe the side benefits to cooking are worth the extra steps in planning and preparing. Hmmm?

Farmer Tristan


Featured Recipe: Stir-Fry Mushrooms & Bell Pepper

Ingredients:

2 tablespoons olive oil 3 green onions, slice 3 garlic cloves, minced 1 bell pepper, deseeded and diced 1 package mushrooms, sliced 1 tablespoon Chinese rice wine 2 -3 tablespoons soy sauce 1-2 teaspoons sesame seeds

Directions:

1. Heat oil until hot. Stir fry onions (1 minute), then garlic (20 seconds). Then add the pepper and mushrooms. Stir-fry until it becomes a bit soft, (about 2 minutes).

2. Add the wine and soy sauce and continue to stir for 2 minutes.

3. When done, remove from heat and add the sesame seeds mixing it all together, and serve.


Know Your Produce: Kiwi Berries

Brought from Asia to the United States in the 1800s, the kiwi berry packs a big nutritional punch as the most nutrient-dense of all major fruits. Not just good for you, kiwi berries are delicious! Each variety has a unique flavor and color and their smooth skins make them the perfect snack. They can be eaten fresh, in salads, salsas, dessert sauces, ice cream and sorbets. Their tropical tastes pair well with orange, honey, and chocolate.

Kiwi berries should be allowed to ripen at room temperature. When they are ready to be enjoyed, the berries will turn a dark green color and feel slightly soft to the touch. Unlike most fruits, they are not ready to eat until they look slightly wrinkled and soft. Once they are ripe, store them in the refrigerator for up to two weeks or eat immediately. Let them come back up to room temperature before eating.

Posted on

Have You Heard of Turmeric?

If you’ve never heard of it, you’re not alone! Little did I know, growing up in Peru, that I ate many Peruvian dishes that use turmeric, thanks to our African influence. In its powder form we call it “palillo.” I was over-the-moon ecstatic to find out that Klesick Farms offers fresh turmeric root! Although it’s not in the Klesick boxes this week, it is an amazing product you can add to your future orders. Let’s take a look at this popular ingredient in Indian, Asian and African cuisine. Turmeric is one the most thoroughly researched plants in existence today. Its medicinal properties and components (primarily curcumin) have been the subject of over 5,600 peer-reviewed and published biomedical studies!

Also known as curcuma, turmeric belongs to the ginger family. It gives curry its peppery taste and characteristic yellow color. Curcuma, which is responsible for turmeric’s yellow color, is also its most active medical component. Studies show that raw turmeric contains higher curcumin content in comparison to its counterpart turmeric powder.

According to studies, turmeric contains components that are both anti-inflammatory and antioxidant, making it useful for treating arthritis, inflammatory conditions and possibly cancer. As a strong antioxidant, turmeric is rich with a substance believed to protect body cells from damage caused by oxidation. In promising, but very early research results, curcuma has kept several kinds of cancers from growing or spreading.

Okay, so how you can use raw turmeric? I’ve included a recipe (below), but you can also use raw turmeric to:

* Make golden milk: Heat 2 cups light unsweetened coconut milk (or almond milk) with 1 tablespoon peeled, grated fresh ginger and 1 tablespoon peeled, grated fresh turmeric and 3-4 black peppercorns. Bring to a simmer and simmer covered for 10 minutes. Strain and sweeten to taste (if desired). Great before going to bed!

* Add to curries and rice

* Add to juices and smoothies

* Add to salads and stir fries, and so on…

One newsletter is not long enough to list the many benefits of turmeric. As per how to use it, the list is endless and just limited by your imagination!

Sara Balcazar-Greene (aka. Peruvian Chick)
Peruvian Food Ambassador
peruvianchick.com
instagram.com/peruvianchick
facebook.com/theperuvianchick


Recipe: Turmeric-Ginger Chicken Lettuce Wraps

Ingredients:

1 2½ to 3-inch piece ginger root

1 3-inch piece turmeric

1 small shallot, peeled

2 small potatoes, diced

2-3 medium cloves garlic

½ cup soy sauce

1 tablespoon Sriracha sauce (optional)

Juice of one large lemon

2 tablespoons water

2 pounds boneless skinless chicken breast, cut into approximately ½-inch strips

1 tablespoon virgin coconut oil

2 large carrots, shredded

3 tablespoons minced fresh cilantro

1 head of butter lettuce, leaves separated, cleaned and dried

Directions:

1. Using the small holes of a grater, finely grate ginger, turmeric, garlic and shallot into a large glass mixing bowl. Add soy sauce, Sriracha, lemon juice, water and whisk to incorporate.

2. Add chicken strips and toss well to coat with marinade. Cover with plastic wrap and marinate for at least 30 minutes up to 2 hours in the refrigerator, stirring occasionally to make sure the chicken is coated.

3. Heat oil in a large sauté pan over medium heat. Add potatoes until they are cooked half way though. Add chicken and sauté in a single layer; turning pieces with a spatula as they cook. Continue stirring until chicken is cooked through, about 15-20 minutes. Remove chicken from pan and transfer to a serving dish; cover to keep warm. To serve, place 4-5 chicken strips inside a lettuce leaf.

4. Top with approximately ½ tablespoon of shredded carrots and sprinkle with a pinch of cilantro.


Know Your Produce: Bartlett Pears

Did you know that Bartlett Pears contain probiotic benefits that support your gut health? New research has found that pears can balance beneficial gut bacteria.

Ripened pears can be used at once or put under refrigeration until you want to use them. Refrigeration will delay further ripening, but will not stop it altogether, giving you adequate time to include fresh pears in your menu planning.

A ripe pear is a sweet pear. A little known fact about the pear is that it is one of the few fruits that does not ripen on the tree. The pear is harvested when it is mature, but not yet ripe, and, if left at room temperature, it slowly reaches a sweet and succulent maturity as it ripens from the inside out.

Place under-ripe pears in a fruit bowl at room temperature near other ripening fruit, like bananas, which naturally give off ethylene and will help speed up the ripening process. And if you find yourself with a few too many overripe pears, blend them into smoothies, soups, sauces and purees!

Posted on

Savoring Summer

I am not going to be one of those people that starts lamenting the end of summer at the beginning of August, but I won’t lie – I’m feeling the end ticking nearer and nearer. Okay, so maybe I am one of those people, but rather than hosting a pity party and shedding tears that there weren’t enough tomatoes, days with sand in our toes, and sun on our faces, I’m going to do my best to soak up each day.

It’s probably no surprise that one of my favorite ways to savor the season is to eat of its bounty. So from here until the end of September, you will find me eating pounds and pounds of tomatoes, serving up slices of melon with a whisper of vanilla salt (just tried it last night for the first time and I’m never going back), picking blackberries off the wild vines, eating fresh peaches and letting their sweet juice drip down my arms and face.

We’ve had a pretty incredible summer this year and perhaps that’s why I’m already feeling a bit of sadness to see the days slip away so quickly, but what I’ve learned with seasons – any season in life – is that if you spend your time willing it to not pass, it won’t listen to you. I’d rather spend these days tucking away flavors and memories to recall when another season is upon us.

This recipe mingles all of my favorite flavors of summer into one bowl. It’s where sweet and savory collide into a flavorful salad filled with vinegar-spiked bread and a showering of fresh herbs. We really believe in the adage “What grows together, goes together” here, when peaches and tomatoes become fast friends. And it’s not just with this recipe—the next time you make the classic Caprese salad, try slipping in a few peach or nectarine slices there as well.

I hope that we all find the time to savor all that this season blesses us with. And may there be an endless supply of tomatoes and peaches until squash hits the basket.

Ashley Rodriguez

NotWithoutSalt.com

Award-winning food blogger

Author of Date Night In


Featured Recipe: Roasted Tomato and Peach Panzanella

SERVES 4

Ingredients:

1 pint / 280 g cherry tomatoes, divided

1⁄2 teaspoon kosher salt, plus more as needed

1⁄4 cup / 60 ml extra-virgin olive oil, divided

3 cups / 85 g 1⁄2-inch bread cubes from a rustic loaf

2 garlic cloves, minced, divided

1 peach, diced

1 tablespoon red wine vinegar

1⁄2 teaspoon dried oregano

1 cup chopped assorted herbs (I used basil, dill, mint, and tarragon)

1 cup baby arugula

1⁄3 cup / 60 g goat cheese, crumbled

Directions:

1. Preheat the oven to 350°F. Line a baking sheet with parchment paper.

2. Place half the pint of cherry tomatoes on the prepared sheet and toss with a generous pinch of salt and 1 tablespoon olive oil. Roast for 45 minutes, gently stirring halfway through the cooking process. Cut the remaining cherry tomatoes in half and set aside.

3. Place the cubes of bread on a second parchment-lined baking sheet and toss with 2 tablespoons olive oil, a pinch of salt, and 1 minced garlic clove. Toast for 20 to 25 minutes, or until golden brown and completely crisp, stirring after 10 minutes. Remove and cool to room temperature.

4. In a large bowl, combine the roasted tomatoes, remaining minced garlic clove, diced peach, vinegar, oregano, 1⁄2 teaspoon salt, and remaining 1 tablespoon olive oil. Gently toss to combine and let sit at room temperature for 30 minutes.

5. Finish the panzanella by adding the crisped and cooled bread cubes to the bowl, along with the herbs, unroasted tomatoes, and arugula. Toss well and let sit for 10 minutes so that the juices start to soften the bread, still leaving a crunch. If you prefer the bread a bit softer, you can let it sit for longer.

6. Finish with crumbled goat cheese and serve.


Know Your Produce: Summer Stonefruit Care

Stonefruit’s (peaches, nectarines, pluots, etc.) biggest enemy while ripening is moisture, coupled with lack of airflow. Set ripening stonefruit on a cloth or paper-covered counter top or in a place where it gets plenty of airflow. Try setting them stem side down to ripen, which lessens the chance of them rolling and bruising.

To test for ripeness, gently press around stem – when flesh gives slightly to pressure fruit is ripe. Never squeeze the sides of the fruit, as even a small bruise will be cause enough to turn into a rot/bruised spot on your fruit as it is still ripening. Stonefruit ripens from the inside to the outside, so if fruit is soft all over it is most likely overripe.

Once your stonefruit is ripe, it deteriorates very quickly. Within a day of being fully ripe, if left out of refrigeration, you can have overripe/spoiled fruit and some very attracted fruit flies. Check daily and place in refrigerator as soon as you notice the stem area has begun to soften. Once refrigerated, plan to use within a day or two.

Posted on

Update: Operation Stem the Tide of Weeds

Thankfully, school is over and a few weeders, pickers, farm hands and all around great people have some time to dedicate to working! Managing a vegetable operation around a school, sports, assemblies, life, etc. schedule keeps me hopping (much like those rabbits that seem to be everywhere!) With school removed from the equation, we can dedicate some serious attention to weeding and other farm chores.

With weather patterns changing we are able to plant a little earlier, but the crops are ready even earlier than my psyche is accustomed to. This makes it a hair harder to manage when school gets out mid-June and the farm is in full production early May. In fact, I am thinking that we should all start referring to June strawberries as May strawberries! And correspondingly, have school get out in May. 🙂 This is a little tongue-in-cheek, of course, as we can’t change our school system to the benefit of the farmers. After all, there are more people incarcerated in America than there are farmers, and the number of farmers who actually grow fruits and vegetables is considerably smaller yet.

But back in the early 80’s in south Everett, a school bus would show up and bunch of middle and high school kids would climb on and head off to the berry fields in Marysville and Mount Vernon. Once they’d finish with berries, they’d start picking pickling cucumbers. Granted that was 30+ years ago, but agriculture was still a vibrant part of our economy; enough so that hundreds of kids from Everett would load up on buses and head to the fields. Many of these kids probably had parents who had done a similar thing when they were in school. Did any of you catch that bus or work on farms when you were in high school?

Sadly, most of that work has gone the way of the dinosaurs – replaced by chemical applications and mechanization. What also happened was a large migrant force of workers replaced the kiddos and the farmers also chose to not grow those labor-intensive crops any longer. Eventually, the school buses stopped coming and good summer jobs for young people stopped as well.

Farming is hard work and growing vegetables organically is very labor intensive. If we could shift our national food policy from corn and soybeans to fruits and vegetables, that would stimulate the farm economy to hire more young people. Eating organically grown fruits and vegetables is so critically important to the health of our nation (think diabetes, cancer, hypertension, etc.) and to the local environment (think salmon, swallows, earthworms, rabbits, trees, etc.).

Farming for you, the environment, and the health of our nation.

Tristan


Recipe: Garlic Scape and Swiss Chard Pesto

Ingredients: 1 bunch garlic scapes 1 bunch swiss chard, leaves only 1/4 cup raw walnuts (optional) 1/2 – 1 teaspoon crushed red pepper flakes (optional) Juice from half a lemon 1/2 cup extra-virgin olive oil Salt and pepper, to taste

Directions:

1. Blanch the Swiss chard leaves in boiling water for about 30 seconds, just to remove chalky taste. Rinse under cold water and squeeze out the water.

2. Put blanched Swiss chard, garlic scapes, walnuts, crushed red pepper and lemon juice into the bowl of your food processor and process until still slightly chunky. Gradually pour olive oil in to feeder tube and continue processing until smooth.

3. Season with salt and pepper.

4. Serve tossed with your favorite gluten-free pasta, add a little of the cooking liquid from the pasta to loosen up the sauce, if you wish.

Recipe from tasty-yummies.com


Know Your Produce: Garlic Scapes

Garlic scapes are the beginning of what would be the garlic plant’s flower; if they’re left on the garlic plant, less energy goes towards developing the head of garlic underground. So, by harvesting these scapes, you cooks get an early taste of the garlic to come down the road, and the bulbs can keep developing.

You can use scapes just like you would garlic; their flavor is milder, so you get the nice garlic taste without some of the bite. Use them on top of pizza, in pasta, and as a replacement for garlic in most other recipes.

Store: Store garlic scapes in a plastic bag in the crisper section of your refrigerator. Store away from your fruit, because garlic is generous with its fragrance, and you may not appreciate biting into a peach and tasting…garlic. Garlic scapes will keep up to two weeks if kept in an airtight container.

Prep: Wash under cool water when ready to use.

Posted on

Summer, we taste you near!

In a true bit of parenting hypocrisy, I’m encouraging, rather, pleading with my children to finish the school year strong while I’m staying up with the sun, ditching work to feel its warmth on my skin, and sneaking away to tuck into the raspberry bushes to taste what to me is summer boiled down into one sweet, tart bite.

“Only one more week of school!” I tell them, hoping that that’ll be the boost they need to finish with a smile on their faces, rather than the moans and groans I hear as I attempt to motivate them out of bed. Meanwhile, I’m still in bed with the lingering scent of smoke from the fire we sat around while staying up far too late on a school night the evening before.

Summer, what we’re saying is, we are so ready for you. We’re ready for your long days, your leisurely activities, and the way you manage to change our priorities so that much of our day can be spent outside. I’m ready for the garden you help me grow, the camping trips you inspire, and the food that sweetens and softens in your heat. I always romanticize you when you first appear. Of course I do know that shortly, with three kids at home, there will be the “I’m boooooored” chorus singing its familiar tune, but I’m choosing to ignore that reality and live in the delight of a new season.

The newness of the nearly summer days have all of us delighted by what’s growing. The kids, without prompting, headed to the garden to pluck the first of the raspberries off the vines, with plans of raspberry ice cream. Their plans never made it to the freezer, as we (mostly me) ate the whole bowl. With the few leftover berries I found this morning, I made my girl what I proclaimed to be the best sandwich of her life – mascarpone slathered between two pieces of seedy bread, and studded with fresh raspberries that practically turned to jam under the weight of its top cover. It was my little way of saying, “Summer is nearly here. Finish strong.” I’m telling myself that too.

Ashley Rodriguez
Award-winning food blogger
Author of Date Night In


Recipe: Fresh Raspberry Scones

This recipe has been made no fewer than a hundred times in our house. These shortcakes are our scones, the cobbler on top of our baked fruit, and sometimes, with the addition of herbs or cheese, savory biscuits to accompany dinner.

The trick here is not to overwork the dough. It’s a very crumbly mass once it comes out of the bowl, but that’s why the finished texture is so light and tender. Don’t knead the dough together, but rather press it until it just holds. This dough can be made by hand, in a food processor, as it is written, or in a stand mixer.

Makes 8 shortcakes

Adapted from Date Night In, by Ashley Rodriguez

Ingredients:

2 cups / 270 g all-purpose flour

1 teaspoon kosher salt

1 tablespoon aluminum-free baking powder

3 tablespoons granulated sugar

1/2 vanilla bean, seeds scraped (optional)

1⁄2 cup / 115 g unsalted butter, diced into 1⁄2-inch cubes, chilled

1 cup / 240 ml plus 2 tablespoons heavy whipping cream, divided

1 – 1 1/2 cups fresh raspberries

3 tablespoons Turbinado or granulated sugar

Directions:

1. In the bowl of a food processor, combine the flour, salt, baking powder, granulated sugar, and vanilla bean seeds, if using. Pulse a few times to combine and break up any clumps.

2. Add the butter, scattering it over the flour. Pulse 15 times to break up the butter. The mixture will look sandy, with some larger pieces of butter throughout.

3. Pour 1 cup / 240 ml cream over the dough and pulse an additional 20 times. Add the raspberries and pulse just a couple more times to combine. The dough will look crumbly and dry.

4. Dump the dough onto an unfloured work surface and use the palm of your hand to work the dough just until it holds together. You don’t want to overwork the dough, as this can make it tough. Gather the dough together into a 6- to 8-inch round (for making wedge-shaped scones) or a rectangle (for cutting out round biscuits).

5. Use a brush or your fingers to spread the remaining 2 tablespoons cream in an even layer on top. Sprinkle the extra sugar, if using, on top of the cream. Chill the dough for 30 minutes.

6. Preheat the oven to 400°F. Line a baking sheet with parchment paper.

7. Cut the dough into the desired shapes and then place them on the baking sheet. Bake for 20 to 25 minutes, or until deep golden along the edges.

8. Cool to room temperature on a wire rack.

9. These are best served the day they are baked. Unbaked dough can be wrapped and frozen for up to 1 month.

Note: Often I make these by hand and simply grate the chilled butter into the dry ingredients with a cheese grater. From there I toss the butter and dry ingredients together, breaking up any large clumps with my hands, and then stir in the cream.

For extra flaky layers, give this dough 1 or 2 turns as you do in the Quick Puff Pastry recipe (page 19 of Date Night In).

Posted on

Breathe

There is a brief lull in the action coming my way soon. Most of our first plantings are in. Round two for the beans, summer squash, and corn will start in another week. Also, we are seeing blossoms on some of the early sugar snap peas! I am thinking that probably next week we will have a lighter load before we start harvesting lettuce, weeding everywhere, and more plantings.

A few years ago, I planted a new blackberry variety called Black Diamond. This season is its first fruiting and it is way earlier than I expected. I also grow some Doyle blackberries and they come on considerably later than the raspberries, but I am thinking that the Black Diamonds may be earlier than the raspberries—time will tell.

Why did I plant blackberries? Because I like them! And I also like not having to fight with the wild blackberries that engulf a mile of my property line. The Black Diamond is a “thorn less” variety that I can contain, farm, and harvest much more reliably. Harvest is an important consideration. It is hard enough trying to find farm help and it is even harder to find farm help to pick wild blackberries!

Blackberries and raspberries also grow upright and this older 6’ 2” frame of mind appreciates harvesting while standing up. This provides a nice break because practically everything else we grow on our farm is grown and harvested at ground level (e.g., lettuce, strawberries, cucumbers, squash, etc.)

The local season is upon us and local food will be finding its way into your boxes of good food from now on!

Enjoy!

Farmer Tristan


Recipe: Balsamic Chicken with Baby Spinach

Ingredients:

1 tablespoon olive oil

3 cloves garlic, chopped

2 (8-ounce) boneless, skinless chicken breasts, halved

1 bunch baby spinach, trimmed

2 tablespoons balsamic vinegar

1/3 cup low-sodium chicken broth (or vegetable stock)

1 cup canned chopped tomatoes with juice

2 cups whole wheat couscous, cooked (substitute with rice for gluten free option)

Directions:

1. Heat a large saute pan over medium-high heat.

2. Add the olive oil and heat.

3. Add the garlic and cook for 1 minute.

4. Add the chicken and cook about 4 minutes per side, or until cooked through and juices run clear. Remove the chicken and set aside.

5. To the same pan, add the spinach and cook just until wilted, about 1 to 2 minutes.

6. Remove from the pan and set aside.

7. Lower the heat to medium and add the balsamic vinegar and chicken broth to the pan and stir, scraping the bottom of the pan to remove any browned bits.

8. Add the tomatoes, bring to a simmer and cook 3 to 5 minutes.

9. Place the couscous in a serving bowl.

10. Top with the spinach, chicken and balsamic-tomato sauce.

Adapted from Ellie Krieger’s recipe from foodnetwork.com


Know Your Produce: Bartlett Pears

Did you know that Bartlett Pears contain probiotic benefits that support your gut health? New research has found that pears can balance beneficial gut bacteria. Check our blog this week for more info on the benefits of pears!

Ripened pears can be used at once or put under refrigeration (35º to 45º F) until you want to use them. Refrigeration will delay further ripening but will not stop it altogether, giving you adequate time to include fresh pears in your menu planning. Remember, pears need to ripen at room temperature, so don’t refrigerate an unripe pear!

A ripe pear is a sweet pear. A little known fact about the pear is that it is one of the few fruits that does not ripen on the tree. The pear is harvested when it is mature, but not yet ripe, and, if left at room temperature, it slowly reaches a sweet and succulent maturity as it ripens from the inside out.

Store: Place under ripe pears in a fruit bowl at room temperature near other ripening fruit like bananas, which naturally give off ethylene and will help speed up the ripening process. And if you find yourself with a few too many overripe pears, blend them into smoothies, soups, sauces and purees!

Posted on

The Bowl Craze Explained

The one-dish meal is having its moment. The bowl craze started with the smoothie bowl and has since become a menu staple in many kitchens and restaurants for breakfast, lunch and dinner. Even if you haven’t seen one of these protein-packed bowls on a menu, you’ve likely seen one on your Instagram feed.

Though its contents may vary, most grain bowls follow a simple blueprint. It begins with a grain base, like rice or quinoa. Then, you could spoon almost anything over your grains and call the result a bowl (and some do). But the best bowls have a balanced combination of flavors and textures, and of vegetables, proteins, sauces and garnishes. Let your creativity soar in the combination of toppings and you’ll be surprised with the results!

Once you have selected your grains, you then need veggies – preferably something green, like kale or spinach. Raw, cooked or steamed vegetables will work great too.

Now you need a protein. Think of small amounts of braised or roasted meats, whether left over or freshly cooked. Beans are a great option as well. Adding a soft-cooked egg, preferably one with a runny yolk to coat the other ingredients like an instant sauce, is always a great idea.

Once you have the bowl assembled – grains, vegetables and protein – it’s time to think about garnishes, which add character and depth. Something pickled or pungent keeps things interesting, and something crunchy (sesame seeds or nuts) diversifies the textures.

Finally, a sauce on the side for everyone to mix in to taste. Use ingredients that mesh with the flavors of the bowl. Combine soy sauce, sesame oil, ginger and rice vinegar or lime juice for Asian-inspired combinations. Pesto goes nicely with roasted red peppers, eggplant or anything else vaguely Mediterranean. A simple salsa works great for a Latin inspired bowl. Bottled hot sauce provides spice to the fire-toothed. And a basic vinaigrette will get along with practically anything else.

Another reason for grain bowls’ popularity is that they’re very customizable. Mix and match. Then mix and match again. If you do it right, you will never serve the same bowl twice – not unless you want to, that is.

Last but not least, bowls can be seasonal! In today’s world of mass production and far-flung distribution, the seasons blend together. Fruits and veggies that used to be available just once a year can now be found 365 days a year. However, thanks to our local farmers we can enjoy ingredients at their prime and find them more flavorful and nutritious than their off-season counterparts.

No wonder the bowl has become a favorite way of eating: out of a bowl, fresh ingredients, bold seasonal flavors, and various textures and temperatures. I’m in – time to mix and match!
Sara Balcazar-Greene (aka. Peruvian Chick)
Peruvian Food Ambassador
peruvianchick.com
instagram.com/peruvianchick
facebook.com/theperuvianchick


Kale-Pesto Quinoa Bowl

Ingredients:

2 large eggs

2 cups cooked quinoa

1 avocado ¼ cup homemade pesto

1 roma tomato, chopped

1 cup baby broccolini, lightly sautéed with salt and pepper

1 cup mushrooms, lightly sautéed with salt and pepper

For the pesto:

2 cups fresh basil leaves

1 cup fresh kale leaves

¼ cup parmesan cheese

¼ cup pine nuts + plus a handful for garnishing

1 large garlic clove

3 – 4 tablespoons olive oil

1 teaspoon lemon juice

Salt + pepper to taste

Directions:

Cook the eggs to your liking. I like mine runny so I cook them for exactly 7 minutes in boiling water.

While the eggs are cooking, add all the pesto ingredients to a food processor. Process until almost smooth.

Prepare your breakfast bowls: Add 1 cup quinoa, broccolini, mushrooms, tomatoes and half of the avocado thinly sliced and pesto sauce to taste.

When eggs have cooled, peel them and slice in half. Add to the bowl and sprinkle with pine nuts.