
Posted on

How to Eat Your BOX! (Week of 9/3/17)

StarKrimson Pears:

They are delicious just raw and out of the box, but if you are looking for something different, try sautéing them in butter with a drizzle of maple syrup or honey and serve them over almond butter toast. Or try adding them (thinly sliced) to a grilled cheese sandwich or your panini!

Patty Pan Squash:
Heat olive oil and butter in a skillet over medium-high heat until it foams up, usually 1 to 2 minutes. Sauté 1 small onion (diced) in the olive oil-butter until tender and translucent. Add sliced squash and garlic; season with lemon pepper. Sauté until squash is easily pierced with a fork, 5 to 6 minutes.

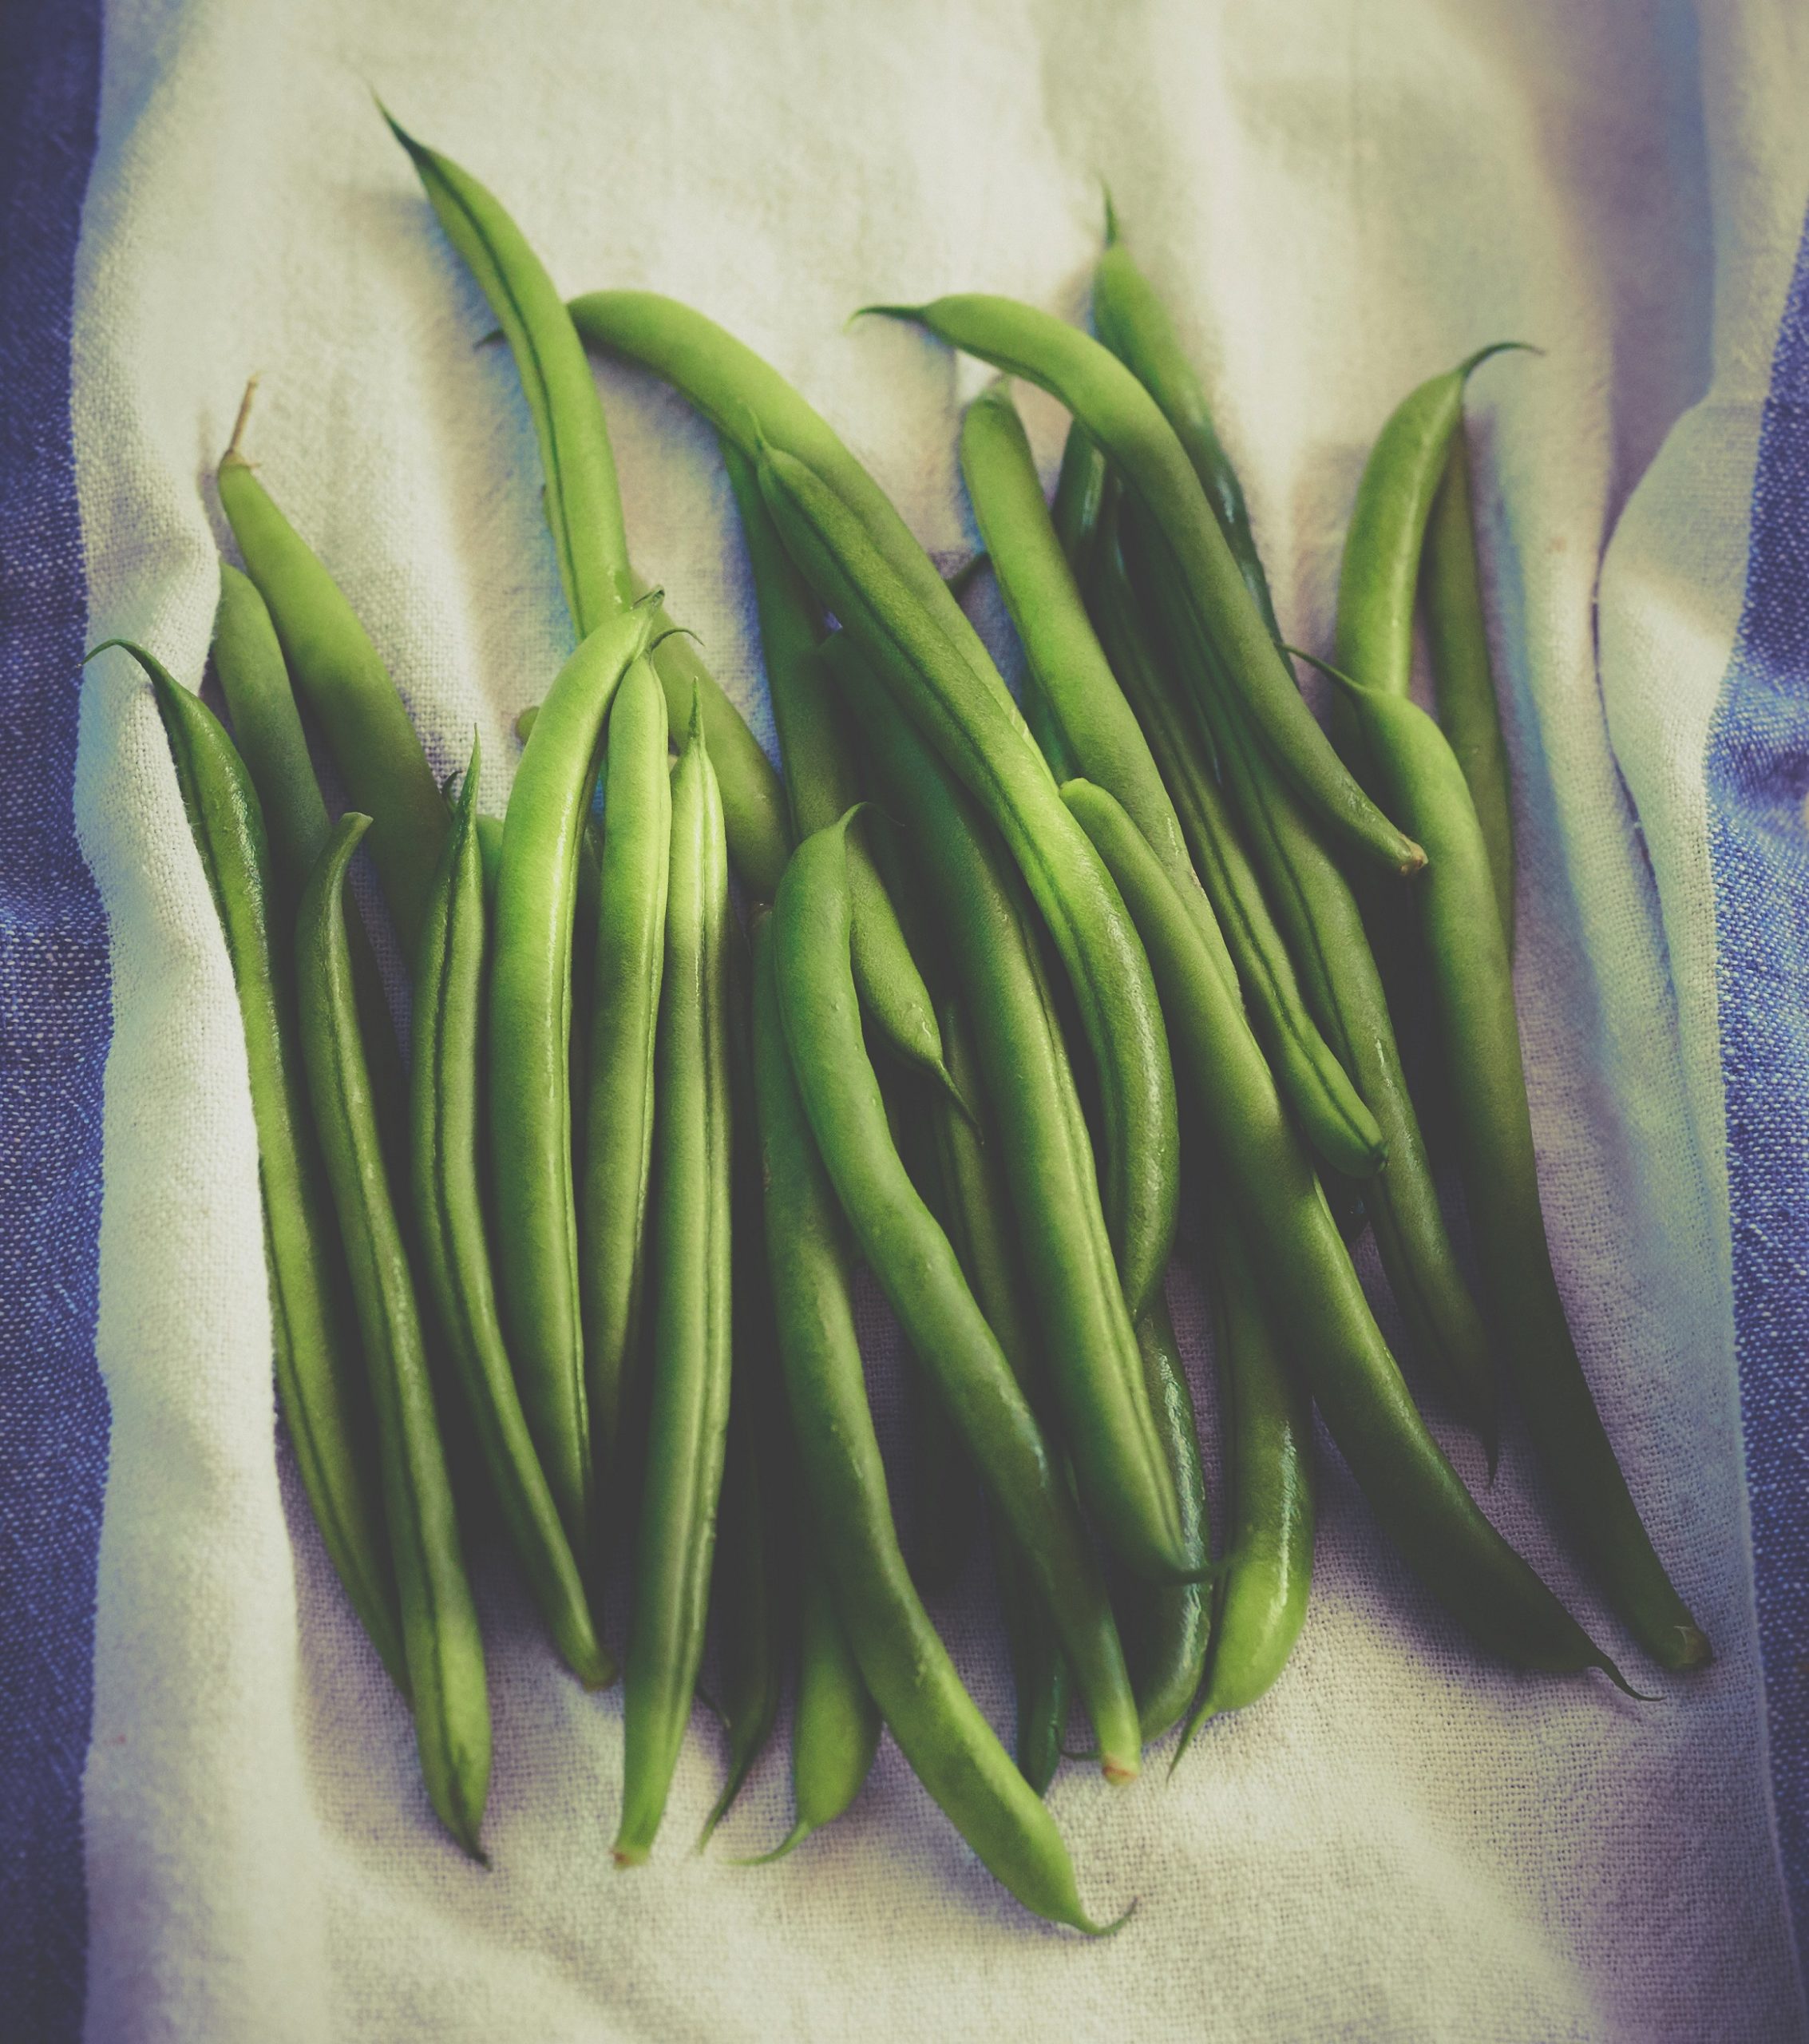
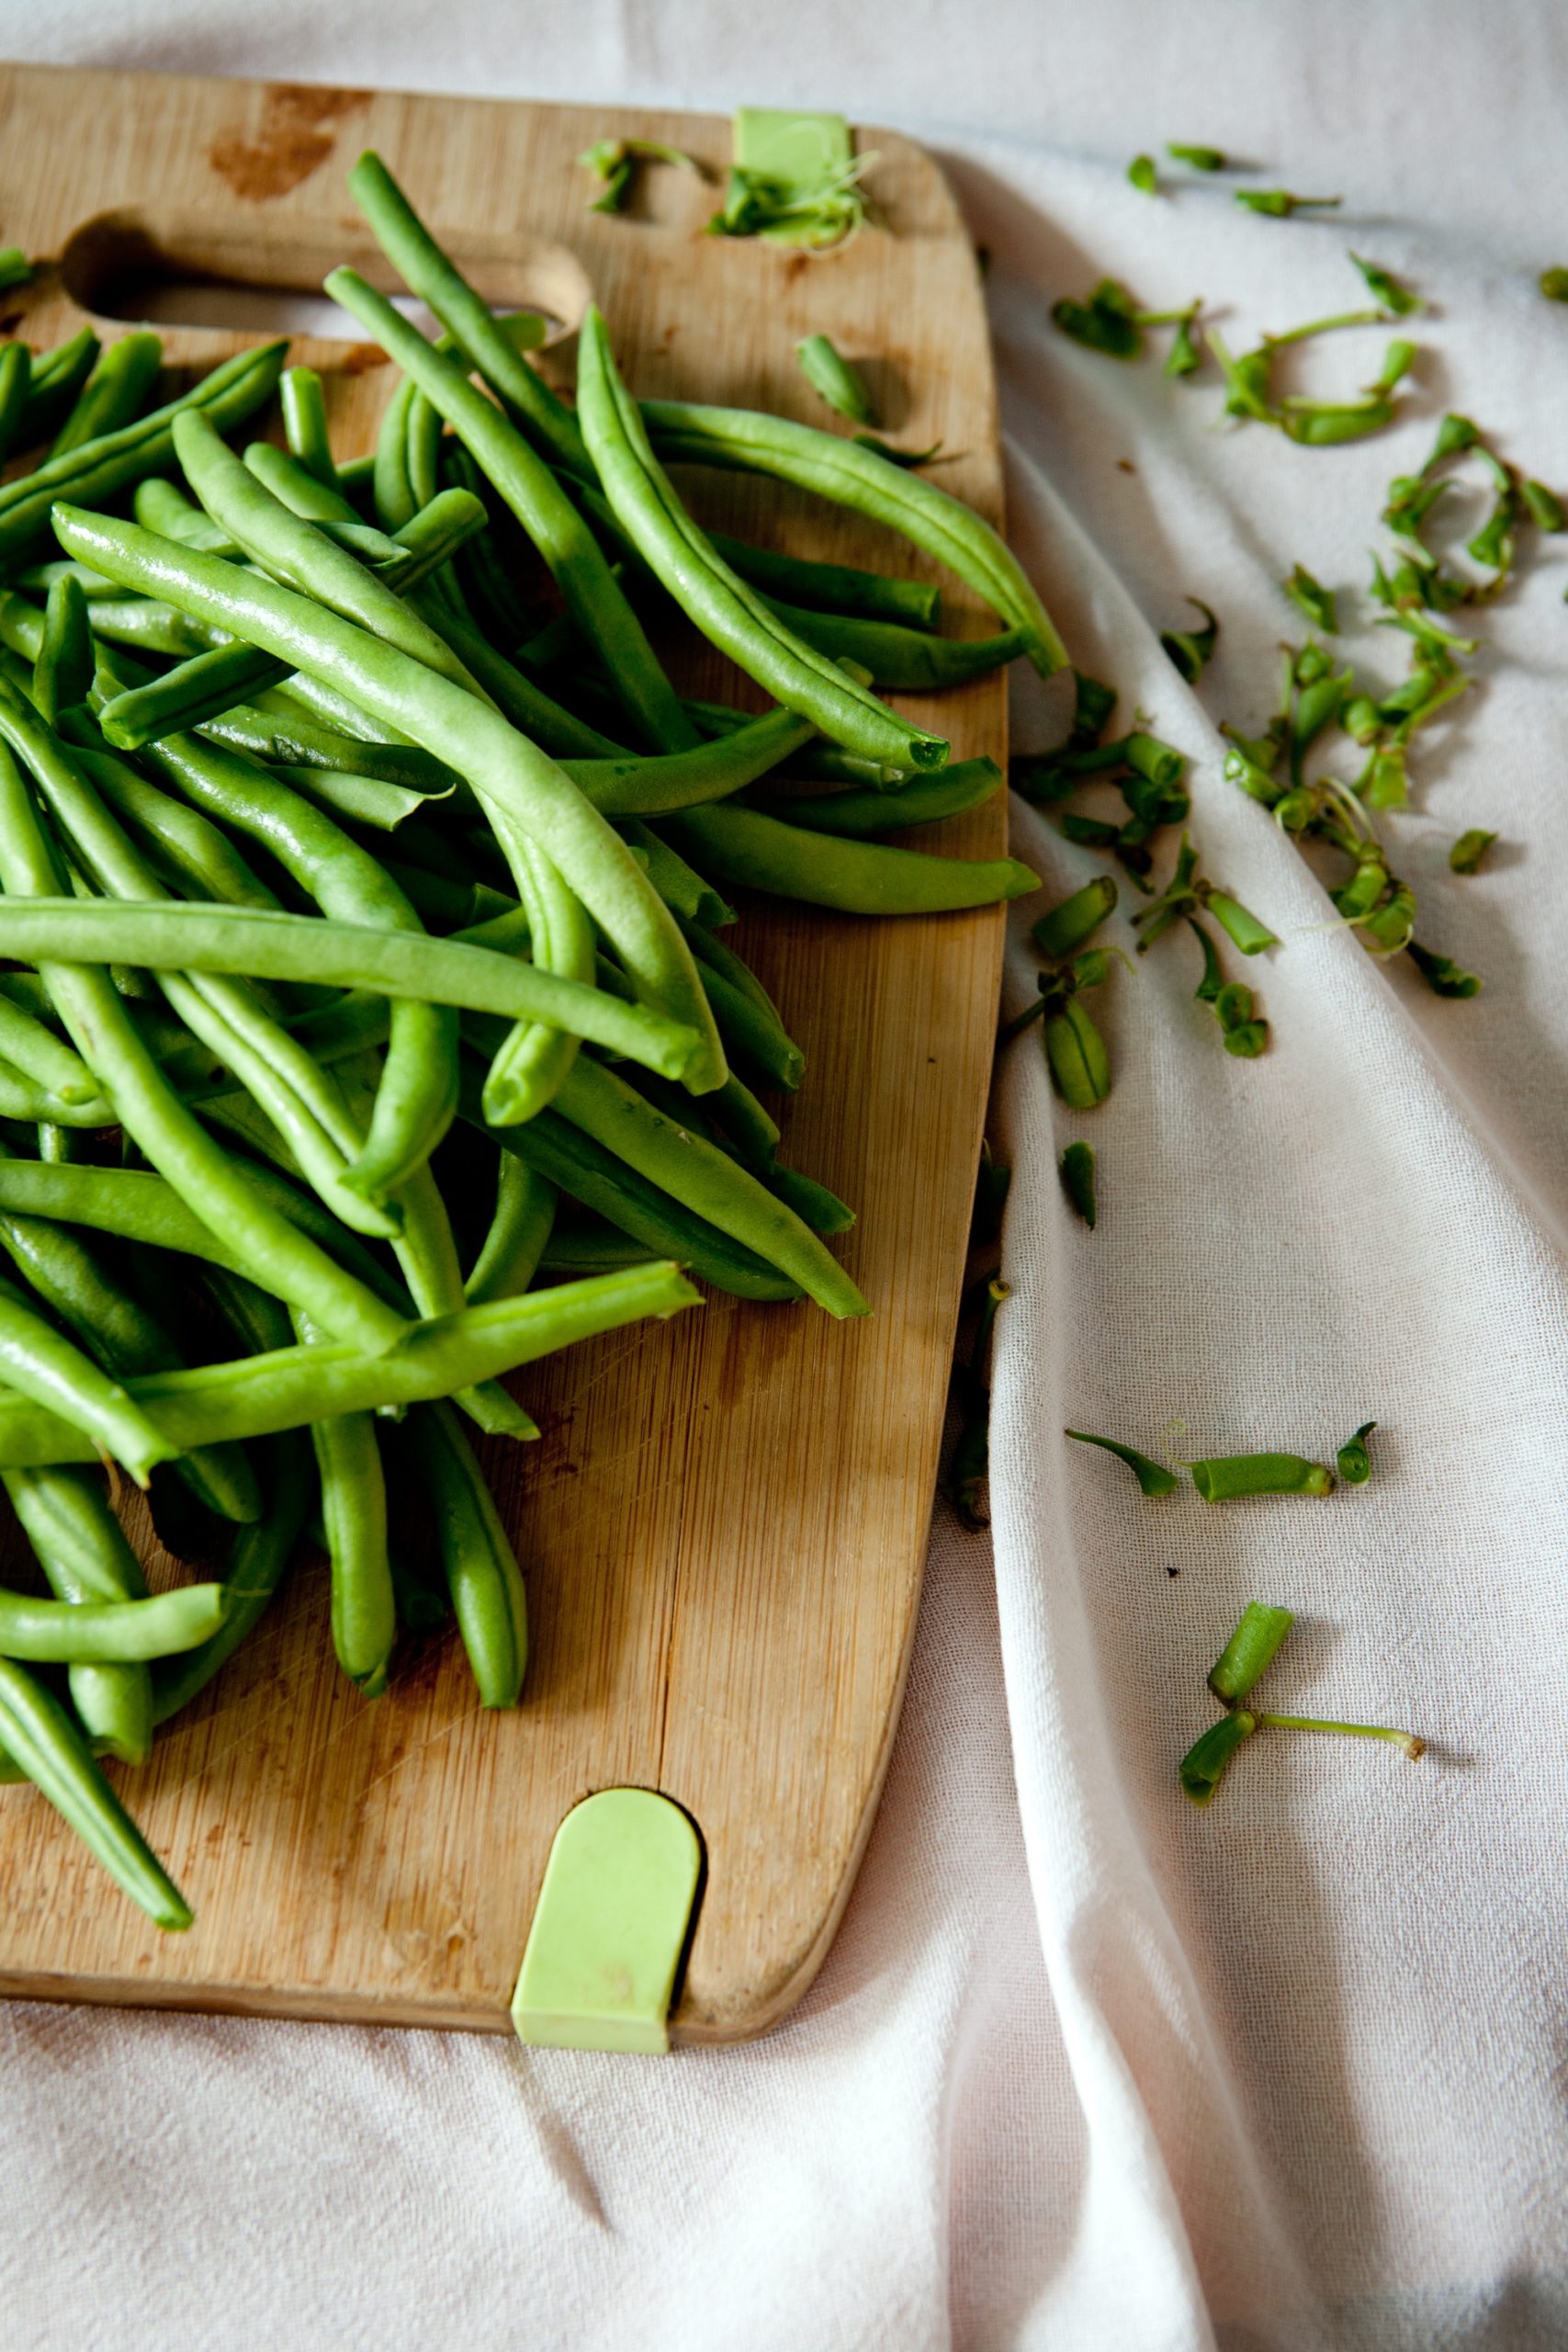
Green Beans:
You can enjoy raw or cooked, in salads, soups or by themselves. My go-to meals are anything stir-fry. They are quick to make, simple, and healthy. Green beans make a delicious stir-fry, check out the recipe, below!

Chicken – Green Bean Stir Fry – by Peruvian Chick

Ingredients:

1 lb. boneless, skinless chicken breasts, thinly sliced
1½ teaspoons cornstarch
3 tablespoons soy sauce, divided
2 tablespoons honey
2 tablespoons sesame or vegetable oil, divided
6 scallions, ends trimmed, cut into 1-inch pieces on the diagonal
1 2-inch piece ginger, peeled, thinly sliced crosswise
12 ounces green beans, trimmed, halved crosswise (about 4 cups) OR 1 lb. Patty Pan Squash, cut into 1-inch pieces
Steamed white rice and sesame seeds (for serving; optional)
Salt

Instructions:
1. Prep all of your ingredients and have them ready and handy to use. Toss chicken, cornstarch, a pinch of salt and 1 Tbsp. of soy sauce in a medium bowl.
2. Heat 1 Tbsp. of oil in a large nonstick pan over high heat. When oil is hot, add scallions and ginger and cook, tossing until scallions are browned and softened, usually about 2 minutes. Add green beans and a pinch of salt and cook, tossing often, until green beans are crisp, but still tender, usually about 4 minutes. Transfer green bean mixture to another bowl.
3. Heat the remaining 1 Tbsp. of oil in same pan over high. When oil is shimmering again, add chicken mixture and arrange slices in a single layer. Cook, until chicken is browned and caramelized on the first side. Toss and continue to cook until it is completely cooked through, usually about a minute or two longer. Pour in the soy-sauce & honey mixture along with the green bean mixture, and cook, tossing briskly until sauce is thickened and all ingredients are coated, usually about 30 seconds. Remove from heat and taste, rectify seasoning and serve with white rice. Enjoy!
Posted on

How to Eat Your BOX! (Week of 8/27/17)

Bartlett Pears:
Try adding them to a salad this week! Cut into wedges or cubes they would make a great addition to this week’s red leaf lettuce. For dressing, try mixing a tablespoon of balsamic vinegar with a little bit of Dijon mustard and about 1/8 cup of maple syrup. Mix together with a wire whisk and beat in an eighth cup of olive or avocado oil. I would probably double the recipe if serving more than 3 people. Can also be topped with gorgonzola, feta, or goat cheese and pecans (or walnuts). Pro tip: The skin of Bartlett pears brightens as it ripens. Bartlett pears are ripe and ready to eat once they change from green to yellow in color. Refrigerate after pears are ripe.
Kale:
Kale is just wonderful and it’s so good for you! One great thing about kale as a salad is that it keeps well in the fridge, so you can make ahead of time and not worry about it wilting. For prep: rinse well upon opening your box, de-stem, and you have it ready for the week! (The stems make a great addition to a stir-fry, or soup stock – don’t toss them!); For a fresh salad: chop the leaves small, sprinkle with salt to cut the bitterness, “tenderize” the leaves by massaging them with your hands (only takes about half a minute). Lastly, massage in your olive oil or salad dressing. This turns the kale bright green and makes it so it is evenly covered. Try topping your salad with fresh apple or pear slices. Cashews, almonds and dried cranberries are also a great addition!


Kale and Roasted Potato Salad
Hearty roasted potatoes, caramelized shallots and wilted kale makes this salad delicious and satisfying!

Ingredients:
6 cups cubed yellow potatoes (about 1″ cubes)
3 cloves crushed garlic
1 large bunch of kale
2-3 carrots, sliced into 1” pieces
3 large shallots, thinly sliced
2 tablespoons grape seed oil
3 tablespoons whole grain mustard
2 tablespoons high quality Extra Virgin Olive Oil
2-3 tablespoons white wine vinegar, to taste
sea salt
black pepper
Instructions:
1. Preheat oven to 400 degrees.
2. Combine potatoes, carrots, grape seed oil, 1 teaspoon of sea salt and 1/8 teaspoon black pepper in a large mixing bowl until veggies are coated and seasoned.
3. Spread coated veggies on baking sheet and cook for 45-50 minutes, turning once or twice to brown evenly. Potatoes are done when browned and crispy.
4. Combine whole grain mustard, extra virgin olive oil, and 2 tablespoons white wine vinegar in a small bowl. Taste and add additional vinegar if desired. Set aside.
5. Caramelize shallots by cooking with 1 1/2 tablespoons of extra virgin olive oil over medium-low heat, for 15-20 minutes or until they’re browned.
6. Prep kale by thoroughly rinsing, chopping off the rough part of the stems and discarding. Slice the kale into 1-2″ strips.
7. When potatoes and carrots are nearly done roasting add garlic and kale to the onions and sauté over medium-low heat. Cook until the kale is thoroughly wilted, stirring often.
8. Combine kale and potatoes in a large serving bowl. Toss in vinaigrette or serve on the side as preferred (this recipe makes more than enough vinaigrette, so dress the salad to your taste). Add additional sea salt to preference. Serve immediately. Enjoy!

Adapted from ahouseinthehills.com

Posted on

How to Eat Your BOX! (Week of 8/20/17)

Sweet Onions
Sweet onions lack the sulfuric pungency of yellow onions. The best part? They won’t make you cry when you cut them up! This is also why they taste “sweet” – not because they have more sugar than regular onions, but because they lack the Sulphur. Sweet onions are best eaten fresh – cooking them wastes their delicate flavor and you won’t get the “onion-y” flavor that you want with a cooking onion. The mild flavor of these onions makes them perfect for your raw in salads and relishes or chopped as a garnish. If you do cook them, either roast them to caramelize their flavor or make homemade onion rings.
Garnet Yams:
Yams are more nutrient dense than potatoes as they have good amounts of potassium, vitamin B6 and Vitamin C, but you can generally use them in the same way as potatoes. They are delicious baked and loaded with beans, scallions and a bit of cheese. They also make a lovely mash or soup. They have a natural sweetness that pairs nicely with something acidic like lemons or vinegars. As with most vegetables, yams are delicious roasted. Cut into wedges then toss with a little bit of cornstarch and finely grated Parmesan. The cornstarch helps to lock in the moisture so they turn crispy and more fry-like in the oven. Drizzle on a bit of olive oil, salt and pepper then roast in a hot oven 425-450°F for 20 – 30 minutes or until caramelized in parts and tender.


Roasted Garnet Yam and Goat Cheese Salad
Hint: Toss the lettuce, onions, roasted red peppers, with the dressing first, THEN add the goat cheese and roasted yams (fresh out the oven) for the ultimate bite.

Ingredients:
For the sweet potatoes:
2 medium sweet potatoes, in ~1in. cubes
1½ tsp. paprika
1 tsp. garlic powder
1 tsp. oregano
⅛ tsp. cumin
1 tsp. salt
½ tsp. pepper
For the salad:
Lettuce, chopped (about 6 cups)
½ Sweet Onion, thinly sliced
4 roasted Red Peppers, sliced
Roasted Garnet Yams, cut into cubes
100-125g goat cheese (plain or herbed, as you like)
For the dressing:
1 tbsp. lemon juice (~half a lemon)
Salt & pepper
1 tsp. honey
1 tsp. Dijon mustard
2 tbsp. olive oil

Instructions:
1. Preheat oven to 375 F.
2. Spread Garnet yam cubes onto a sheet pan and drizzle with olive oil.
3. In a small bowl, combine paprika, garlic powder, oregano, cumin, salt, and pepper.
4. Sprinkle spice blend on top of yams and toss with a spatula.
5. Roast in the oven for 20-25 minutes, or until fork tender and slightly browned (keep an eye on them to avoid burning!). This may take slightly more time depending on your oven.
6. In a small bowl, whisk together lemon juice, salt, pepper, honey, and Dijon. Pour olive oil slowly, while whisking constantly.
7. In a large bowl, toss the baby greens, green onion, and roasted red peppers. Dress to your liking (you don’t have to use all the dressing if you don’t want to)
8. Dish out the salad onto plates or bowls, top with tons of goat cheese and, finally, with the warm roasted Garnet yams.
Adapted from ahintoffaith.com

Posted on

How to Eat Your BOX! (Week of 8/13/17)

Beets:

Beets can be cooked just about any way you like. They are great boiled or baked, sautéed or stewed. Usually I cut them into bite size pieces to bake in the oven because I love roasted beets! Simply coat in olive oil, sprinkle with salt and pepper, and bake at 375 °F for about 35 minutes (try adding some parsley when they’re done). But they can just as easily be cooked in a frying pan along with other veggies. The beet greens are great sautéed as well so don’t throw them out! Try cooking the greens in a little olive oil with garlic, salt and pepper on medium heat until bright green – be careful not to over cook. 

Celery:

Popular as a finger food, celery also makes a flavorful addition to soups. Because of their crescent shape, they make a great healthy medium to stuff as a fun and flavorful snack. You can get creative when it comes to what you put on them: Peanut or almond butter is the classic pairing but you can pair celery with just about any snack dipper. Cream cheese makes a good filler, try it mixed with chopped nuts and raisins. Homemade ranch or Hummus also makes a good savory pairing. Celery is also great in salad. It can lend itself to the sweet: using thinly sliced apples, pecans, raisins, yogurt or sour cream, honey and a pinch of cinnamon, or, the savory: with lettuce or spinach, finely chopped onion, olive oil, lemon juice or vinegar, salt and pepper.

Herb, Savory:

Savory is an aromatic herb similar in flavor to thyme that works well to season fish and meats as well as vegetables like summer squash, green beans, and tomatoes. It is perhaps best known for flavoring lentils and beans, where it helps with digestion. Savory blends nicely with other spices such as rosemary, basil, oregano, marjoram, and bay leaf. Strip the leaves from the stalk and add towards the end of cooking to best preserve the flavor. This savory was cut at prime while flowering and dried for packing early August.


Chocolate Beetroot Cake

Who knew that adding this vegetable to a chocolate cake could make it the most moist and delicious cake ever? The beetroot plays up the chocolate but you’ll be hard-pressed to taste it! Ingredients:

3-4 medium beets, trimmed, peeled, and cut into 2-inch chunks*

2 cups all-purpose flour

1 1/4 cups organic whole cane sugar

1/2 cup unsweetened cocoa powder

1 1/2 teaspoons baking soda

¾ teaspoon Salt

2 large eggs

3/4 cup warm water

1/4 cup safflower oil

1 teaspoon pure vanilla extract

cooking spray

  1. Preheat oven to 350 F.
  2. Cover beets with 2 inches water in a saucepan. Bring to a boil. Reduce heat, and simmer until very tender when pierced with the tip of a sharp paring knife, about 30 minutes. Drain. Puree beets in a food processor until smooth. (See note, below)
  3. In a large bowl, whisk together flour, sugar, cocoa powder, baking soda, and 3/4 teaspoon salt. Add in eggs, water, oil, vanilla, and 1 1/4 cups beet puree (reserve any remaining puree for another use). Whisk until just combined.
  4. Line the bottom of a 9 x 3-inch round cake pan with parchment, and coat pan with spray. Pour batter into pan. Bake until a toothpick inserted into the center comes out clean, about 45 minutes. Let cool in pan on a wire rack for 20 minutes. Turn cake out from pan onto racks, and discard parchment. Let cool completely, right side up.
  5. Trim top of cake using a serrated knife to create a level surface. Transfer cake, cut side down, to a platter. Pour chocolate glaze over the top, and let set, about 30 minutes.


*If you don’t have a food processor, leave the beets whole when cooking, then grate beets on your finest-hole cheese grater.

Adapted from marthastewart.com


Posted on

How to Eat Your BOX! (Week of 8/6/17)

This week’s How to Eat Your BOX and recipe brought to you by Ashley Rodriguez.


Green Beans:

I’m not one to eat green beans raw like my children although thinly sliced and added to green salads is a fine vegetal bite but the truth is my favorite way to eat green beans is when they are deeply tender and sweet.

This year I’ve discovered grilled green beans and that is now my favorite way to enjoy them.

Roasting is also a good choice when you don’t want to turn on the grill. Roast until thoroughly crisp and they’ve nearly shriveled down to nearly nothing. Dress in a simple vinaigrette and serve alongside anything.

When blanching green beans be sure to make the water taste of the sea. This will not only provide an adequate seasoning for the beans but also help to preserve the texture.

Zucchini:

Raw, roasted, sautéed, grilled – I love it all.

Use a vegetable peeler to shave long thin strips of raw zucchini. Toss with basil, olive oil, lemon juice or red wine vinegar and a heap of halved cherry tomatoes. Finish with fresh feta or goat cheese if you’d like.

Grilled zucchini steaks make a lovely accompaniment to grilled chicken, steak, or fish. Top with a fine chop of fresh herbs (basil, mint and chives are nice options), lemon zest, and garlic. Thin with a bit of olive oil.

Whenever you grill zucchini brush with plenty of olive oil and be sure to use a good bit of salt.

Small tender zucchini is best for eating raw or for a quick sauté. Larger zucchini can tend to lose some of its sweetness but are perfect for baking.


Grilled Green Beans with Basil Gremolata and Parmesan Brittle

This recipe is from my next book – yet to be titled. It uses my current favorite cooking method for green beans; grilling. While warm and freshly charred the green beans are tossed in a fragrant basil gremolata (an herb sauce laced with lemon, garlic and sometimes anchovy). It’s then topped with crispy baked Parmesan that you will want to put on all the things.

Ingredients:

1 1/2 pounds green beans, trimmed

1 tablespoon olive oil

1 teaspoon sea salt

1 cup basil leaves, finely minced

Zest and juice from 1 lemon

1 garlic clove, finely minced

Flake salt

1 cup crumbled Parmesan Brittle (recipe below)

Bring a large stock pot of heavily salted water to a boil. Meanwhile fill a large bowl with ice and cold water. Blanch the beans just until their color shifts, about 2 minutes. Shock them to halt the cooking process by adding them to the ice water. I find a spider – the tool often used when frying – is the best for retrieving the beans from the boiling water. Or tongs.

Drain the cooled beans and toss with the olive oil and sea salt. Grill over high heat until the beans are tender and deeply charred in parts.

In a large bowl combine the basil, lemon zest and juice, and garlic clove. Toss the warm beans in the gremolata. Taste a bean and add flake salt or more sea salt if needed.

Turn out the beans onto a platter and finish with the Parmesan Brittle.

*To prevent the beans from falling into the cavernous grill set a wire cooling rack (not rubber coated) over the grill grates and place the beans on the wire rack.

Posted on

How to Eat Your BOX! (Week of 7/30/17)

Green Beans:

Green beans are a workhorse vegetable: nothing flashy, rarely the star, but always dependable in a supporting role. They’re versatile, too – they’ll work well with just about any cuisine.

Greens beans make a great side for dinner, you can steam them just until bright green and tender, then toss with a little butter, or, sauté them in little olive oil and garlic. To cook more evenly blanch first by adding to a pot of boiling for 2 minutes. Then drain and put in ice water to stop the cooking process. Sauté garlic in olive oil and add green beans, sautéing until lightly seared. Add salt and pepper to taste. Green beans can also be easily baked in the oven like any other vegetable. Simply spread out evenly on a baking sheet, drizzle with olive oil, salt, pepper, and garlic powder, and toss to coat. Bake at 425°F for 15 minutes. Take out after about ten minutes and shake to turn. Sprinkle with some parmesan and serve.


Inchelium Red Garlic:

One of the most productive of all the heirloom garlics, this soft neck variety is also an artichoke type. This means that its bulbs cluster in layers like artichoke petals. This makes these garlic bulbs particularly perfect for roasting. Roasted garlic cloves are a softer, milder version of their spicy raw selves. Spread them over crackers or bread for a delicious appetizer or mix into spreads, dressings or dips for delicious flavor. Unlike raw garlic, roasted garlic won’t hurt your stomach so eat as much as your heart desires! While foil-wrapped garlic is a popular way to roast it, it is possible to avoid foil-wrapping your food and still get good roasted garlic.

To Roast Garlic: Remove the outside layers. Cut the tops of each garlic bulb, so can see the exposed the garlic within. Then, lay the bulbs cut side down, on a parchment-lined baking sheet. Cook in a 350 °F oven for 35-40 minutes or until done. Let cool and peel the clove from the outside in. Keep roasted garlic in a canning jar (pint size should be sufficient) with lid, in the fridge for no more than 1 week (7 days).

3-Ingredient Garlic Broccoli Stir Fry

“Compared to your usual oven roasting method or blanching, this recipe does not require you to heat up the oven, or boil a pot of water. So, you save extra 15 minutes, plus you can finish up cooking in one pan! The hot pan will steam the broccoli in a minute, and lightly crisp up the garlic at the same time. For a light dinner, simply throw some leftover chicken into the pan and let it heat up with the veggies – dinner in 5 minutes!” – omnivore’s cookbook

Ingredients:

2 teaspoons olive oil

2 cloves garlic

1 big head broccoli, separated into florets

1/4 teaspoon salt

1/4 cup chicken stock

  1. Heat a large heavy-duty skillet until hot. Add oil. Swirl to coat the bottom. Add garlic and broccoli, and sprinkle with salt. Cook and stir to coat broccoli with oil.

2. Add chicken stock. Cover and cook for 1 minute, or until the broccoli reaches your desired doneness. Turn to low heat and carefully taste the broccoli. Adjust seasoning by adding more salt, or cover to cook a bit longer if necessary.

3. Serve warm.

From omnivorescookbook.com

Posted on

How to Eat Your BOX! (Week of 7/23/17)

Bunch Carrots:

It’s important to store your bunch carrots properly to prolong their freshness. To do so, twist the green tops off when you first get your box, otherwise the greens will keep drawing up moisture and nutrients from their “root” and you’ll get a rubbery dried out carrot. Carrots are one of the easiest veggies to incorporate into a busy lifestyle. They are quick and easy to prep for snacking – just remove the tops, wash and store in the fridge – really, no peeling necessary! One thing that consumers should be aware of is the importance of buying organic carrots. Conventionally grown carrots are often a concentrated source of heavy metals, nitrates and pesticides. Eating carrots is a healthy alternative to junk food, and just one carrot can boost your willpower that is in resistance to those processed foods.

Baby Bok Choy:

This Asian vegetable is in a class all on its own. It has a delicate and almost foam like texture but can be quite versatile. Try sautéing in a little olive oil and freshly minced garlic or follow the recipe below. I recently discovered that baby bok choy has a nice flavor without being cooked at all (not sure why I didn’t try it this sooner!) Plus, it has a wonderfully crunchy texture, which I love! So, if you’re not a fan of the squishier consistency of cooked bok choy, try tossing it into a salad with other salad veggies (try using diced apple and raisons in this one!). Then top with your favorite dressing (a ginger vinaigrette works great) or try making your own! You could simply mix olive oil and vinegar with a little mustard (my go to), or try something a little fancier by blending ½ cup of soy, hemp, or almond milk, ½ cup cashews or ¼ cup cashew butter, ¼ cup balsamic vinegar, and a teaspoon of Dijon mustard.


How to Make an Amazing Green Salad

We’ve all had one of those amazing salads, that was so good we just had to keep shoving forkfuls into our mouths. What makes these salads so delicious? It’s the added proteins and blend of different flavors that made each of them special and tasty in their own way.

WHAT MAKES A SALAD GOOD?

  • Lots of different textures- soft, Crunchy, smooth, chewy, crisp
  • Dressing mixed well throughout
  • Fresh, tasty salad base (lettuce, Spinach, herb mix, etc.)
  • Blend of tastes- sweet, salty, savory, sour, bitter

TRY FOR A MIX OF THESE 5 BASIC ELEMENTS:

  1. Base of greens
  2. One or more other vegetables (crunchy, colorful, variety of sizes and textures)
  3. Something sweet
  4. A type of protein
  5. Dressing (either complex or simple)

Sample Salad #1

Supergreens mix (available at klesickfarms.com), cooked diced chicken (leftover from another meal), red peppers, red onions, cucumbers, feta cheese, candied or toasted walnuts, homemade balsamic vinaigrette.

Sample Salad #2

Torn leaf or romaine lettuce, black beans and chicken (which you can quickly warm up with some taco-type spices), shredded Monterey jack cheese, diced avocado, diced tomatoes, crumbled tortilla chips, red peppers, a few parsley leaves, homemade ranch dressing.

Adapted fromkeeperofthehome.org

Posted on

How to Eat Your BOX! (Week of 7/16/17)

Fortune Plums:

Great in fruit salads, atop green salads (think Balsamic vinegar, goat cheese, walnuts, red onions) because they’re firm enough to hold up with a little tossing. Try them atop plain green yogurt with a drizzle of honey for breakfast. Plums are particularly delicious in fruit galettes as baking them brings out their sweet-tart flavor. If too firm to use, place in a closed paper bag at room temperature for one to two days.

How to Store: Once ripe, plums can be kept in a plastic bag in the refrigerator up to three days.

Rainbow Chard:

Both the leaves and stalk of chard are edible, although the stems vary in texture with the white ones being the most tender. When you get your box, give your chard a quick rinse in cold water, spin dry, and store in a Ziploc bag to use in smoothies, salads, stir fry’s, and as a wrap for tacos. Unless you’re using the chard as a wrap, you can take your meal prep a step further and tear the leaves into fork-friendly pieces to speed up your meal prep all week long.

Cucumber:

Now we’ve probably all had cucumber salad at some point but I still tend to forget that it makes a great main ingredient for salad, not just as a topping. Try marinating thinly sliced cucumber, onion, bell pepper, crushed garlic cloves in a one to one mixture water and white (or cider) vinegar and a tablespoon of sugar. Cover and let sit in refrigerator for a couple hours. If you leave it overnight the flavors come out even more! Drain and enjoy. Try adding a garnish of freshly chopped parsley or dill.


Grilled Plums with Burrata and Balsamic Basil Vinaigrette

A simple and quick summer fruit salad, featuring grilled plums atop creamy burrata, paired with fresh lettuce and a balsamic basil vinaigrette.

Ingredients

For Dressing: For Salad:

1/8 cup olive oil

1 tablespoon minced basil

2 teaspoons balsamic vinegar

1 pinch kosher salt

1 pinch black pepper

4 ripe plums, halved and pitted

2 tablespoons olive oil

8 ounces burrata (try to get two balls of burrata)

4 leaves romaine, sliced into ribbons

4 leaves fresh basil

A pinch of kosher salt

Directions:

For Dressing:

In a small bowl, whisk together ingredients for the balsamic dressing until emulsified. Set aside.

For Salad:

  1. Heat grill to high heat. Brush flesh side of plums with olive oil and grill, flesh side down, until the plums develop brown charred markings. This should take about 5-8 minutes, but will depend on your grill and how hot it is. You could also use a grill pan, or the grill side of a panini press (my favorite way to make this salad!). When plums are grilled, set aside and allow to cool for about 10 minutes.
  2. Cut the burrata balls into quarters and divide evenly between two plates. When plums have cooled, divide them evenly on the plates. Top each plate with a handful of the sliced romaine and 2 leaves of fresh basil. Drizzle each plate with the balsamic basil dressing and a small pinch of kosher salt. Adapted from thecharmingdetroiter.com


Posted on

How to Eat Your BOX! (Week of July 9, 2017)

Garlic Scapes:

You can use Scapes just like you would garlic; their flavor is milder, so you get the nice garlic taste without some of the bite. Use them on top of pizza, in pasta, in salsas, and as a replacement for garlic in most other recipes. There are many things you can do with scapes, but my personal preference is to turn them into garlic scape pesto. It’s a sharper, greener take on traditional basil pesto that can be used to add a fresh garlicky zing to just about anything – Spoon it into soups, spread it on sandwiches, toss with cooked pasta, beat it into scrambled eggs, and (best of all) slather it onto pizza dough before adding on the toppings. It freezes beautifully, too, so it’s easy to make an extra-large batch to tide you over until next spring.

Kale:

Apple Kale Salad: (Kale, Apple, Pear, Red Bell Pepper, Green onion, Carrot….) Kale is just wonderful and it’s so good for you! One great thing about kale as a salad is that it keeps well in the fridge, so you can make ahead of time and not worry about it wilting. Kale can be a little tricky because it tends to be a bit tough and sometimes bitter. Here are a few tips that have helped me. First make sure to make sure to remove all large ribs and stems (They make a great addition to a stir-fry though!); Chop the leaves small; Sprinkle with salt to cut the bitterness; “Tenderize” the leaves by massaging them with your hands (only takes about half a minute); And lastly, massage in the olive oil or salad dressing. This turns the kale bright green and makes it so it’s evenly covered. For the dressing, I like to use a combination of vinegar and olive oil. Once you have prepped your kale and worked in the dressing, add your toppings. Try with apple or pear slices. Cashews, almonds and dried cranberries also taste great with this combination!

Posted on

Sweet, Sweet Summer!

I’m excited because – SUMMER!!! The change in season opens up a whole new world of possibilities for creativity and new summer memories!

Think about it. A new season brings forth a need for different types of activities. You also have different holidays to look forward to. The types of food and drinks we like to consume differ with the season. Ultimately, life is completely different in the summer than it is in the winter. To me, summer screams of beach, watermelon and ice cream, lots of ice cream!

Many of my favorite summer memories go back to my early childhood and teenage years. We spent every summer at the beach. My dad would drive to the city everyday so we could enjoy 3 blissful months of sand between our toes, messy hair and well, you guessed it … ice cream! I vividly remember the ice cream cart guy, Mr. Santiago. He lived by the beach year-round as a fisherman, but during the summer months he ran an ice cream cart. He had a big smile, dark skin and for some odd reason I remember his green and black flip-flops. He knew everyone’s name and was everyone’s friend.

Every house in the neighborhood had an account with him. Us (kids) had a credit limit of how many popsicles we were allowed per day; mine was 2. And, oh my, were we in trouble if we went past the limit! Every Sunday afternoon, Mom and Dad had to “settle” our account with Mr. Santiago.

He would ride his yellow cart from house to house, pulling out his little black book noted with every move we made: date, time and ice cream we had! It was there, in writing, with our “signature” next to it. It was nerve-wracking and exciting at the same time: “Did I stick to the agreement? Did I go overboard? Did my brother sign my name instead of his? Do I have extra credit?” The last one never happened by the way … but ultimately it didn’t matter. I looked forward to it every week. Mr. Santiago’s cart parked in front of our house meant the weekend was over, the house guests had gone back to the city and it was back to the 6 of us: Mom, Dad, my three brothers and me. And every Sunday we shared one more sunset over one more ice cream.

With love and gratitude,

Sara Balcazar-Greene

Peruvian Chick

peruvianchick.com  

instagram.com/peruvianchick

facebook.com/theperuvianchick

Sweet Summer Ice Cream Toppers

Grilled Peaches

Fruit on the grill? Yes! Preheat grill to high. Brush peach halves with oil. Grill until tender. Place 2 peach halves in each bowl and top with a scoop of ice cream (or sorbet) and coconut.

Berry Compote

Nothing says summer like fresh berries. Try this simple sundae sauce over ice cream for a scrumptious summertime treat. Puree strawberries and raspberries with sugar and lemon juice in a blender. Serve over ice cream and top with sliced strawberries and raspberries, if desired.

Sauteéd Pears

Melt butter in a small nonstick pan. Add pear slices and cook, stirring occasionally, until golden and tender. Sprinkle with sugar, cinnamon and ginger; stir until the sugar melts. Serve over ice cream.

Kid-Friendly Bananas Foster

INGREDIENTS

4 tbsp. butter

1 cup dark brown sugar

2/3 cup maple syrup

1/2 teaspoon cinnamon

4 bananas, peeled and sliced lengthwise and crosswise

Vanilla ice cream

PREPARATION

In a large, deep skillet over medium heat, melt butter. Stir in brown sugar, maple syrup and cinnamon. When mixture begins to bubble, place bananas in pan. Cook until bananas are hot, 1 to 2 minutes. Serve at once over vanilla ice cream.

Posted on

How To Eat Your BOX! (Week of 6/25/17)

Apricots:

Ripen apricots in a paper bag at room temperature for 2 to 3 days. Unripe apricots can be stored at room temperature up to 5 days. Refrigerate ripe apricots in a sealed container up to one week. (Be sure that they are ripened first, as they will not ripen in the refrigerator.)


Braising Mix:

Braising is a method of cooking where the main ingredient is first seared in hot oil and then simmered in liquid. However, braising mixes do not have to be braised. They can also be sautéed, stir-fried, blanched, steamed or mixed into stews and soups. They can be eaten alone, added to pasta dishes, quiches, rice dishes or burritos, and they can be served with most any other vegetable, especially potatoes. The simplest method of preparing greens is to sauté them in olive oil with a little garlic and serve them with a splash of vinegar.


Garlic Scapes:

You can use Scapes just like you would garlic; their flavor is milder, so you get the nice garlic taste without some of the bite. Use them on top of pizza, in pasta, in salsas, and as a replacement for garlic in most other recipes. There are many things you can do with scapes, but my personal preference is to turn them into garlic scape pesto. It’s a sharper, greener take on traditional basil pesto that can be used to add a fresh garlicky zing to just about anything – Spoon it into soups, spread it on sandwiches, toss with cooked pasta, beat it into scrambled eggs, and (best of all) slather it onto pizza dough before adding on the toppings. It freezes beautifully, too, so it’s easy to make an extra-large batch to tide you over until next spring.


Garlic Scape Pesto

Spread on pizza, add to pasta, use anywhere you would regular pesto – makes a great dip!


Ingredients:

8-9 garlic Scapes, roughly chopped (~1 cup)

1/2 cup grated parmesan cheese

1 Tbs. minced garlic

1 /4 – ½ cup olive oil

Sea salt, to taste

Directions:

  1. Combine the garlic Scapes and parmesan in the bowl of a food processor. Pulse until the Scapes are finely chopped.
  2. Pour in 1/4 cup of the olive oil, and continue processing until the mixture is smooth, adding more oil 2 tablespoon at a time if needed to get the proper consistency. Add salt to taste and blend in. Refrigerate until ready to use.
  3. You can also make pesto cubes by spooning the pesto into a clean ice cube tray. Place the tray in the freezer for 2-3 hours or until the cubes are frozen solid, then pop them out of the tray and into a zip-top bag. Return to freezer, to be used as needed anytime over the next 6-12 months.


Recipe adapted from crumbblog.com

Posted on

How to Eat Your BOX! (Week of 6/17/17)

Plums: From sweet to tart, plums are big part of summer fruit in the Pacific Northwest. While great fresh as it or atop yogurt, fruit salads and even green salads (think walnuts, soft goat cheese and arugula), plums also shine when cooked as a sauce along with chicken, pork or duck. Care: Eat ripe plums immediately or put them in the refrigerator (unwashed, not in a sealed bag) for use within five days. When ready to eat, wash and enjoy! To hasten the ripening, leave plums on the counter, out of the sun, in a paper bag with an already-ripe apple or banana. Check daily. Plums are ripe when stem area yields to gentle pressure or is slightly fragrant.


Garlic Scapes: Garlic scapes are the beginning of what would be the garlic plant’s flower; if they’re left on the garlic plant, less energy goes towards developing the head of garlic underground. So, by harvesting these scapes, we get an early taste of the garlic to come down the road, and the bulbs can keep developing for a later harvest.


You can use scapes just like you would garlic; their flavor is milder, so you get the nice garlic taste without some of the bite. Use them on top of pizza, in pasta, in salsas, and as a replacement for garlic in most other recipes.


Featured Recipe: Plum-Chipotle Barbecue Sauce

Plums boost the tangy-sweet flavor of this quick homemade barbecue sauce, which is finger-lickin’ good on grilled chicken, pork (ribs, especially), and duck. Wait until the meat is almost cooked before brushing on the sauce, so it doesn’t burn. Plus, you get the added benefit of knowing exactly what’s inside your barbeque sauce. It’s a win-win. Makes 1 cup.


Ingredients:


1 lb. firm-ripe plums (about 4 medium), pitted and quartered

1/2 cup chopped yellow onion

2 Tbs. balsamic vinegar

2 Tbs. cider vinegar

1/4 cup honey or brown sugar

1 Tbs. minced garlic

1 tsp. minced seeded canned chipotle chiles in adobo sauce

1 tsp. kosher salt

1/8 tsp. ground cloves


Directions:


  1. Put all of the ingredients in a heavy-duty 3-quart saucepan and bring to a boil. Turn the heat down to medium, cover, and simmer, stirring occasionally, until the plums break down, about 10 minutes. Uncover and simmer until thick, 5 to 7 minutes.
  2. Purée the sauce in a blender until smooth. Use or cool to room temperature and refrigerate in an airtight container for up to 1 week.


Recipe adapted from finecoooking.com

Posted on

How To Eat Your BOX! (Week of 6/11/17)

How to cook your box:

Nectarines: You can either eat these smooth-skinned stonefruits crisp and hard like an apple, or set out on the counter to allow to ripen for a day or two if you like them sweeter and soft. Test for ripeness by fragrance and by gently pressing around the stem – it should give to light pressure when ripe. Place in sealed container in the fridge when ripe – if you leave them exposed to the open air in the fridge, they will wrinkle from dehydration. Nectarines, like other stonefruit, ripen from the inside to the outside, so if fruit is soft all over it is more likely overripe. Try nectarines for breakfast paired with yogurt or hot/cold cereal, as a topping to a green salad, and as an ingredient in fruit salads. Nectarines are also great on the grill, but be sure to use slightly less ripe fruit, it will hold up better without breaking apart/juicing. And of course, nectarines bake up fabulously into crisps, pies, and sauces!

Carrots: Twist the tops off those carrots as soon as they arrive so that they stay nice and crisp in the refrigerator. If you’re reading this, you’ve chosen organically grown carrots, so give yourself a fist bump. ? Carrots are so important to get organic because conventionally grown carrots are often a concentrated source of heavy metals, nitrates and pesticides. Eating carrots is a healthy alternative to junk food, and just one carrot can boost your willpower that is in resistance to those processed foods. Consider adding bunch carrots on to your order on a weekly or bi-weekly basis. Your body will thank you!

Recipe for Roasted Carrots with Spicy Green Sauce

Swiss Chard

Swiss Chard is loaded with vitamins A, K, and C and when consumed raw there are significant amounts of vitamin E and Iron. Besides a being a great green for a quick sauté similar to kale or spinach, swiss chard is great eaten raw. Cut into fine ribbons and tossed in a salad along with a fine mince of their brilliantly colored stems for a bit of crunch.

The frilly leaves are perfect smoothie fodder as their mild flavor is hardly detected when there are frozen berries involved (a must to get our youngest to enjoy her smoothie).

Along with salads, sautés and smoothies the hardy chard stems are perfect for a quick pickle. Make up a simple bring with vinegar, spices a bit of salt and a faint touch of honey then warm over the stove. Turn off the heat then add chard stems. Let them cool in the brine then refrigerate for up to two weeks. Dice them up then add to salads or serve alongside a cheese platter or simple snack on them throughout the day.

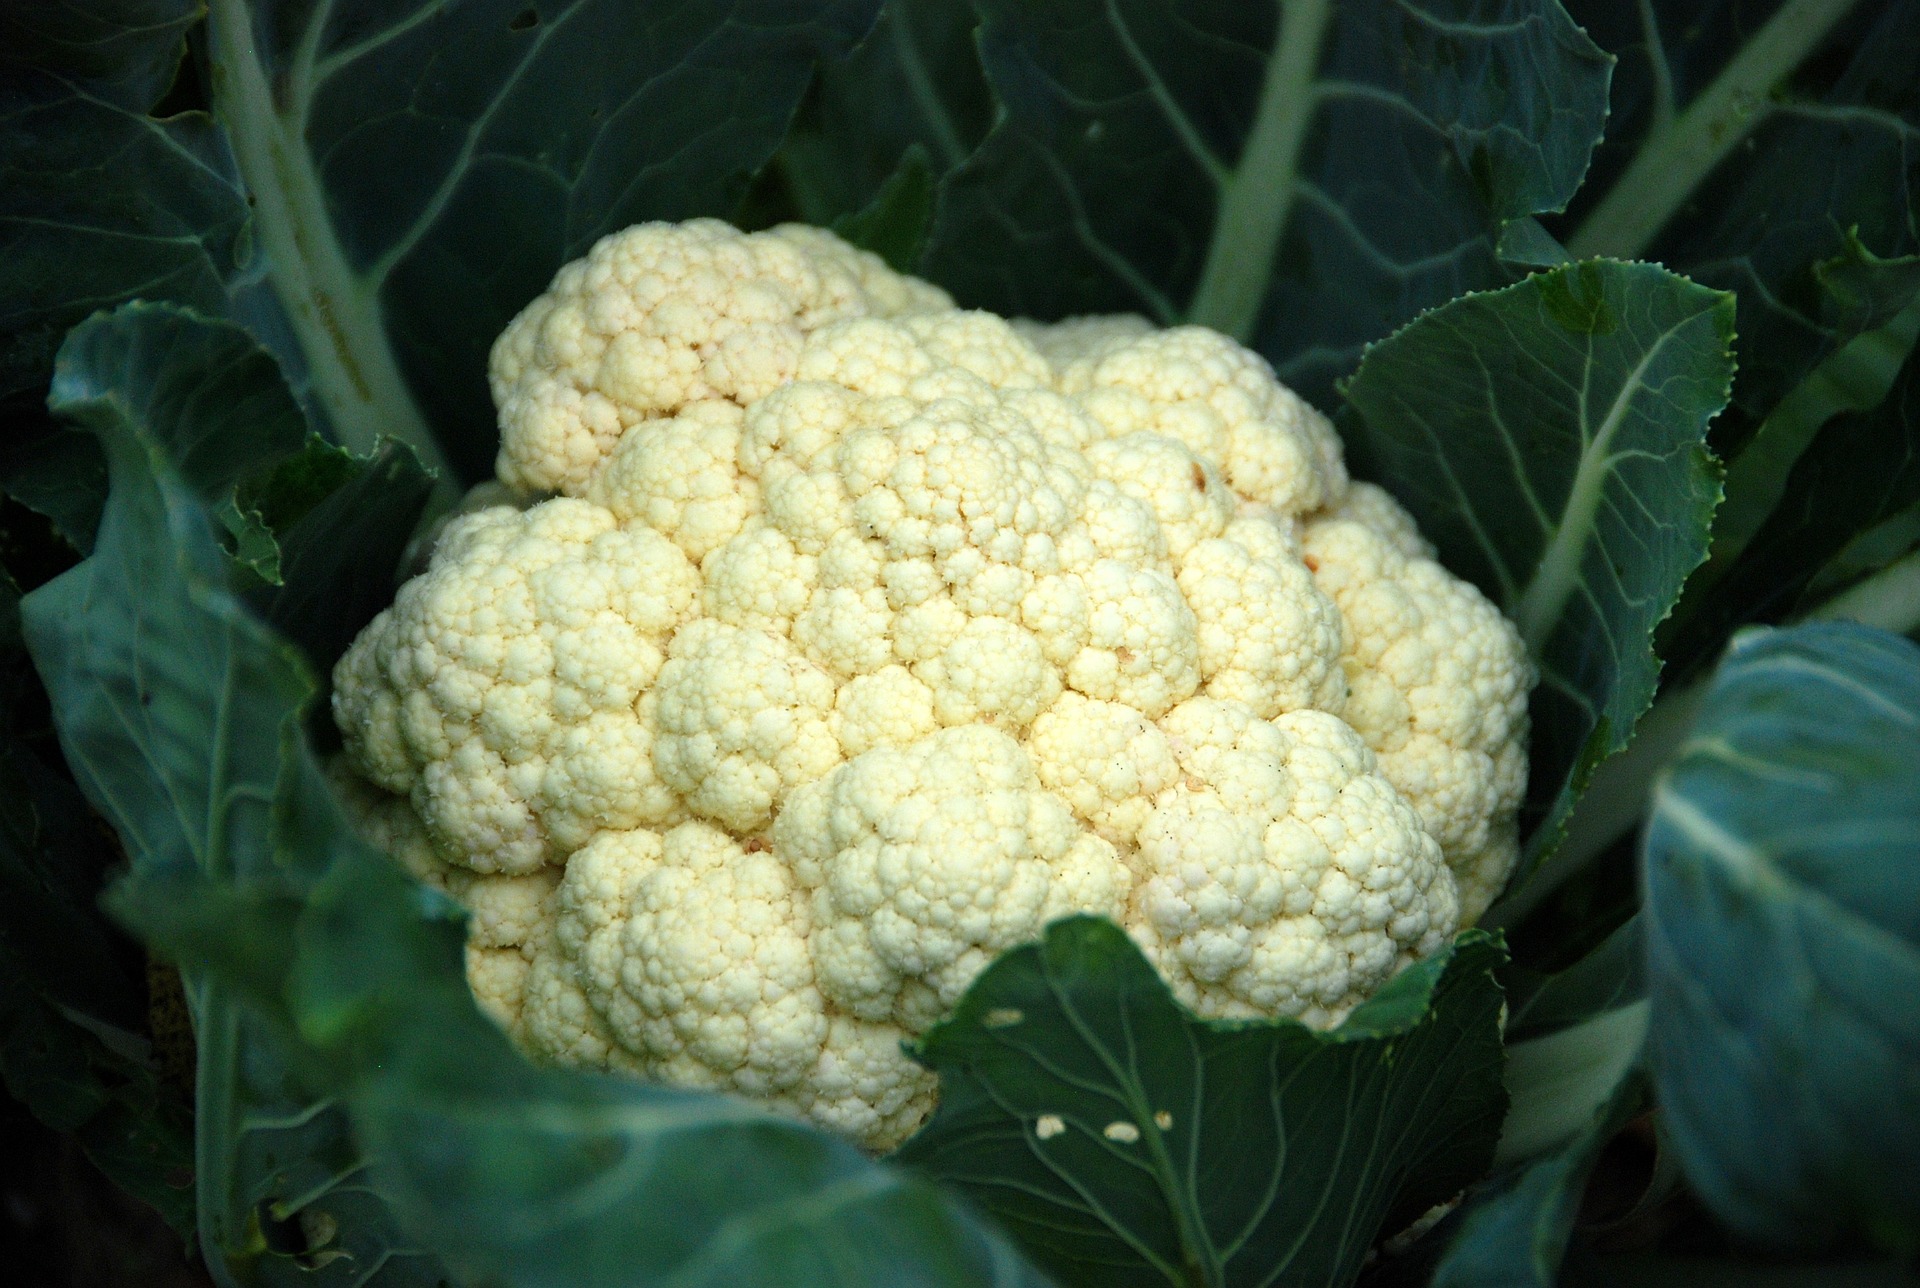
Cauliflower

This little vegetable darling is finally getting the spotlight it deserves. It boasts high levels of vitamin C and moderate levels of Vitamins B and K. Really though it’s quite possibly the most delicious vegetable after a good roast in the oven.

Vegetable butchers praise the cauliflower steak. If you think I’m kidding about any part of that last sentence you are mistaken. Cut a cauliflower into thick 1-inch slices. Slather with olive oil then sprinkle with sea salt and pepper then roast in a 400°F oven until tender and the edges are deeply caramelized and even charred in parts. Top with a simple salsa of fresh herbs, lemon, garlic and olive oil. A fried egg on top of that makes a fine dinner or breakfast. Or chop the cauliflower into florets and roast in the same way. Toss with chili flakes, pasta and fresh goat cheese for a simple dinner.

And since I can’t stop talking about tacos today, roasted cauliflower makes a mighty fine taco add in too. Pulverized in a food processor cauliflower resembles the texture of rice or couscous. Baked or even consumed raw you have a lovely vegetable alternative. Check out this recipe for a raw cauliflower tabouli.

Cauliflower Tabouli

Swiss Chard and Caramelized Onion Tacos

from Mexican Everyday, by Rick Bayless

Serves 4

Ingredients:

12 oz. bunch of Swiss chard, thick lower stems removed, cut into 1/2-inch ribbons (10 oz. cleaned

spinach can be used instead)

1 1/2 tbsp. oil, lard or bacon drippings

1 large onion, thinly sliced

3 garlic cloves, finely chopped

1 tsp. red pepper flakes (add more or less depending on how spicy you like it)

1/2 cup chicken or vegetable broth (water works too)

Salt

12 warm corn tortillas

1 cup (4 ounces) Queso Fresco or other fresh cheese such as feta or goat cheese

Salsa, for serving

Directions:

Heat the oil in a large skillet over medium-high heat. Add the onion then cook until golden brown, about 10 to 15 minutes. To the onions add the red pepper flakes and garlic. Stir for about 20 seconds until you are hit with the aroma of the garlic then immediately add the broth or water, ½ teaspoon salt and the greens. Adjust the heat to medium-low then cover the skillet. Cook until the greens are almost tender. For Swiss chard this will be about 5 minutes. Spinach only takes about 2 minutes.

Uncover the pan, adjust the heat to medium-high then cook until the juices have reduced significantly and merely glaze the greens. Taste and add salt if you think it needs it.

Serve with the corn tortillas, crumbled fresh cheese and Chipotle salsa.

Posted on

How to Eat Your BOX! (Week of 6/4/17)

Cabbage:

Cabbage is a handy thing to have around. Don’t let it be that vegetable that sits in the bottom of your refrigerator drawer for months on end. There are endless opportunities to use it up. I’m constantly pulling mine out and adding it to my “just about anything”. I like to make cabbage “shavings” by first cutting the cabbage in half, then simply shaving off pieces from along the edges. Also, if you’re like me and rarely use a whole cabbage in one sitting, keep the cut edges from drying out by rinsing and storing in a sealed plastic bag.

Broccoli:

Baked broccoli is one of my favorite dinner sides. I like it best roasted to crispy perfection with a little garlic, salt and pepper. Try tossing chopped broccoli florets with olive oil, salt and seasonings of choice. Bake on a cookie sheet at 450° for about 20 minutes, until edges are crispy and the stems are tender. For extra flavor, drizzle with lemon juice or top with parmesan cheese. Broccoli is also great in salad, stir-fry, soup, or raw with your favorite veggie dip.

Leeks:

Leeks are cousins to the old, familiar onion, but have a sweeter, more delicate flavor reminiscent of garlic or chives and are delicious no matter how they’re cooked. Additionally, leeks contain generous amounts of vitamins, minerals and antioxidants, making the vegetable a wise addition to a healthy diet. You can cook leeks by poaching them in chicken broth, pan-frying them in a little oil, or boiling them until tender, or you can include the leeks in a variety of other recipes (such as the one below).


Featured Recipe: Classic Potato Salad

Ingredients:

3 medium potatoes (1 to 1 ½ pounds), quartered

1 ½ tablespoons white vinegar

1 large celery stalks, diced

1 Leek, diced

3 hard boiled eggs, peeled

¾ cups mayonnaise

½ tablespoon yellow mustard

¾ teaspoons celery seed kosher salt and freshly ground black pepper paprika for garnish

Directions:

  1. Bring potatoes to a boil in large pot of cold water that’s been liberally salted. Reduce the heat to medium high or a lightly rolling boil and cook for 10-15 minutes or until the potatoes are easily pierced with a paring knife. Drain and let cool until just able to handle.
  2. Peel the skins from the potatoes and cut into large diced pieces. Transfer the warm potatoes to a large mixing bowl and sprinkle with the white vinegar and stir. Allow the potatoes to cool, about 15 minutes. Add the celery and leeks Chop 2 of the hard-boiled eggs and add to the potato mixture.
  3. In a medium bowl, mix the mayonnaise, yellow mustard, celery seed and salt and pepper. Mix well into the potato mixture and season with more salt and pepper if needed. Slice the last egg into thin slices and place the slices on top of the salad. Sprinkle with paprika if desired. Chill for at least 1 hour Recipe adapted from “foodiecrush.com”
Posted on

How to Eat Your BOX! (Week of 5/28/17)

Fennel:

Known for its crunchy texture and mild anise flavor, fennel is best used within 5 days. Keep fennel bulbs wrapped in the fridge to keep out air that will lessen its flavor. Fennel is wonderful braised, roasted, or grilled where its it brings flavor reminiscent of pine nuts to the table, or, sautéed, or used raw in salads, where it is crunchy and sweet.

Garnet Yams:

Technically sweet potatoes, in the United States, we refer to the orange specimens as “yams” to differentiate from the sweeter white colored version. Technical terms aside, Garnet Yams are one of the most versatile veggies out there! Eating them just for Thanksgiving is a thing of the past, they can be simply baked like a potato, poked with a fork and roasted for about an hour at 400 degrees and then eaten as is, or stuffed with any number of ingredients, including, but not limited to traditional chili, cooked veggies, sour cream, or curry. Slice them into 1” cubes, toss with a little olive oil and your favorite spice (I like paprika, or tandoori marsala seasoning), and bake on a sheet pan for 20 minutes or so, salt as needed, and you’ve got super tasty breakfast side or a topping for that green salad lunch the next day. Peel, cube, and boil until fork tender, like a potato if you’re trying to cut down on vegetable oils. You can also slice them into “fries”, but if you do so, we recommend frying in a high-heat stable oil like coconut oil.

Radishes:

A favorite among farmers and gardeners because they can be grown and harvested virtually before any other crop, radishes deserve a place in the kitchen too! Crisp and peppery, they begin with a mild flavor, and have a spicy finish, which is why they’re a natural salad toppers. Another, not as well-known method is braising them, which softens their spicy profile and makes them calmer for those of us who don’t enjoy their spicy side.


Featured Recipe: Braised Red Radishes

Braising softens the bright red of radishes to a pretty pink and gives them a sweet turnip-like flavor. Ingredients:

– Kosher salt

– 10 red radishes with greens (about 1 bunch), greens trimmed to ¼-inch and radishes halved lengthwise – 2 tablespoons extra-virgin olive oil

– 1/2 cup water

Directions:

  1. Put the radishes in a medium saucepan and add a generous pinch of salt (just over ¼ teaspoon), oil and water. Bring to a boil over high heat, then lower the heat to moderate, cover and simmer until the radishes are tender, about 12 minutes.
  2. Using a slotted spoon, transfer the radishes to a serving bowl. Boil the cooking liquid over high heat until reduced to 1/8 cup, about 8 minutes. Season with salt if preferred and pour the liquid over the radishes.

Recipe adapted from “Across the Street Red Radishes” by foodandwine.com

Posted on

How to Eat Your BOX! (Week of 5/21/17)

Spinach:

Spinach is one of those handy vegetables that can be used raw or cooked. Used in salad,

it’s a nice change from the norm. Try using thinly sliced green onions, cucumber, and

apples from this week’s box in yours! For dressing, vinaigrettes go well with spinach. I like

to mix balsamic vinegar with olive oil but just about any dressing will do.

Spinach is used in cooking just as often as it is used fresh. It makes a great addition for

scrambled eggs, sandwiches, tacos, wraps, pasta, or sauté. Some like to sauté it up in just

a little olive oil and garlic and eat it like Popeye. I even enjoy adding a handful to my

smoothies.

Cauliflower:

There are so many ways to use this vegetable I don’t even know where to start. They can

be chopped up and added to salad or soup, roasted in the oven, tossed in a stir fry, boiled

and pureed as a stand-in for mashed potatoes or to make a creamy soup, baked into a

pizza crust as a flourless alternative, or simply eaten raw. The options are endless! You

don’t even have to cut it up. Try baking it whole by simply cutting off the leaves and stem

so it can sit upright, baste in olive oil, salt and spices of your choice, and bake on a cookie

sheet or cast iron skillet at 450° for about 45-60 minutes or until a knife can be inserted

easily. Because of its mild flavor, cauliflower goes well in spicy dishes or curries as it soaks

up all the other flavors.


Recipe: Baked Eggplant

Ingredients:

• 1-2 medium eggplants, cut into 1/2 inch slices (no thinner or they’ll burn)

• 1/8 cup extra virgin olive oil

• 2 cloves garlic, finely chopped

• Sea salt and pepper, to taste

• 1/8 cup Italian parsley

Directions:

1. While the oven is preheating to 475-500 degrees Fahrenheit, lay the sliced eggplant

in a single layer on lightly oiled baking sheet. Brush each slice with the olive oil.

2. Press garlic slices into the eggplant and season with the salt and black pepper.

Make sure the garlic is pressed as much as possible into each slice to ensure the

flavor soaks into the slices.

3. Bake the eggplant for 20 to 25 minutes. They should be golden brown. Remove

them from the oven and let them cool.

4. Once they are cool, sprinkle with the parsley, if desired, and serve.

Try adding cherry tomatoes or topping with a slice of tomato. Topping with mozzarella

cheese is also a great addition, either cold, or boiled until melted.

Recipe adapted from foodnetwork.com

Posted on

How to Eat Your Box! (Week of 5/14/17)

Red Bell Peppers:

Red Peppers are a great way to add a bit of color to your food which is not only appealing to the eye but good for your eyes! Literally, they are packed with vitamin A, which is essential for good vision. These bright red veggies pair well with most savory dishes and can be added to soups, stir fries, salad, shish kabobs, or as a part of a veggie tray. They are also commonly used for stuffing because of their perfect cup shape. It’s best to eat your peppers right away, while still fresh. Don’t let them sit around too long as they lose their crunch and can become rubbery….bleh.

Mangos, Ataulfo:

Unlike other mangos, Ataulfos should be soft and slightly wrinkled when ripe. They change color from green to a beautiful rich yellow when they are at their sweetest. They also have a creamier texture and don’t get those annoying stringy fibers like other mangos do. Eat them raw or try adding them to one of your favorite cooked savory dishes. Fried rice with mango is simply amazing! Mangos also are great on salads, stir-fries, or added to sauces or in salsa. If you have a dehydrator they are so good dehydrated, or made into fruit leather. You can order a whole case and dehydrate them or freeze to use in smoothies.

Artichokes:

Artichokes can be steamed, boiled, baked or grilled. The recipe below gives instructions on boiling but they are also great when baked. To prepare, cut about an inch off the top and stem of the artichoke. Then cut it in half and remove the fuzzy part in the center with a spoon. Rub the cut side with a half a lemon, squeezing some juice into the fold and the middle. Drizzle with olive oil, sprinkle with salt, pepper and freshly minced garlic. Bake on a cookie sheet for about 25 minutes at 425°. Melted butter or mayonnaise mixed with a little balsamic vinegar is commonly used for a dip but you can be creative and use whatever your taste buds desire!

Recipe: Steamed Artichoke with Lemony Aioli

Ingredients:

-2 artichokes, stems, and tips of leaves trimmed to remove any prickly edges

-1/2 cup light mayonnaise (preferably made with sunflower or avocado oil)

-1 tablespoons fresh lemon juice

-1/2 teaspoon salt

-1/2 teaspoon pepper

-pinch of whole cloves (2-4)

-1/4 teaspoon garlic powder

-Water, for cooking

Directions:

1. In a large sauce pan (large enough to fit the artichokes side by side upright), bring about two-three inches of water to an aggressive simmer.

2. Cut the stem off each artichoke so it can sit upright on its own, and place the artichokes upright in the pan. Sprinkle the whole cloves over the top so that they settle among the artichoke leaves. Cover and let simmer for about 45 minutes until the leaves are tender. (Test by poking with a fork) Add more water as needed so that it doesn’t run dry and the artichoke doesn’t burn.

3. While the artichoke is cooking, whisk together the mayonnaise, lemon juice, salt, pepper and garlic powder.

4. Once cooked, remove the artichoke carefully with tongs into a platter (cover if not serving immediately), and serve with the aioli.

Recipe adapted from honeyandspiceblog.com